Want to preserve your beautiful flowers without waiting weeks? Microwave flower pressing is a quick and easy method that gives amazing results in just minutes. You can turn flowers into stunning wall art, gift tags, or coasters with this simple technique.
Drying flowers in the microwave takes about 90 seconds at half power, leaving your blooms paper-like and perfectly preserved. The process is straightforward – you sandwich your flowers between paper towels, place them between two plates, and microwave them briefly. This method works for many flower types and sizes.
You’ll need just a few basic supplies to get started: paper towels, microwave-safe plates, your favorite flowers, and of course, a microwave. This craft is perfect for beginners and experienced crafters alike. The dried flowers last for months or even years when stored properly.
Understanding the Basics of Flower Drying
Flower drying preserves the beauty of your favorite blooms, allowing you to enjoy them long after they would naturally wilt. Different methods offer various results in terms of color retention, shape preservation, and drying time.
The Importance of Preserving Flowers
Drying flowers lets you keep special memories alive. That wedding bouquet, anniversary roses, or wildflowers from a perfect hike can become lasting keepsakes when properly preserved.
Dried flowers also make beautiful decorations for your home. You can use them in wreaths, shadow boxes, or as wall art that won’t wilt or need watering.
Many people find flower preservation to be a relaxing hobby that connects them with nature. Working with flowers can be therapeutic and gives you a creative outlet.
Preserved flowers are also eco-friendly alternatives to artificial flowers. They’re biodegradable while still offering long-lasting beauty without plastic waste.
Overview of Various Drying Methods
Air-drying is the traditional method where you hang flowers upside down in a dark, dry place for 1-3 weeks. This technique is free but takes time and may cause colors to fade.
The microwave method is quick and convenient, taking just minutes instead of weeks. You’ll need paper towels and microwave-safe plates. This method helps retain more vibrant colors than air-drying.
Silica gel creates stunning results by drawing moisture out while maintaining the flower’s shape and color. You cover flowers completely in this crystal medium for 3-7 days.
Pressing flowers between heavy books flattens blooms for use in framed art or cards. The microwave can speed up this process too!
Each method has its benefits depending on what type of flowers you’re drying and how you plan to display them.
Choosing Flowers for Microwave Drying
Not all flowers work well for microwave drying. The size, moisture content, and petal structure affect how well a flower will dry in a microwave. Picking the right blooms makes a big difference in your results.
Types of Flowers Best Suited for Microwave Drying
Small to medium-sized flowers typically dry best in the microwave. Roses (small varieties), daisies, pansies, marigolds, and petunias are excellent choices for beginners. Other good options include zinnias, cosmos, verbena, and larkspur. These flowers tend to hold their shape and color well during the quick drying process.
Ferns also work surprisingly well and add nice texture to your dried flower collection. Avoid very thick or watery flowers as they might not dry evenly.
When selecting flowers for your project, fresh blooms work better than older ones. Try to pick flowers in the morning after the dew has dried but before the hot sun hits them.
The Role of Petal Delicacy
The thickness of petals plays a big part in how well flowers dry. Flowers with delicate petals often dry faster and more evenly in the microwave. Thin petals allow moisture to escape quickly, which helps prevent browning or mold.
Very delicate petals need shorter microwave times – sometimes just 30 seconds is enough. You’ll need to handle these gently when placing them between paper towels.
Flowers with thicker petals, like small roses, need a bit more time but still work well. The key is watching closely and checking after each minute. If your flower still feels damp or soft, it needs more time. A perfectly dried flower should feel papery but not brittle.
Supplies Needed for Microwave Drying
Drying flowers in your microwave is quick and easy when you have the right tools on hand. This method saves time compared to traditional pressing and helps preserve the natural colors better.
Materials Checklist
Essential Items:
- Microwave-safe plates (2 flat ones work best)
- Paper towels or blotting paper
- Fresh flowers of your choice
- Tweezers for delicate handling
- Microwave oven
Optional Tools:
- Microfleur flower press (a special microwave flower press with foam pads)
- Small weights or heavy books (for after-drying pressing)
- Cardboard pieces (alternative to plates)
- Cotton fabric (can replace paper towels)
The Microfleur press is wonderful if you plan to dry flowers often. It has special padding that helps preserve flower color and shape better than DIY methods.
You might already have most of these supplies at home! The paper towels absorb moisture as the flowers dry, so have plenty on hand for best results.
Preparation of Flowers for Drying
Before you put those pretty blooms in the microwave, you need to prepare them properly. Good preparation ensures your flowers dry evenly and maintain their color and shape.
Trimming and Cleaning
Start by selecting flowers that are fresh but not fully open. Partially open blooms dry better and keep their shape nicely. Cut the stems to about 1-2 inches long, as shorter stems dry faster in the microwave.
Remove any damaged or discolored petals gently. These imperfections will only get more noticeable after drying.
Brush off any dirt, insects, or pollen from the petals and leaves. You can use a small, soft paintbrush for this task. Pollen can stain your flowers and the paper towels during the drying process.
Make sure your flowers are completely dry on the surface. If you’ve just picked them from your garden, let them sit for about 30 minutes to ensure any dew or moisture has evaporated.
Arranging Flowers for the Drying Process
Place your flowers between two paper towels on a microwave-safe plate. Arrange them so they don’t overlap or touch each other. This allows for even drying and prevents the flowers from sticking together.
For best results, lay the flowers face-up and spread out their petals gently. Try to make them look how you want them to appear when dried.
If you’re working with larger flowers like roses, you might want to process them individually. Smaller flowers like pansies or daisies can be dried together.
Add a second paper towel on top and place another microwave-safe plate over everything. This “sandwich” creates gentle pressure that helps the flowers dry flat while protecting their shape.
The Microwave Drying Process
Microwave drying is a quick and efficient way to preserve flowers without waiting days or weeks. This method uses heat to remove moisture while keeping the flower’s shape and color intact.
Step-by-Step Guide
First, gather your supplies: fresh flowers, paper towels, two microwave-safe plates, and something heavy like a ceramic mug. Choose flowers that are in good condition without spots or wilting.
Trim any extra leaves or stems from your flowers. Longer stems can prevent proper drying and may cause uneven results.
Place a paper towel on the bottom plate. Arrange your flowers on top, making sure they don’t overlap. Cover with another paper towel and place the second plate on top.
Microwave at half power for about 30-90 seconds depending on the flower type. Thicker flowers like roses need more time than delicate ones like pansies.
Let the plates cool for a minute before checking. This prevents any moisture from re-entering the flowers.
Monitoring the Drying Time
Check your flowers after the first 30 seconds. Touch them gently to see if they feel papery and dry. If they still feel soft or moist, return them to the microwave for another 30 seconds.
Different flowers require different drying times. Small, thin petals dry faster than thick, fleshy ones. Experiment with one flower first before drying a whole batch.
Watch for signs of burning or browning. If you notice any color changes, reduce the power level or shorten the time.
For best results, keep microwave sessions short. Multiple brief sessions are better than one long one. This gives you more control over the drying process.
Safety Considerations
Never use metal in the microwave. Make sure your plates and pressing objects are microwave-safe.
Be careful when removing plates as they may be hot. Use oven mitts to protect your hands.
Some flowers contain oils that might create odors when heated. Ensure good ventilation in your kitchen while drying flowers.
Don’t leave the microwave unattended during the drying process. Keep an eye on your flowers to prevent overheating or fires.
If you have allergies, wear gloves when handling flowers and consider wearing a mask. Some people may have reactions to pollen even from dried flowers.
Using a Flower Press
Flower presses offer another excellent way to preserve your blooms with beautiful, flat results. They work well on their own or combined with microwave techniques for faster drying.
The Basics of Pressing Flowers
A traditional flower press consists of two boards with layers of absorbent paper and cardboard between them. You place flowers between sheets of blotting paper, stack them with cardboard spacers, and tighten the press with screws or straps.
Choose flowers that are dry and free from morning dew or rain. Flat flowers like pansies, daisies, and larkspur work especially well. For thicker flowers, you might want to cut them in half.
Arrange your blooms carefully on the blotting paper—they won’t move once pressed! Tighten the press firmly but not so tight that it crushes delicate petals.
Leave the press in a dry, warm place for 2-4 weeks. The longer you wait, the more thoroughly dried your flowers will be.
Combining Microwave Drying with Flower Pressing
You can speed up the traditional pressing process by using your microwave! Place your flowers between two pieces of absorbent paper towels, then between two microwave-safe ceramic tiles or a microwave-safe dish.
Heat for 30-90 seconds at half power, checking frequently. Your flowers should feel papery when done, but be careful not to overcook them.
This quick method preserves colors better than traditional pressing alone. For best results, finish microwave-pressed flowers in a traditional press for a few days to ensure they’re completely flat and dry.
Try pressing flowers face-down for a different effect. Leave a little space between each flower to prevent moisture from transferring between blooms.
Alternative Flower Drying Techniques
While microwave drying is quick and convenient, other methods can preserve your flowers with different results. These techniques offer unique benefits depending on the type of flowers you’re working with and the look you want to achieve.
Air-Drying and Hanging Method
Air-drying is one of the oldest and simplest ways to preserve flowers. To try this method, gather your flowers when they’re not fully open and remove extra leaves from the stems.
Tie small bunches together with string or rubber bands. Make sure not to crowd too many flowers together, as this can cause mold to grow.
Hang the bunches upside down in a dark, dry place with good air circulation. A closet, attic, or unused room works great. Keep them away from direct sunlight to prevent color fading.
The drying process usually takes 2-3 weeks. Your flowers are ready when they feel papery and crisp to the touch. This method works especially well for roses, lavender, and baby’s breath.
Using Silica Gel for Drying
Silica gel is a special drying agent that pulls moisture from flowers while helping them keep their shape and color. You can find it at craft stores in the floral section.
To use silica gel, place a layer in the bottom of an airtight container. Add your flowers, then gently pour more silica gel around and over them until completely covered.
Put the lid on the container and leave it for 3-7 days, depending on the flower type. Check occasionally by gently removing some gel to see if the flowers feel dry.
This method is perfect for delicate blooms like daisies, pansies, and zinnias. It preserves more of the flower’s natural color than air-drying. Just remember to handle the dried flowers carefully, as they become very fragile.
Aftercare for Dried Flowers
Once you’ve successfully dried your flowers in the microwave, proper aftercare is essential to maintain their beauty. Taking good care of your dried blooms will help them last for months or even years.
Storage and Display
Store your dried flowers in a cool, dry place away from direct sunlight. Sunlight can fade the colors quickly, making your beautiful blooms look dull. A closed container or shadow box works well for long-term preservation.
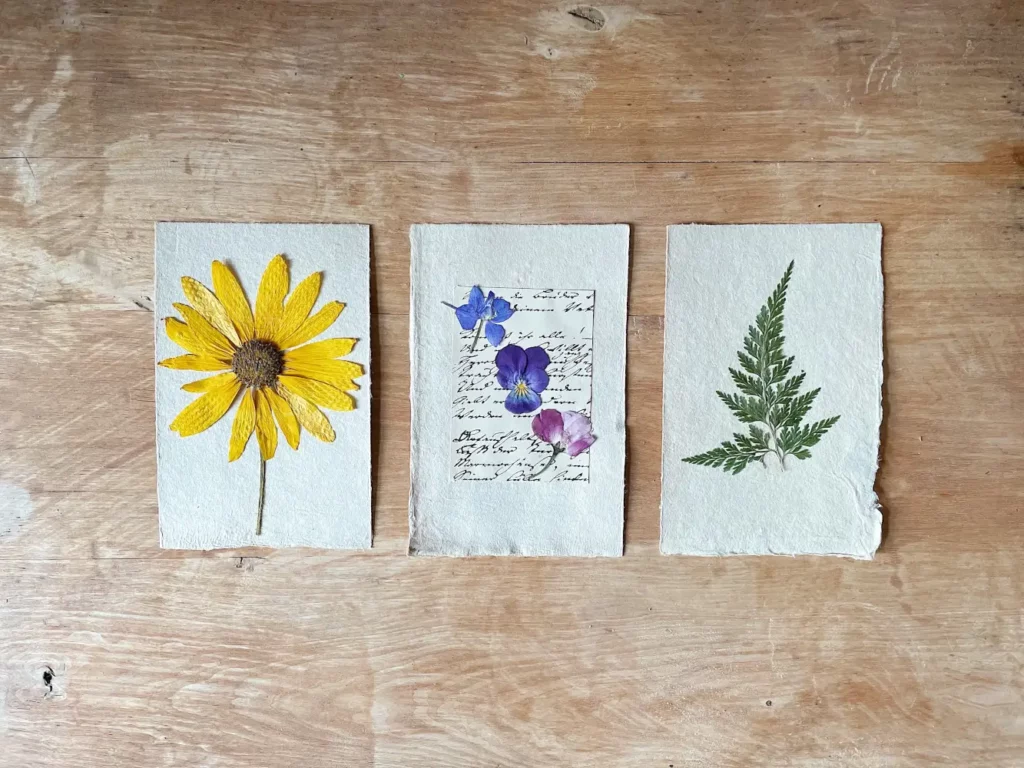
You can display your dried flowers in many creative ways! Try framing them between glass for wall art, using them in homemade cards, or arranging them in a shadow box. Clear glass ornaments can also showcase smaller dried flowers beautifully.
To protect your dried flowers from humidity, consider adding silica gel packets to your storage containers. This helps prevent moisture damage that can cause mold or discoloration.
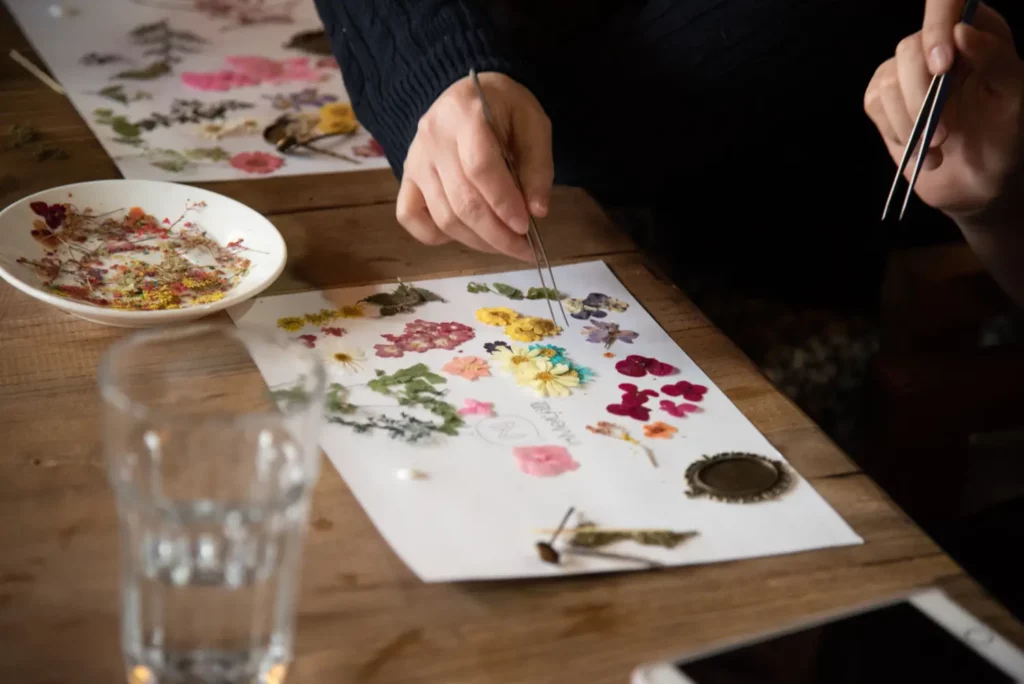
When handling your dried flowers, be gentle! They become quite fragile after drying. You might want to use tweezers for delicate arrangements or apply a light coat of hairspray as a sealant for extra protection.
Crafting with Dried Flowers
Once you’ve mastered drying flowers in the microwave, a world of creative possibilities opens up! Dried flowers preserve the beauty of nature and can be used in many enjoyable craft projects.
Creative Ideas and Tips
Pressed flowers make beautiful decorations for handmade cards and bookmarks. You can arrange them on cardstock and cover with clear contact paper for a personalized touch.
Try creating a botanical wall art by framing your dried flowers against a neutral background. This makes for stunning home decor that preserves special blooms from your garden or meaningful occasions.
Resin crafts are perfect for showcasing your microwave-dried flowers. Pour clear resin into molds with your dried flowers to create unique jewelry, coasters, or decorative objects.
For a simple project, attach dried flowers to gift wrapping with a small dot of glue. This adds a special, handmade touch to any present.
Remember to handle your dried flowers gently as they become brittle. Store any unused dried flowers in a book or box away from direct sunlight to maintain their color and shape for future projects.
Troubleshooting Common Issues
Even with careful preparation, you might encounter a few challenges when drying flowers in your microwave. Here are solutions to the most common problems that can occur during the process.
Addressing Moisture Problems
If your flowers aren’t completely dry after microwaving, don’t worry! This is a common issue that’s easy to fix. First, check if your flower is too thick or contains a lot of moisture. Larger blooms like roses might need extra drying time.
Try microwaving your flowers in shorter 30-second intervals rather than one long session. This prevents overheating while allowing moisture to escape gradually. Between each interval, let the flowers cool slightly.
For stubborn moisture, place a small container of silica gel in the microwave alongside your flower sandwich. The silica helps absorb excess moisture during the drying process.
Quick tip: If you notice damp spots, place the flowers between fresh paper towels and press them between heavy books for 24 hours after microwaving.
Fixing Color Fading
Color fading is frustrating when you want vibrant dried flowers. To prevent this, avoid excessive microwave time which can bleach natural pigments. Start with shorter times (30-45 seconds) and check frequently.
Some flowers naturally preserve color better than others. Roses, daisies, and lavender typically maintain their hues well. Blue and purple flowers tend to fade more quickly.
Try these preservation tricks:
- Microwave flowers at 50% power instead of full power
- Add 1 teaspoon of glycerin to 2 cups of water and lightly mist flowers before drying
- Store dried flowers away from direct sunlight after processing
Best practice: For vibrant results, choose fresh flowers at their peak rather than ones that have already started to wilt. The fresher the flower, the better it will maintain its natural coloring through the drying process.