

Saving flower petals creates beautiful keepsakes from special moments. Whether you received roses from someone special or want to remember a wedding bouquet, preserved petals can last for years.
You can preserve flower petals using several easy methods including air drying, pressing, or using silica gel. The silica gel method is especially effective – simply place your petals in an airtight container filled with silica gel, making sure they’re completely covered, then seal and wait. This helps maintain both the shape and color of your petals.
For a quick and simple approach, try air drying your petals by spreading them on paper towels in a sunny spot for about two weeks. Don’t forget to turn them occasionally! Once dried, a light spray of hairspray can help keep your preserved petals crisp and vibrant for crafts, decorations, or memory books.
Understanding Flower Preservation
Flower preservation is a way to keep your beautiful blooms looking nice for a long time. It’s all about removing moisture from natural flowers and petals while keeping their shape and color.
There are several methods you can use to preserve flower petals. Each technique has its own benefits, depending on what you want to do with the petals later.
Popular preservation methods include:
- Air-drying
- Pressing
- Using silica gel
- Glycerin preservation
- Hairspray setting
One of the easiest ways to preserve petals is using silica gel. You can simply place your petals in a box with silica gel and let them dry completely. The gel absorbs moisture while maintaining the petals’ color and shape.
If you’re looking for a simpler option, air-drying or pressing works well too. These methods take about 2-4 weeks but require minimal supplies.
For pressed flowers, a light spray of hairspray after drying helps keep them crisp and nicely preserved. This adds a protective layer that prevents damage.
Preserved flowers can last much longer than fresh ones – sometimes years! They make wonderful keepsakes for special occasions like weddings or anniversaries.
Remember that different flowers preserve differently. Some keep their vibrant colors while others may fade slightly during the process.
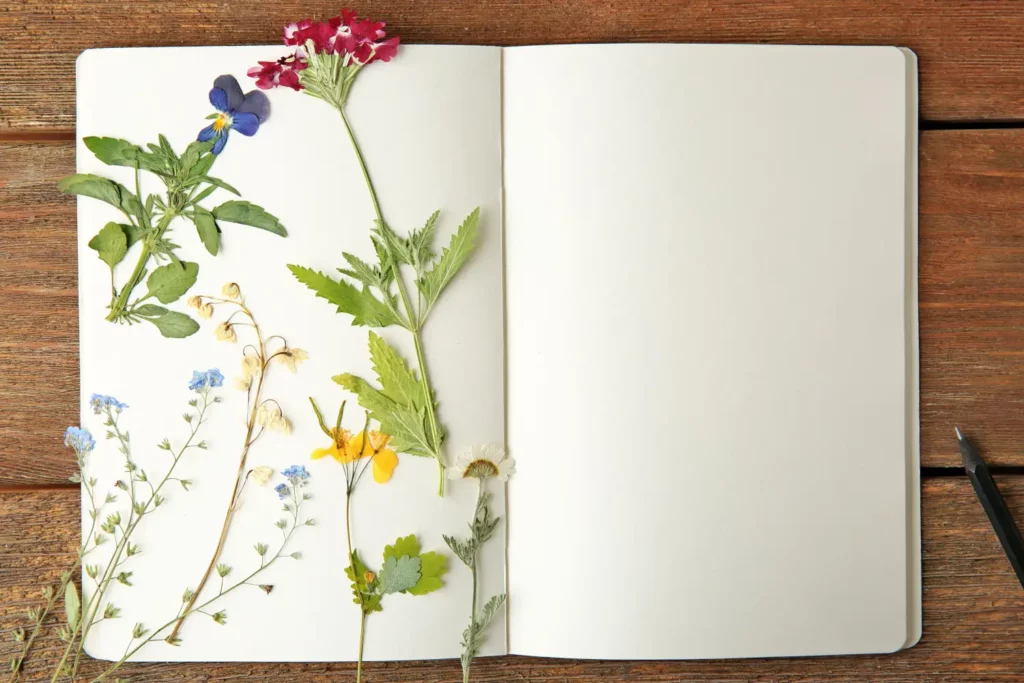
Selecting Flowers for Preservation
Not all flowers are created equal when it comes to preservation. Some hold their color and shape better than others during the drying process.
Flowers with thicker petals like roses, peonies, and dahlias work wonderfully for preservation projects. These sturdy blooms maintain their form even after drying.
Flowers with naturally flat petals such as pansies, daisies, and cosmos are ideal for pressing. Their shape makes them perfect additions to craft projects like bookmarks or framed art.
Try to collect flowers at their peak bloom for the best results. Avoid flowers that are already wilting or showing signs of damage.
For vibrant colors in your craft project, choose flowers with naturally strong hues. Bright yellows, deep purples, and rich reds tend to retain their color better than pale shades.
Best flowers for preservation:
- Roses
- Lavender
- Hydrangeas
- Daisies
- Baby’s breath
- Carnations
Consider the season when selecting flowers. Spring and summer offer the widest variety, but fall flowers like chrysanthemums can provide beautiful autumn colors for your projects.
Remember to pick flowers when they’re dry – collecting flowers wet with dew or rain can lead to mold during the preservation process.
Methods of Flower Preservation
Preserving flower petals allows you to enjoy their beauty long after the blooms have faded. Several effective methods exist, each with unique advantages depending on your time frame and the look you want to achieve.
Air-Drying Flowers
Air-drying is one of the simplest and most natural ways to preserve flower petals. To get started, gather your flowers when they’re not wet from rain or dew. Remove the stems and spread the petals on a clean, dry surface like a paper towel or a screen.
Place them in a warm, dark area with good air circulation. Avoid direct sunlight as it can fade the colors. A closet, attic, or dry basement works well.
The drying process typically takes 1-2 weeks. You’ll know your petals are ready when they feel papery and crisp to the touch. Air-dried petals maintain their color better than some other methods, though they may curl slightly.
This method works best for roses, lavender, and hydrangeas. The finished petals can be used in potpourri, crafts, or decorative displays.
Pressing Flowers
Pressing creates flat, papery petals perfect for bookmarks, cards, and framed art. To press flowers, you’ll need absorbent paper like coffee filters, blotting paper, or non-glossy book pages.
Basic pressing steps:
- Arrange petals on one sheet of paper
- Cover with another sheet
- Place between the pages of a heavy book
- Add more weight on top (additional books work well)
- Leave undisturbed for 2-3 weeks
For best results, change the paper every few days to prevent mold growth. Pressing works beautifully with delicate flowers like pansies, violets, and daisies.
You can also use a purchased flower press if you plan to press flowers regularly. These typically have layers of cardboard and blotting paper held together with straps or screws.
Using Silica Gel for Drying
Silica gel preserves flowers in a more three-dimensional form while maintaining their color and shape. You can find silica gel at craft stores or online. It’s those little packets that come in shoe boxes and electronics!
To use silica gel:
- Place a layer in the bottom of an airtight container
- Arrange petals on top, making sure they don’t touch
- Gently pour more silica gel over and around the petals
- Seal the container tightly
- Let sit for 2-7 days depending on petal thickness
The silica gel absorbs moisture without damaging the petals. Check occasionally until they feel dry and papery. Gently brush off any remaining gel crystals with a small paintbrush.
This method works wonderfully for wedding bouquet preservation. The silica gel can be reused after drying it out in the oven.
Microwave Flower Press Technique
When you need preserved petals quickly, the microwave method delivers fast results. You’ll need two microwave-safe ceramic tiles and several layers of paper towels or coffee filters.
Quick microwave pressing:
- Place petals between layers of paper
- Put between the ceramic tiles
- Microwave on low for 30-60 seconds
- Let cool completely before checking
- Repeat if needed until petals are dry
Always watch carefully to prevent scorching. The ideal microwave time varies depending on your microwave’s power and the moisture content of your petals.
This technique works best for thin, delicate petals rather than thick, fleshy ones. The finished petals may be slightly more brittle than those dried through other methods.
Using a Dehydrator for Flowers
A food dehydrator offers consistent, controlled drying for petals of all types. Set your dehydrator to its lowest setting (95-115°F) and arrange petals in a single layer on the trays.
Dry time varies from 2-8 hours depending on petal thickness. Check regularly and remove petals as they become completely dry to avoid over-drying.
The advantages of dehydrator drying include:
- Faster than air-drying
- More controlled than oven methods
- Better color preservation than some other techniques
- Less risk of mold than with pressing
For best results, place similar flowers together since drying times vary. Roses and carnations typically take longer than delicate flowers like daisies.
The gentle airflow helps petals retain their natural shape while removing all moisture. Your dried petals will be perfect for bath products, confetti, or decorative displays.
Preparing Flowers for Preservation
Timing is everything when preparing flowers for preservation. Pick your flowers in the morning after the dew has dried but before the heat of the day. This is when flowers are at their freshest.
Remove any damaged petals that show signs of browning or wilting. These won’t preserve well and can affect the quality of your dried flowers.
Gently shake the flowers to remove any insects or debris. You don’t want to preserve unwanted guests along with your beautiful blooms!
Cut stems at an angle using sharp scissors or garden shears. If you’re only preserving the petals, carefully pluck them from the flower head and place them on a clean, dry surface.
Sort your petals by size and color if you’re preserving a large batch. This helps create more attractive arrangements later.
For best results, begin the preservation process immediately after harvesting. Fresh flowers preserve better than those that have started to wilt.
Remove any excess greenery or leaves that you don’t want to preserve. This helps speed up the drying process and creates cleaner results.
Pat the petals dry with a paper towel if they’re damp. Excess moisture can lead to mold during preservation.
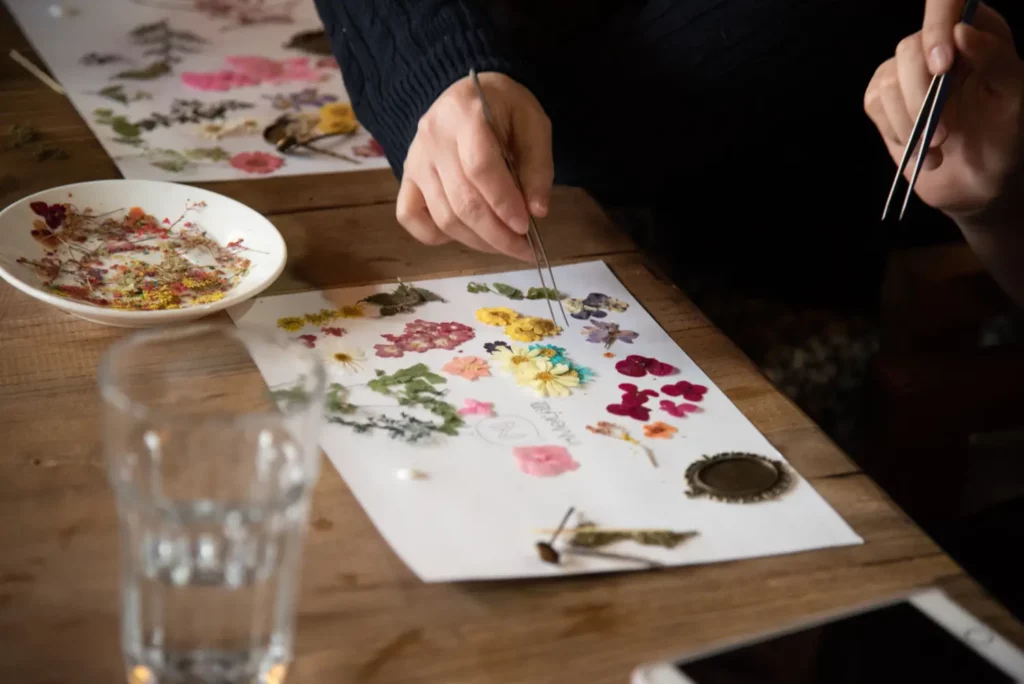
Creating a Pressed Flower Project
Once you have your perfectly preserved flower petals, it’s time to create something beautiful with them! Pressed flowers can be used in many craft projects from cards to bookmarks to framed art.
Choosing the Right Materials
When starting a pressed flower project, select materials that will showcase your flowers while keeping them protected. Look for acid-free paper or cardstock as your base to prevent yellowing over time.
For displaying pressed flowers, consider these options:
- Clear glass frames with double-sided mounts
- Laminating sheets for bookmarks and cards
- Clear contact paper for simple preservation
- Acid-free glue or adhesive dots for secure attachment
Try to avoid regular tape as it can yellow and damage delicate petals. Tweezers are essential for handling tiny flowers without breaking them.
For preservation, a light spray of artist’s fixative can help maintain colors longer, but test it on a sample flower first.
Assembling the Press
Creating your own flower press is simple and more effective than using books. You’ll need:
- 2 pieces of plywood (about 8×8 inches)
- 4 bolts with wing nuts
- Several sheets of cardboard
- Blotting paper or coffee filters
- Newspaper
Assembly steps:
- Drill matching holes in the corners of both plywood pieces
- Cut cardboard and blotting paper to the same size as the wood
- Layer like this: wood → cardboard → blotting paper → flowers → blotting paper → cardboard
- Add multiple layers if pressing different flowers
- Secure with bolts and tighten wing nuts evenly
Change the blotting paper every few days to prevent mold and help maintain flower colors.
Design and Composition Tips
When arranging pressed flowers, think about color harmony and natural flow. Create balance by placing larger flowers first, then filling in with smaller blooms and leaves.
Try these design approaches:
- Wreath patterns work well for circular frames
- Scattered arrangements look natural on cards
- Gradient layouts (light to dark or by color) create visual interest
- Botanical illustrations can be enhanced with pressed specimens
Take photos of your arrangement before gluing anything down. This helps you experiment with layouts without damaging delicate petals.
Don’t overcrowd your design—negative space highlights the beauty of each flower. For a professional look, include identification labels with flower names if you’re creating botanical art.
Care and Storage of Preserved Flowers
Once you’ve successfully preserved your flower petals, proper storage is essential to maintain their beauty. Keep dried flowers away from direct sunlight to prevent color fading. Sunlight can quickly bleach your preserved petals, making them lose their vibrant colors.
Store your dried petals in a cool, dry place. Humidity is the enemy of preserved flowers! Too much moisture can cause mold or make your dried flowers lose their shape.
Protection Tips:
- Place dried flowers in sealed containers or bags
- Add silica gel packets to absorb any moisture
- Keep away from bathrooms or kitchens where humidity levels change
For pressed flowers, consider storing them between acid-free paper. This helps prevent yellowing over time. You can also display them in glass frames, but make sure to use UV-protected glass if hanging in a bright area.
Handle your preserved petals with care! Dried flowers become fragile and can crumble easily. When working with them for crafts, use gentle tools like tweezers.
A light spray of clear acrylic sealant can help protect your dried petals from humidity and make them last longer. Just apply a thin coat and let it dry completely before handling.
Remember to dust your displayed dried flowers occasionally. Use a soft brush or can of compressed air to gently remove dust without damaging the delicate petals.
Craft Ideas and Uses for Preserved Flowers
Once you’ve successfully preserved your flower petals, a world of creative possibilities opens up! Preserved blooms can add beauty and meaning to your home, gifts, and artistic creations.
Home Decor With Preserved Flowers
Dried and pressed flowers make stunning home decorations that last much longer than fresh arrangements. Try arranging preserved blooms in shadow boxes or floating frames to create wall art that captures special memories. These displays work well in bedrooms, living rooms, or hallways.
You can also make your own candles with embedded flower petals. Simply attach dried petals to the outside of a plain candle using a thin layer of wax, or carefully place them inside clear candles as you pour them.
Dried flower garlands add a touch of nature to any room. String preserved blooms together using thin thread or wire and hang them across windows, doorways, or mantels for a whimsical touch.
For a simple decorative accent, fill clear glass jars or vases with colorful dried petals. These make beautiful centerpieces that last for months.
Making Gifts With Dried Petals
Preserved flowers make meaningful, personal gifts that show extra thought and care. Handmade potpourri using dried petals and essential oils creates a lovely fragrant gift that friends will appreciate.
Try making custom bookmarks by pressing flowers between clear contact paper or laminating them. These make perfect gifts for book lovers!
Jewelry made with resin and dried petals creates one-of-a-kind accessories. You can make pendants, earrings, or rings that contain tiny preserved blooms.
Consider crafting personalized greeting cards with pressed flowers. The natural elements add dimension and uniqueness that store-bought cards simply can’t match.
Bath products like soap or bath bombs containing dried petals not only look beautiful but provide a luxurious experience. These make wonderful self-care gifts.
Creating Art and Mixed Media
Pressed flowers offer endless possibilities for artistic expression. Create botanical prints by arranging pressed flowers on watercolor paper and framing the results. The natural colors and shapes create striking compositions.
Scrapbooking with preserved petals adds a special touch to memory books. You can place them directly on pages or in plastic sleeves to maintain their integrity over time.
Try making collages that combine dried flowers with other materials like paper, fabric, or photos. These mixed media pieces can tell stories or evoke certain moods through their combinations.
Resin art has become increasingly popular, and dried flowers make perfect inclusions. Pour resin into molds with arranged petals to create coasters, trinket dishes, or decorative panels.
Remember that preserved flowers are delicate, so handle with care during your craft projects to avoid damage.
Tips and Tricks for Better Preservation
Timing matters when selecting flowers for preservation! Pick your flowers in the evening during golden hour when they’re dry and not too moist. This helps them press and dry more effectively.
Remove any damaged petals before preserving. Those brown or discolored outer petals won’t look good in your final preserved collection, so discard them early in the process.
For pressing flowers, place your petals between absorbent paper like coffee filters or parchment paper. Then put them inside a heavy book with additional weight on top. Check them after 2-3 weeks.
Try silica gel for faster drying! This is a fantastic method where you simply bury your flower petals in silica gel inside a container. The gel pulls moisture from the petals while maintaining their shape and color.
Remember to turn your petals regularly if you choose air drying. Spread them on a screen or paper towel in a dry, dark place with good air circulation.
Quick Methods for Busy Flower Lovers:
- Microwave pressing (flowers between paper towels, 30-second bursts)
- Oven drying (lowest setting, door slightly open)
- Hair dryer on cool setting for delicate petals
Keep your preserved petals away from direct sunlight after drying to prevent fading. Store them in airtight containers if you’re not using them right away in crafts.
Incorporating Preserved Flowers in Culinary Creations
Preserved flower petals can add color, flavor, and elegance to your dishes. They transform ordinary meals into beautiful culinary experiences while introducing subtle floral notes that delight the palate.
Edible Flower Guide
Not all flowers are safe to eat! When selecting flowers for culinary use, choose organic blooms that haven’t been treated with pesticides or chemicals. Some popular edible options include:
- Roses: Sweet, aromatic petals perfect for desserts
- Lavender: Strong flavor that works well in baked goods
- Violets: Mild sweet flavor, beautiful purple color
- Calendula: Slightly peppery, adds golden color
- Chamomile: Apple-like flavor, great for teas
- Nasturtium: Peppery taste, similar to watercress
Always verify a flower is edible before consuming it. Some flowers look similar to toxic varieties. When in doubt, check with a reliable plant identification guide or expert.
Dried Flower Garnishes
Dried flower petals make stunning garnishes for both sweet and savory dishes. Sprinkle them over cookies, cakes, or cupcakes for an instant visual upgrade. They’re perfect for special occasions!
Try creating a “flower confetti” by mixing different colored petals to sprinkle over vanilla ice cream or chocolate desserts. For cookies, press dried petals gently into the dough before baking for a stained-glass effect.
Savory dishes benefit from dried flowers too. Add them to flatbreads, sprinkle over creamy soups, or mix into compound butter for an elegant touch.
Floral Infusions and Flavors
Preserved flowers create wonderful flavor infusions. Make floral honey by adding dried lavender, rose petals, or chamomile to warm (not hot) honey. Let it steep for 1-2 weeks for a delicious spread.
Floral sugars are simple to create. Layer dried petals with granulated sugar in a jar and let sit for two weeks. Use this in baking or to rim cocktail glasses.
For a refreshing drink, steep dried flowers in hot water to make herbal tea. Rose, hibiscus, and chamomile work beautifully. You can also infuse flowers in oils, vinegars, or alcohols to create unique cooking ingredients.
Freeze petals in ice cubes for a pretty addition to summer drinks. They make ordinary beverages feel special without much effort!
Eco-Friendly Practices in Flower Preservation
Preserving flower petals can be environmentally friendly when you choose the right methods and materials. Green practices not only protect our planet but often result in more beautiful and meaningful keepsakes.
Sustainable Sourcing of Flowers
Start your preservation journey by choosing flowers grown with eco-friendly practices. Look for locally grown blooms from farmers markets or your own garden to reduce carbon emissions from transportation.
Seasonal flowers require fewer resources to grow, making them a greener choice. When possible, select organically grown flowers that haven’t been treated with harmful pesticides or chemicals.
Consider wild flowers that grow naturally in your area, but always get permission before picking and never take protected species. Many decorative plants like lavender, roses, and daisies are perfect for drying and grow easily in home gardens.
Create a small cutting garden at home if you have space. This gives you a steady supply of flowers for preservation projects while supporting local pollinators.
Biodegradable Materials for Pressing
Choose recycled paper like old phone books or newspaper for pressing flowers. These materials absorb moisture well and can be composted after use.
Wooden flower presses made from sustainable woods like bamboo or reclaimed timber offer a reusable option. Many craftspeople create beautiful presses from salvaged materials.
For binding pressed flowers, look for plant-based glues or make your own using flour and water. These alternatives avoid the harmful chemicals found in synthetic adhesives.
Use biodegradable wax paper instead of plastic sheets when pressing delicate petals. It keeps petals from sticking while being kinder to the environment.
Old cotton fabric scraps work wonderfully for pressing flowers too. The natural fibers absorb moisture and can be washed and reused many times.
Natural Preservation Techniques
Air drying is perhaps the most eco-friendly preservation method. Simply hang flowers upside down in a cool, dry place for 1-2 weeks. This technique requires no additional materials or energy.
Try sand drying using clean, fine sand from your garden. Place your flowers in a container, gently cover with sand, and allow to dry for 1-2 weeks.
Salt preservation offers another natural option. Mix equal parts salt and flour, cover your blooms completely, and let them rest in a dry place.
Plant-based glycerin (derived from vegetable oils) can preserve flowers while keeping them flexible. Mix one part glycerin with two parts water, and let stems absorb the solution.
Avoid chemical sprays and opt for light beeswax applications to protect dry flowers. Simply melt a small amount and apply with a soft brush for natural preservation.