
Epoxy resin is amazing for DIY projects, but cleanup can be tricky! Working with this sticky substance often leaves residue on your tools, workspace, and sometimes even your hands. To clean up non-hardened epoxy resin, you can use isopropyl alcohol, denatured alcohol, or acetone with rags or paper towels to dissolve and wipe away the residue.
For your resin cups and tools, a good cleaning with resin remover or alcohol can help you reuse them for future projects. This saves money and reduces waste! When cleaning finished resin pieces, a gentler approach works best—just use mild dish soap with a soft, non-abrasive cloth to keep your creations looking their best without scratches.
With the right cleaning methods, your epoxy resin DIY projects can stay neat and tidy from start to finish. Keeping your workspace clean not only makes the creative process more enjoyable but also helps your tools last longer and your finished pieces shine!
Understanding Epoxy Resin
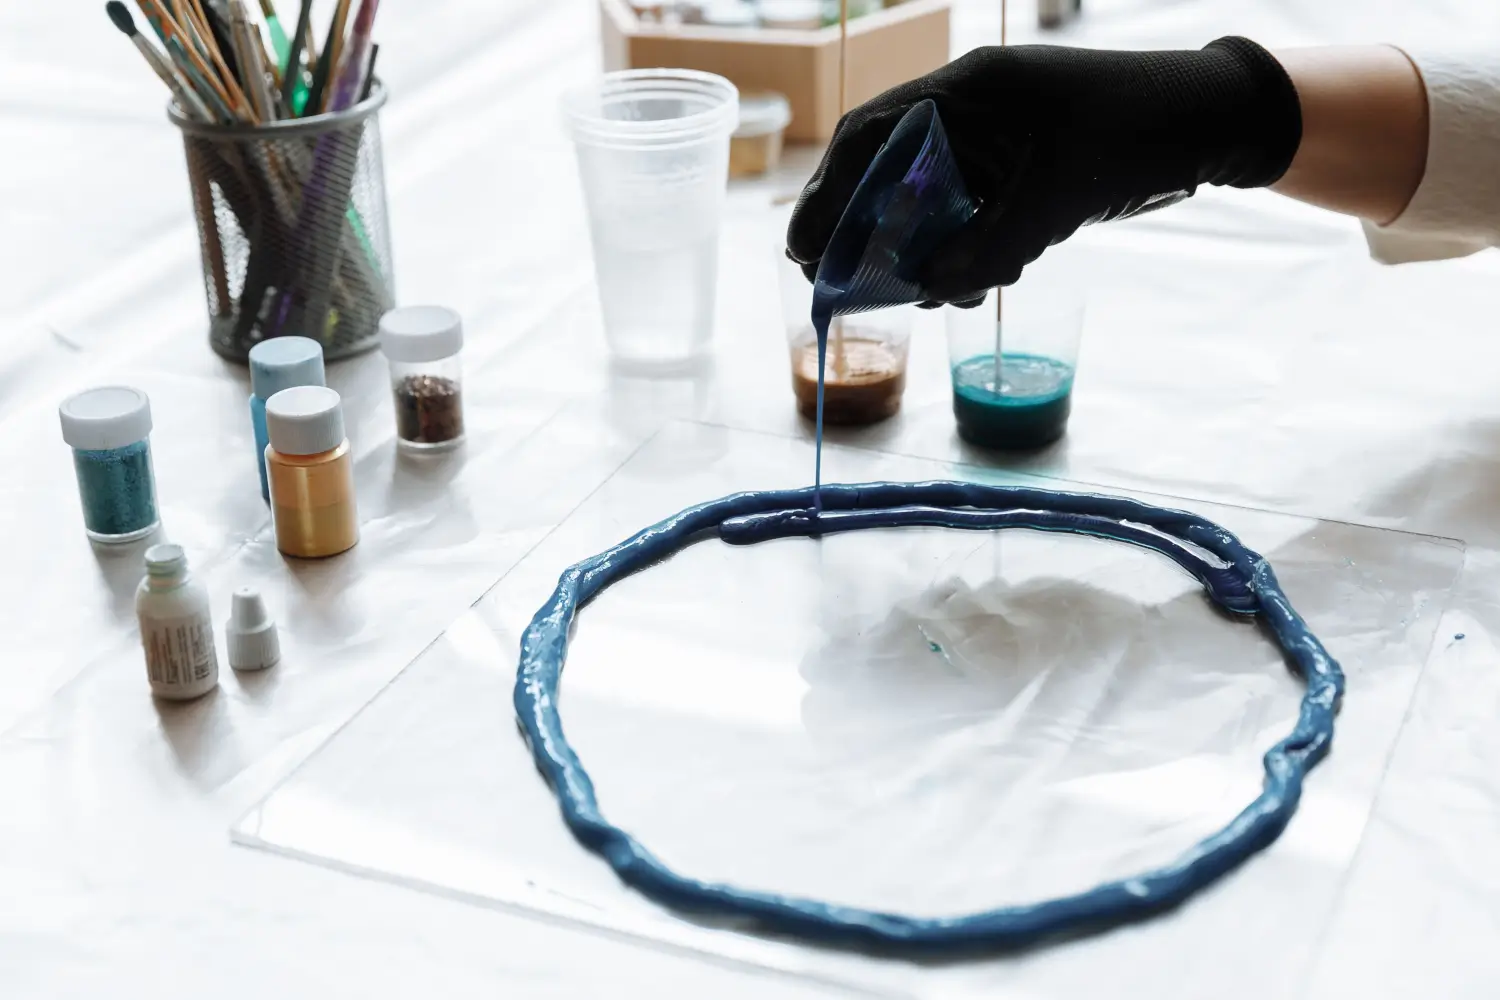
Epoxy resin is a versatile material used in many projects, from crafts to construction. It starts as a liquid that transforms into a hard, durable surface when properly cured.
Types of Epoxy
Epoxy resins come in several varieties, each designed for specific uses. Cast resin is perfect for jewelry and art pieces because it cures crystal clear. Coating resin spreads easily across surfaces, making it ideal for tabletops and bar counters. It creates a glossy, protective layer.
Laminating resin works well for fiberglass projects and boat repairs. It bonds strongly with fibers and fabric. Construction epoxy is thicker and built for heavy-duty repairs and bonding.
For beginners, UV resin offers convenience since it cures with sunlight or a UV lamp rather than mixing. However, it’s typically used for smaller projects due to its higher cost.
Epoxy as a Two-Part Adhesive
Epoxy functions as a two-part adhesive system, consisting of a resin and a hardener. When you mix these components, a chemical reaction begins that transforms the liquid into a solid.
The ratio between resin and hardener is crucial. Most systems require an exact 1:1 or 2:1 mixture. Using the wrong ratio will prevent proper curing, leaving you with sticky or soft spots.
Mixing must be thorough—about 2-3 minutes of stirring—to ensure the hardener fully combines with the resin. The chemical reaction creates heat, which helps the mixture cure.
Working time (or “pot life”) varies between products, typically ranging from 20 minutes to several hours. Temperature affects curing time—warmer environments speed up the process, while colder ones slow it down.
Safety First: Protective Equipment
Working with epoxy resin requires proper safety measures to protect yourself from potential health risks. The right protective gear can prevent skin irritation, respiratory issues, and other hazards during your resin projects.
Choosing the Right Gloves
Nitrile gloves are your best option when handling epoxy resin. These chemical-resistant gloves provide a strong barrier against harmful substances that can irritate or damage your skin. Avoid latex gloves as they don’t offer enough protection against resin chemicals.
Always check your gloves for tears or holes before starting. Even tiny openings can allow resin to contact your skin.
Replace your gloves immediately if they become contaminated with resin. Never reuse disposable gloves, as this increases your risk of exposure.
For longer projects, consider double-gloving or using heavier-duty nitrile gloves with at least 8 mil thickness for better protection.
Additional Protective Gear
A proper respirator mask is essential, not just a dust mask or N95. Look for respirators rated for organic vapors that can filter out the harmful chemicals in resin fumes.
Protective eyewear shields your eyes from splashes and irritating vapors. Choose wrap-around safety glasses for complete coverage.
Wear long sleeves and pants to protect your skin from accidental spills or splashes. Consider a workshop apron for an extra layer of protection.
When sanding cured resin, always wet sand when possible to reduce dust particles. If using power tools like a Dremel, wear your respirator to prevent inhaling dangerous resin dust.
Change contaminated clothing immediately and wash your hands thoroughly with warm water and soap after working with resin.
Preparation for Epoxy Use and Cleaning
Getting ready before you start your epoxy project can save you time and prevent messes. Good preparation helps ensure your project turns out well and makes cleanup much easier.
Setting up Your Workspace
Choose a flat, level surface for your epoxy project. Cover your work area with plastic sheeting, newspaper, or a silicone mat to protect it from spills. These coverings can be thrown away or easily cleaned later.
Make sure your workspace is well-ventilated. Open windows or use fans to keep air flowing, as epoxy fumes can be strong.
Keep your tools organized and within reach. This includes:
- Mixing containers
- Mixing sticks
- Measuring cups
- Gloves
- Application tools (brushes, spreaders)
Temperature matters when working with epoxy! Most resins work best between 70-75°F (21-24°C). Too cold and it won’t cure properly; too hot and it might set too quickly.
Gathering Cleaning Materials
Before you start your DIY project, collect your cleaning supplies so they’re ready when needed. You’ll want:
- Isopropyl alcohol or denatured alcohol
- Paper towels or clean rags
- Disposable wipes
- Acetone (for tougher cleanup jobs)
- Extra mixing sticks for scraping
- Small container for soaking tools
Having these items on hand means you can clean spills immediately. The sooner you clean epoxy, the easier it is!
Consider wearing disposable gloves to keep your hands clean. Nitrile gloves work well because they resist chemicals better than latex.
Label your cleaning solutions clearly so you don’t mix them up during your project.
Handling Uncured Epoxy
Uncured epoxy is much easier to clean up than hardened epoxy, but it requires quick action and the right solvents. Time is your friend when dealing with fresh epoxy mishaps.
Removing Epoxy from Skin
If you get uncured epoxy on your skin, act quickly! First, wipe away as much as possible with a paper towel. Don’t use solvents like acetone on your skin as they can cause irritation.
Try these safer options:
- Vinegar or citrus-based cleaners: Apply to the affected area and gently rub
- Waterless hand cleaners: These work well on stubborn spots
- Warm soapy water: Wash thoroughly after using any cleaning method
Never use harsh chemicals on your skin. If the epoxy has started to harden, don’t scrape or pick at it as this can damage your skin. It will eventually wear off in a day or two.
Cleaning Tools and Surfaces
For uncured epoxy on tools and surfaces, solvents are your best friends. Acetone is highly effective but should be used in well-ventilated areas.
Quick cleanup options:
- Isopropyl alcohol (91%): Great for most surfaces and less harsh than acetone
- Acetone: Very effective but can damage some plastics and finishes
- Denatured alcohol: Works well on wood surfaces
Apply your chosen solvent to a rag or paper towel rather than directly on the surface. Wipe gently, replacing your rag as it becomes saturated with epoxy. For workbenches or large spills, contain the area with more rags to prevent spreading.
Metal tools can be cleaned even after epoxy has partially cured. Brushes are often more economical to dispose of than clean, especially if the epoxy has begun hardening.
Dealing with Cured Epoxy
Once epoxy has hardened, it becomes much more challenging to remove. Different methods work better depending on the surface and how long the epoxy has been cured.
Removing Hardened Epoxy
When epoxy has fully cured, mechanical removal is often your first option. Try using a plastic scraper to gently lift the epoxy from the surface. For stubborn spots, you might need a heat gun to soften the resin before scraping.
Soaking the area with vinegar can help break down cured epoxy. Apply vinegar to the affected area and let it sit for 15-20 minutes before attempting removal.
For wood surfaces, careful sanding might be necessary. Start with coarse sandpaper and gradually move to finer grits to avoid damaging the underlying material.
Frozen epoxy becomes more brittle. Try placing ice on the cured epoxy for several minutes, then tap it gently with a hammer to crack it.
Epoxy-Safe Solvents
Chemical solvents can be effective on cured epoxy, but always test on an inconspicuous area first. Paint thinner works well on many surfaces but can damage plastics and some finishes.
Acetone is one of the strongest options for removing stubborn epoxy. Apply it to a cloth and rub the affected area. Remember to work in a well-ventilated space and wear gloves.
Denatured alcohol or isopropyl alcohol (91%) works for smaller spots of cured epoxy. These are gentler than acetone but still effective.
Commercial epoxy removers are specifically designed for this purpose. They’re often your best bet for large areas or particularly stubborn cured epoxy.
Using Solvents for Epoxy Resin
Cleaning up epoxy resin requires specific solvents that can break down the sticky substance before it cures completely. The right solvent can make cleanup much easier and help salvage tools and work surfaces.
Acetone and Its Uses
Acetone is one of the most effective solvents for removing uncured epoxy resin. It works quickly to dissolve sticky residue from tools, brushes, and work surfaces. You can find acetone at most hardware stores in the paint section.
To use acetone for cleanup, pour a small amount onto a cloth and wipe the affected area. For stubborn spots, you might need to let the acetone sit on the epoxy for a few minutes before wiping.
Safety tip: Always wear gloves when handling acetone! It’s harsh on skin and can cause irritation. Also, work in a well-ventilated area since acetone fumes can be strong.
Remember that acetone might damage some plastics and finished surfaces, so test it on a small area first.
Alternatives to Acetone
If acetone seems too harsh, you have several gentler options that still work well:
Denatured alcohol (also called methylated spirits) is a good first choice for epoxy cleanup. It’s effective but less aggressive than acetone. Apply it with a cloth to wipe away uncured epoxy from tools and surfaces.
Isopropyl alcohol (rubbing alcohol) works well for small areas and light cleanup tasks. The higher the percentage (91% is better than 70%), the more effective it will be at dissolving epoxy.
For very light cleanup or sensitive surfaces, try these approaches:
- Warm, soapy water for fresh spills
- Freezing small drips and then peeling them off
- Commercial products like “Goo Gone” for tiny spots
Always clean up epoxy before it cures completely for best results!
Effective Cleaning Techniques
Cleaning up epoxy resin doesn’t have to be difficult if you know the right methods. With proper solvents and timing, you can keep your tools in great shape for future projects.
Best Practices for Brushes and Rollers
Brushes and rollers are expensive tools you’ll want to reuse. Don’t wait until the epoxy hardens completely! As soon as you finish your project, wipe excess resin off your brushes and rollers with paper towels.
For cleaning, denatured alcohol works wonders. Pour some into a container and soak your brushes for 5-10 minutes. Then gently work the bristles with your fingers to remove stubborn resin.
For tougher residue, try acetone. It’s stronger but may damage some brush types, so test it first. You can also use a clean brush dipped in acetone to scrub resin from your tools.
Between cleanings, spritz your brushes with denatured alcohol and wipe them dry. Repeat until all sticky residue is gone. Hang brushes to dry with bristles pointing down.
Tips for Epoxy-Soiled Pots and Pans
Mixing containers need special attention. For plastic cups, consider them disposable if you’re a casual crafter. But for reusable pots, act quickly before the resin cures!
Wipe out as much excess resin as possible with paper towels. Then try these methods:
- Soap and warm water – Works well for fresh resin
- Resin remover – Commercial products designed specifically for epoxy cleanup
- Denatured alcohol – Apply with paper towels and wipe thoroughly
- Acetone – For stubborn residue (use in well-ventilated area)
For silicone mixing containers, the good news is epoxy doesn’t stick well to silicone. Flex the container once resin has cured, and the epoxy should pop right out!
Never pour leftover resin down drains. Let it harden and dispose of it properly according to local regulations.
Selecting the Best Epoxy Products
Choosing the right epoxy product can make cleanup much easier later. The type of epoxy you select affects not just your project results but also how simple it will be to handle spills and messes.
Top Epoxy for DIY
When working on DIY projects, look for epoxies labeled as “low VOC” or “low odor.” These are easier to clean up and safer to use in home environments. Some brands offer water-based epoxies that clean up with just soap and water while still wet.
For tabletops and crafts, consider crystal-clear epoxies with UV resistance to prevent yellowing. These typically come with better self-leveling properties, reducing drips and spills.
Easy-cleanup brands to consider:
- ArtResin – wipes clean with isopropyl alcohol
- TotalBoat – known for low odor and simple cleanup
- ProMarine – offers longer working time, giving you more cleanup flexibility
Always check the manufacturer’s recommendations for cleanup solvents before you start your project.
Epoxy Gel and Dual Syringe Applications
Epoxy gel is fantastic for vertical surfaces or filling gaps. It’s thicker and doesn’t run as much, making it cleaner to work with from the start. The less runny consistency means fewer drips to clean up later.
Dual syringe applicators are perfect for small fixes and repairs. These pre-measured systems mix the exact amount of resin and hardener, reducing waste and mess. They’re ideal for quick jobs where setting up mixing cups would create unnecessary cleanup.
When using dual syringes:
- Work on a protected surface
- Keep isopropyl alcohol (91%) nearby for immediate cleanup
- Wipe the tip after each use to prevent clogging
The precision of these applicators helps you apply epoxy exactly where needed, minimizing overflow and resulting in less cleanup work.
Maintenance and Longevity of Epoxy Projects
Taking care of your epoxy projects helps them stay beautiful for years. With proper maintenance, your epoxy creations can retain their shine and durability even with regular use.
Water Resistance and Care
Epoxy resin is naturally water resistant, making it perfect for DIY projects in kitchens, bathrooms, and outdoor areas. This water-resistant quality doesn’t mean your projects are maintenance-free, though!
Protect your epoxy from extended water exposure when possible. While it can handle moisture, standing water left for long periods might eventually affect the finish.
For items like epoxy countertops or tables, quickly wipe up spills to prevent potential staining. Some colored liquids like wine or coffee can leave marks if left too long.
To maintain the water-resistant properties, avoid using abrasive scrubbers that might scratch the surface. These scratches can become entry points for moisture over time.
Regular Cleaning for Epoxy Coated Surfaces
Clean your epoxy surfaces weekly with warm water and mild soap. This simple routine keeps dirt from building up and maintains that gorgeous shine.
For stubborn spots, a glass cleaner works wonderfully without damaging the epoxy. Spray it on and gently wipe with a soft cloth.
Avoid harsh chemicals like ammonia, vinegar, or bleach in your cleaning routine. These can dull the finish and reduce the lifespan of your epoxy projects.
For daily clean-up, a microfiber cloth is your best friend. It removes dust without scratching and keeps your epoxy looking fresh between deeper cleanings.
Using coasters and trivets protects your epoxy surfaces from hot items and potential stains. This small habit greatly extends the life of your DIY epoxy projects.
Troubleshooting Common Epoxy Issues
Working with epoxy can sometimes lead to unexpected challenges. Here are solutions to common problems you might face with epoxy on different surfaces.
Tackling Epoxy-Based Tile Adhesive
Removing hardened epoxy tile adhesive can be tricky but not impossible. Start by softening the adhesive with heat using a heat gun on low setting. Move it constantly to avoid damaging the tile.
Once softened, use a plastic scraper to gently lift the adhesive. Be careful not to scratch your tiles! For stubborn spots, try a commercial epoxy remover specifically designed for tile.
Apply the remover according to package directions, usually letting it sit for 15-30 minutes. The adhesive should bubble up, making it easier to scrape away.
For final cleanup, wipe the area with isopropyl alcohol on a clean cloth. This removes any remaining residue and prepares the surface for new adhesive if needed.
Safely Removing Epoxy Paint from Skin
Got epoxy paint on your skin? Don’t panic! First, try washing with warm soapy water and a soft brush while the epoxy is still wet. This works best within the first few minutes.
For partially cured epoxy, use vinegar or citrus-based cleaners. Apply to the affected area, wait a few minutes, then gently scrub with a soft cloth.
If that doesn’t work, try isopropyl alcohol or acetone (nail polish remover). Apply with a cotton ball, let it work for a minute, then wipe away. Be sure to moisturize after, as these solutions can dry your skin.
Never use harsh chemicals like paint thinners directly on skin. If epoxy doesn’t come off with these methods, it will eventually wear off naturally in a few days.