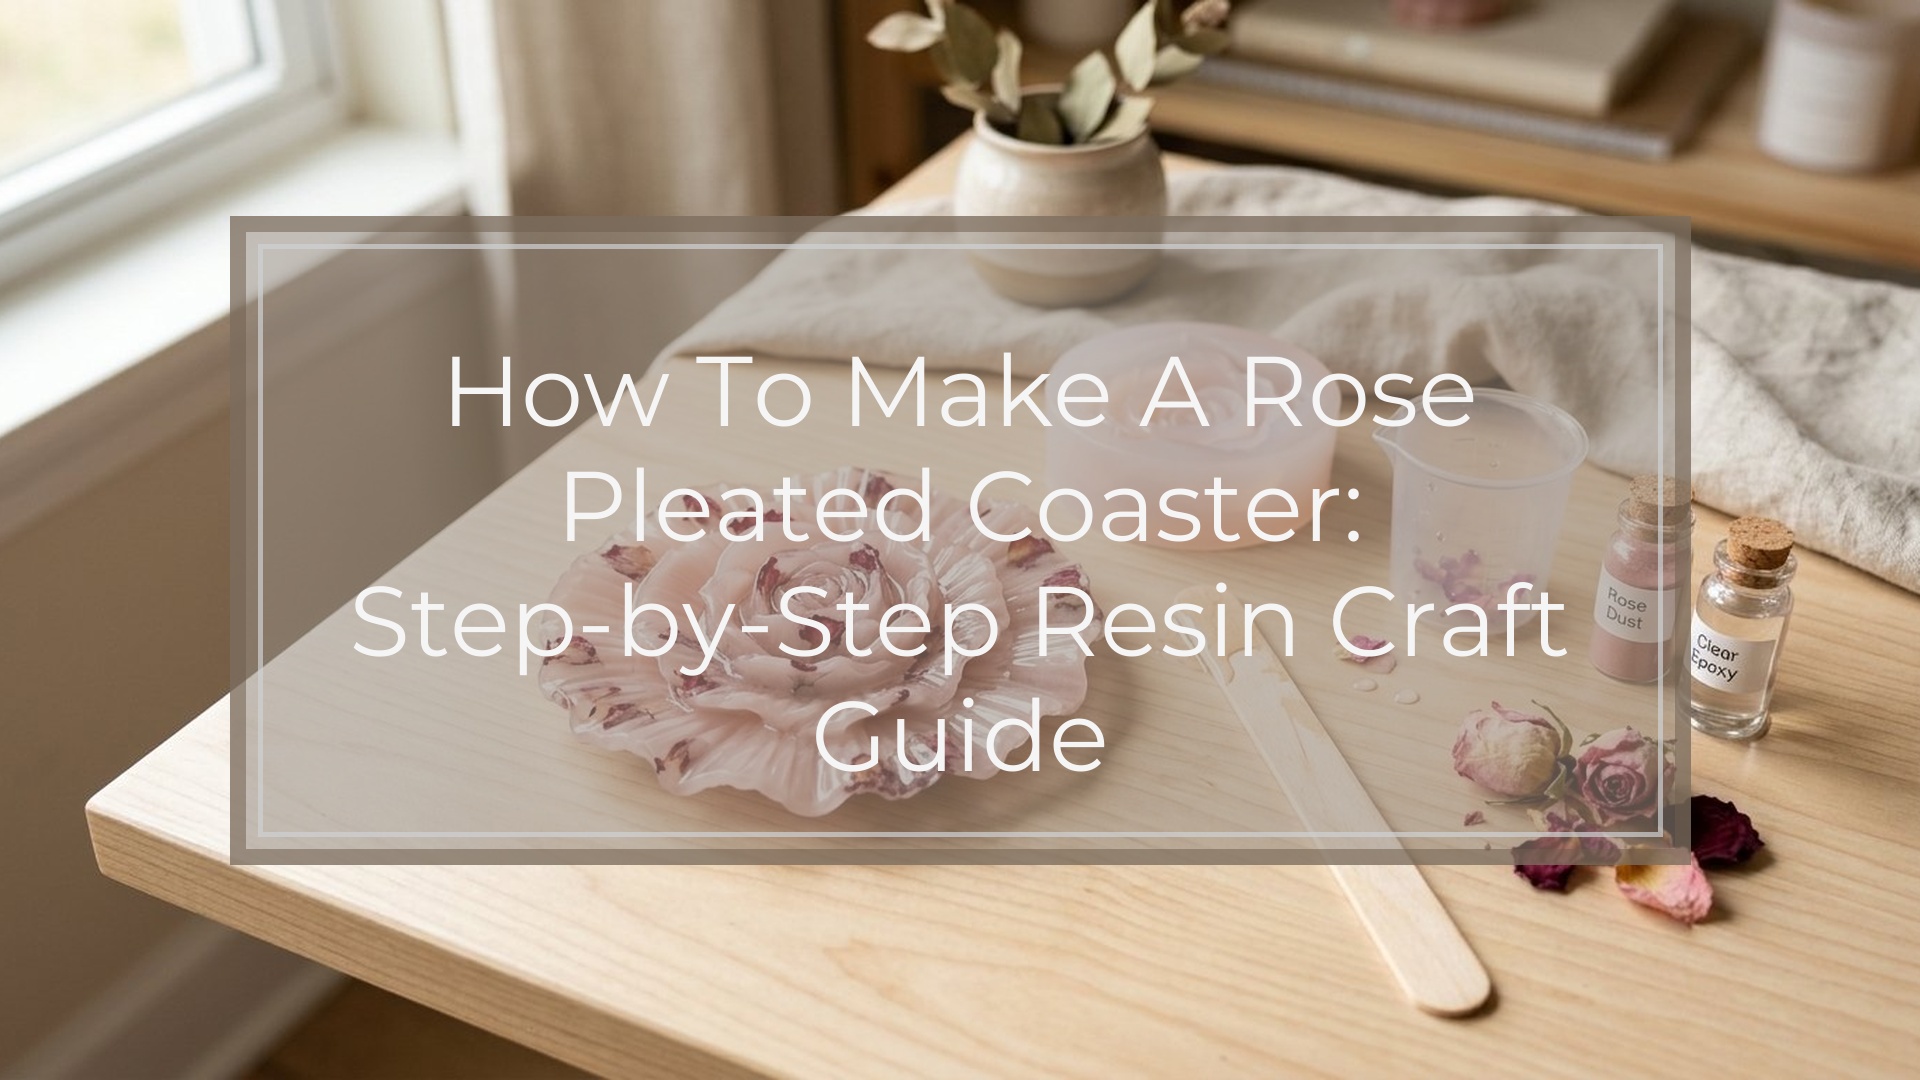
A rose pleated resin coaster is made by pouring tinted resin in a shallow round mold, then using a shaping tool to drag soft pleats from the outer edge toward the center in a spiral or petal pattern. The key is timing: the resin must be fluid enough to move, but thick enough to hold the folds. If you prep your mold, mix small color batches, work in layers, and shape before the resin fully levels out, you can create a coaster with a soft flower-like texture that cures glossy and durable. The process is beginner-friendly if you control heat, avoid overmixing colors, and let the piece cure on a perfectly level surface.
What You Need Before You Start
Gather everything before you mix resin, because once resin is combined, your working time starts immediately.
You will need:
- Coaster mold: a round silicone mold works best for a rose pleated look
- Casting epoxy resin made for molds or coasters
- Resin hardener matched to the resin brand
- Mixing cups with measurement marks
- Stir sticks
- Disposable gloves
- Respirator or mask rated for resin fumes if your product requires it
- Silicone mat or protected work surface
- Pigments: mica powder, resin dye, or alcohol ink compatible with epoxy
- Pleating tool: silicone detail tool, toothpick, skewer, palette knife, or fine ball stylus
- Heat gun or butane torch for surface bubbles
- Level or flat checked surface
- Dust cover such as a box or plastic bin
- Optional: glitter, gold flakes, pearl powder, or a clear topcoat layer
Your workspace should be clean, dry, level, and between the temperature range recommended by your resin maker, usually around 70 to 75°F. Cold rooms thicken resin too fast and trap bubbles. Hot rooms shorten working time.
Before starting, wash and dry the mold, then remove lint with tape. Moisture, dust, and oily fingerprints can ruin the finish. Also read the resin label for its mix ratio, pot life, and cure time. Do not guess the ratio. Bad measurements are one of the fastest ways to end up with a sticky coaster.
Step 1
1. Prep the Mold and Plan the Flower Pattern
Set the mold on a level surface and decide how you want the rose pleats to look before mixing. A simple design starts with one center point and outward pleats that curve slightly, like unfurling petals. If you want a more dramatic rose effect, plan to use two or three related colors instead of many contrasting ones.
Lightly warm the resin bottles in lukewarm water for a few minutes if the room is cool. This can help reduce bubbles, but keep water out of the resin containers.
2. Measure and Mix the Resin Carefully
Measure enough resin for one coaster plus a little extra for dragging and edge coverage. For a standard coaster mold, that is often a small batch, but follow your mold size and resin depth. Pour resin and hardener into a cup exactly as directed by the manufacturer.
Stir slowly for the full recommended time, scraping the sides and bottom. Then divide the mixed resin into smaller cups for your colors. Tint each cup with a small amount of pigment. Start light; you can always add more color, but too much pigment can affect curing.
A good beginner palette is:
- one main rose color
- one lighter highlight color
- one clear or pearl-tinted batch
3. Pour the Base and Add the Colors
Pour a thin clear or lightly tinted base into the mold first. This gives the coaster a clean background and helps the pleats glide. Next, pour your main color in loose rings, curved bands, or petal-like blobs. Add the lighter color between them and leave some clear space if you want more definition.
Do not fill the mold to the very top yet. You need room to move the resin without flooding the pattern. Pass a heat gun quickly over the surface to pop bubbles, but keep it moving. Too much heat at this stage can over-thin the resin and make your design spread flat before you shape it.
Step 2
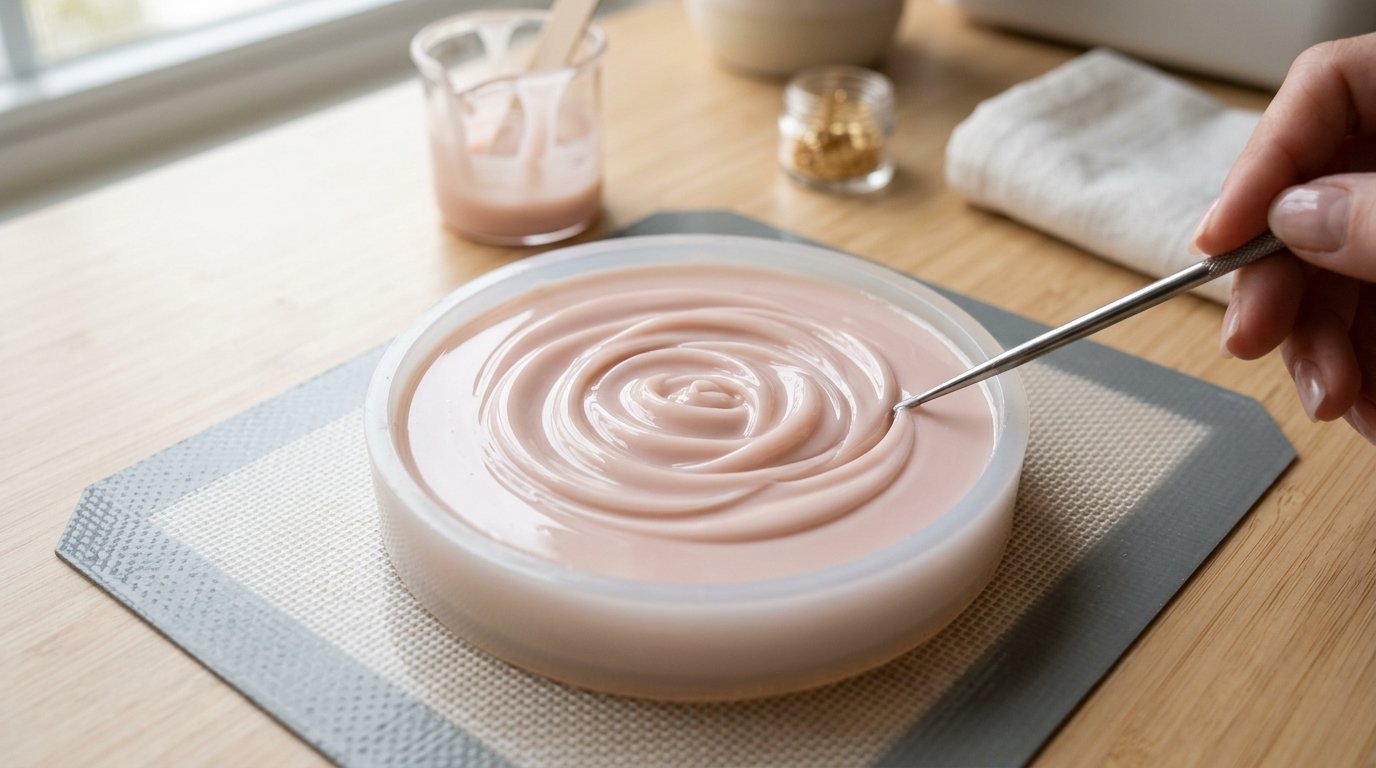
4. Wait for the Right Consistency, Then Create the Pleats
This is the step that makes the coaster look like a rose. Let the resin sit briefly if it is very thin. Depending on your brand and room temperature, that may be a few minutes. You want the surface to be fluid but slightly thicker than water.
Place the tip of your tool near the outer edge and drag inward toward the center in one smooth pull. Lift, rotate the mold slightly, and repeat. Keep the lines close together so they resemble layered petals. For a softer rose, curve each drag slightly in the same direction to build a spiral effect.
Alternate between longer and shorter drags. Longer drags create outer petals; shorter ones build the center. Wipe your tool often so muddy color does not transfer across the coaster.
Caution: do not overwork the resin. Too many passes will blur the lines, mix the colors into brownish streaks, and flatten the pleated texture.
5. Refine the Center and Edges
Once the overall flower shape appears, tighten the center. Use the tip of the tool to make small curved pulls that resemble a rosebud. Then inspect the edge of the mold. If there are bare spots, add a little resin and draw it gently into the design rather than dumping extra color on top.
If you want embellishments, add them now with restraint. A dusting of pearl powder or a few metallic flakes near the outer petals can look elegant. Too much glitter hides the pleating.
6. Remove Bubbles and Protect the Coaster
Use a heat gun or torch very briefly over the top to release any bubbles raised by dragging. One or two quick passes are enough. Lingering heat can cause the pleats to relax and spread.
Cover the mold immediately with a dust cover. Resin attracts lint, pet hair, and floating dust while it cures. Leave the mold undisturbed on a level surface.
7. Let It Cure Fully, Then Demold and Finish
Follow the full cure time on your resin label, not just the touch-dry time. Many coasters can be demolded in about 12 to 24 hours, but full hardness often takes longer. When the piece feels firm, peel the silicone mold away slowly instead of bending the coaster sharply.
Check the edges. If there are slight drips or flashing, trim them with a craft knife after partial cure or sand them after full cure, depending on the resin hardness. For extra gloss, you can add a very thin clear topcoat, but only after the first layer has cured properly.
How to Check the Result
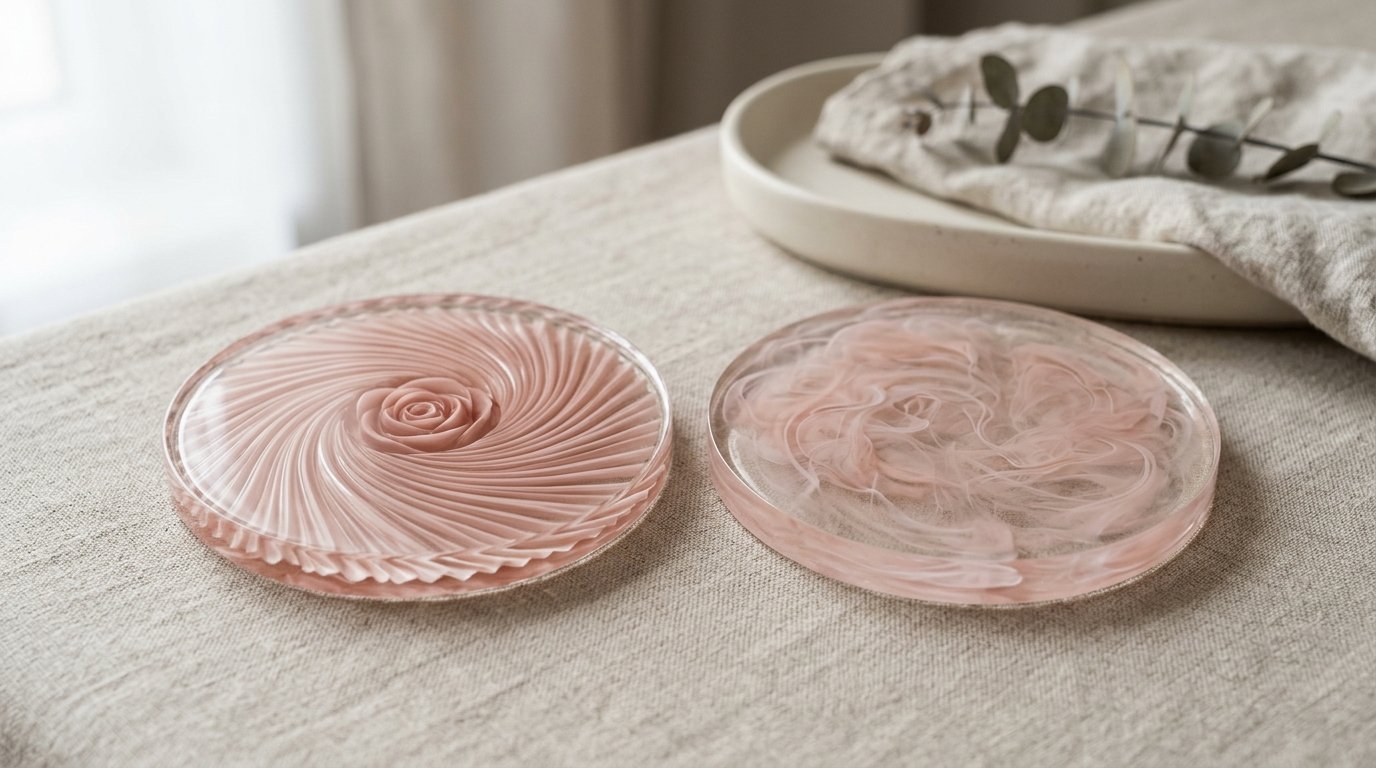
A successful rose pleated resin coaster should have a clear flower-like structure, not random swirls. Look for visible pleat lines that travel inward and a center that reads like a rosebud or layered petals. The pattern does not need to be perfectly symmetrical, but it should feel intentional.
Check these points:
- Surface gloss: the top should look smooth and shiny, without tacky spots
- Color separation: the shades should stay distinct enough to show petal depth
- Pleat definition: dragged lines should still be visible after curing
- Flatness: the coaster should sit evenly on the table without rocking
- Bubble control: a few tiny bubbles may be acceptable, but large craters are not
- Edge quality: the rim should be clean, not heavily warped or overflowing
If the coaster cured but the flower effect looks weak, the resin was likely too thin when you dragged it or you used too much heat afterward. If the colors turned muddy, you probably overmixed with the tool or chose too many strong pigments. If the coaster stays sticky, the mix ratio or mixing time was likely off.
When the pattern is readable, the coaster is hard all the way through, and the bottom sits flat, your rose pleated coaster is ready to use or gift.
FAQ
What Resin Works Best for a Rose Pleated Coaster?
A casting epoxy or coaster resin with a moderate working time works best. You need enough open time to pour colors and drag pleats, but not such a thin formula that the pattern immediately levels out. Always choose a resin made for molds or decorative surfaces.
Can Beginners Make a Rose Pleated Resin Coaster?
Yes. Beginners can make one successfully if they keep the design simple, use only two or three colors, and work in a clean level space. The biggest beginner wins come from accurate measuring, slow mixing, and shaping the resin before it gets too runny or too thick.
How Do I Keep the Colors from Blending Into Mud?
Use fewer colors, pick shades that belong together, and avoid repeated dragging through the same area. Wipe your tool often and stop once the pleats are visible. A clear or pearl base also helps separate colors so the pattern stays cleaner and more defined.
When Should I Use the Tool to Make the Pleats?
Use the tool after pouring the colors, when the resin is still movable but not ultra-thin. If you drag too early, the lines melt away. If you wait too long, the resin resists movement and leaves rough tracks instead of soft pleats.
How Long Does a Resin Coaster Take to Cure?
It depends on the brand, room temperature, and pour depth. Many resin coasters can be demolded within 12 to 24 hours, but full cure may take 48 to 72 hours or longer. For best durability, wait for the full cure before stacking, wrapping, or regular use.