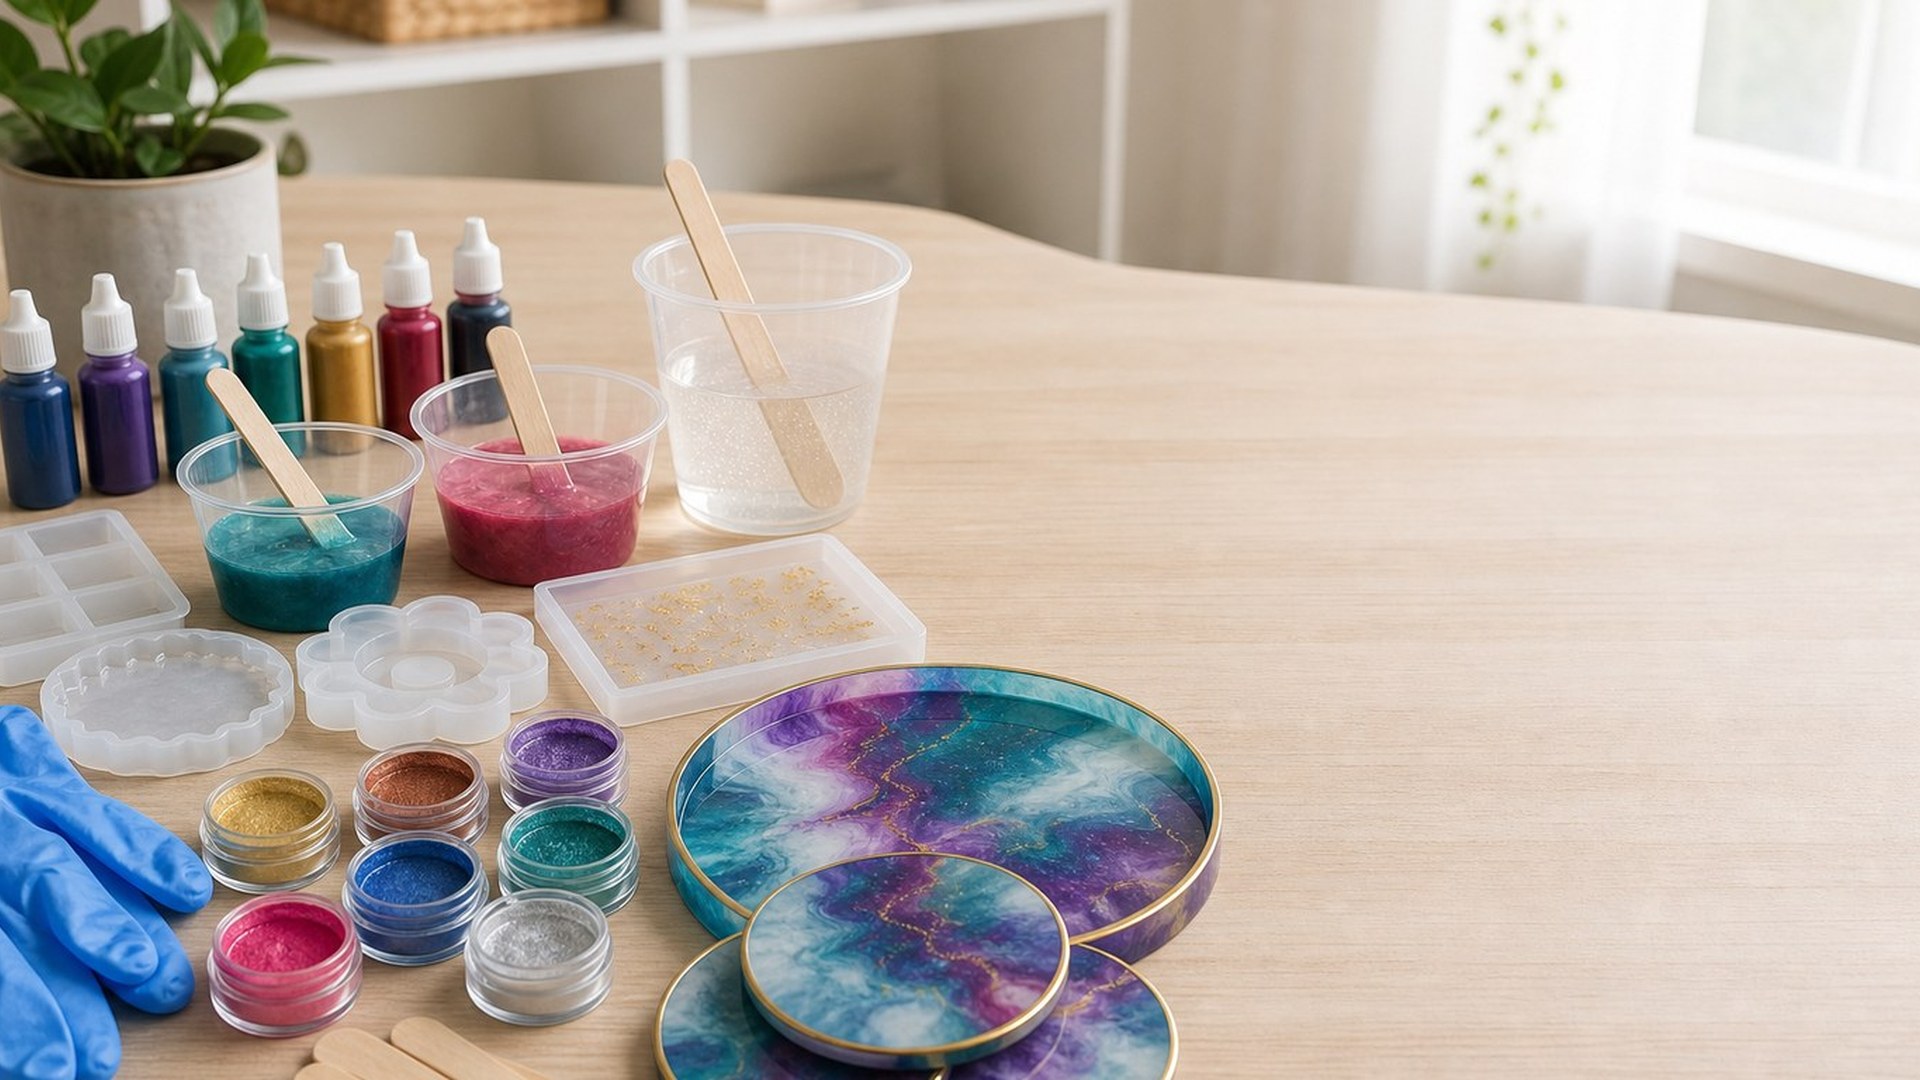
The easiest way to make colorful beginner epoxy projects is to mix your resin correctly first, divide it into small cups, then tint each cup with a tiny amount of mica powder or liquid pigment before pouring. Mica powder gives resin a pearly, shimmery, metallic look. Liquid pigment gives smoother, more solid color and is useful when you want bold or translucent tones.
For best results, use resin-safe pigments, add color slowly, and avoid overloading the resin. Too much pigment can cause sticky, soft, or poorly cured projects. Start with simple molds such as coasters, keychains, bookmarks, or small trays. Keep your design simple, work within the resin’s pot life, remove bubbles gently, and let the piece cure fully before demolding.
What You’ll Make in This Beginner Epoxy Pigment Tutorial
This guide walks you through a simple colorful epoxy project using a silicone mold, mica powder pigments, and liquid pigments. The goal is not advanced resin art or complicated ocean effects. You will learn how to prepare, color, pour, cure, and check a beginner-friendly resin piece.
Use this process for small projects such as coasters, charms, bookmarks, pendants, magnets, or sample tiles. Once you understand the basics, you can experiment with more colors and layered designs.
Prerequisites: Supplies, Workspace, and Safety Basics
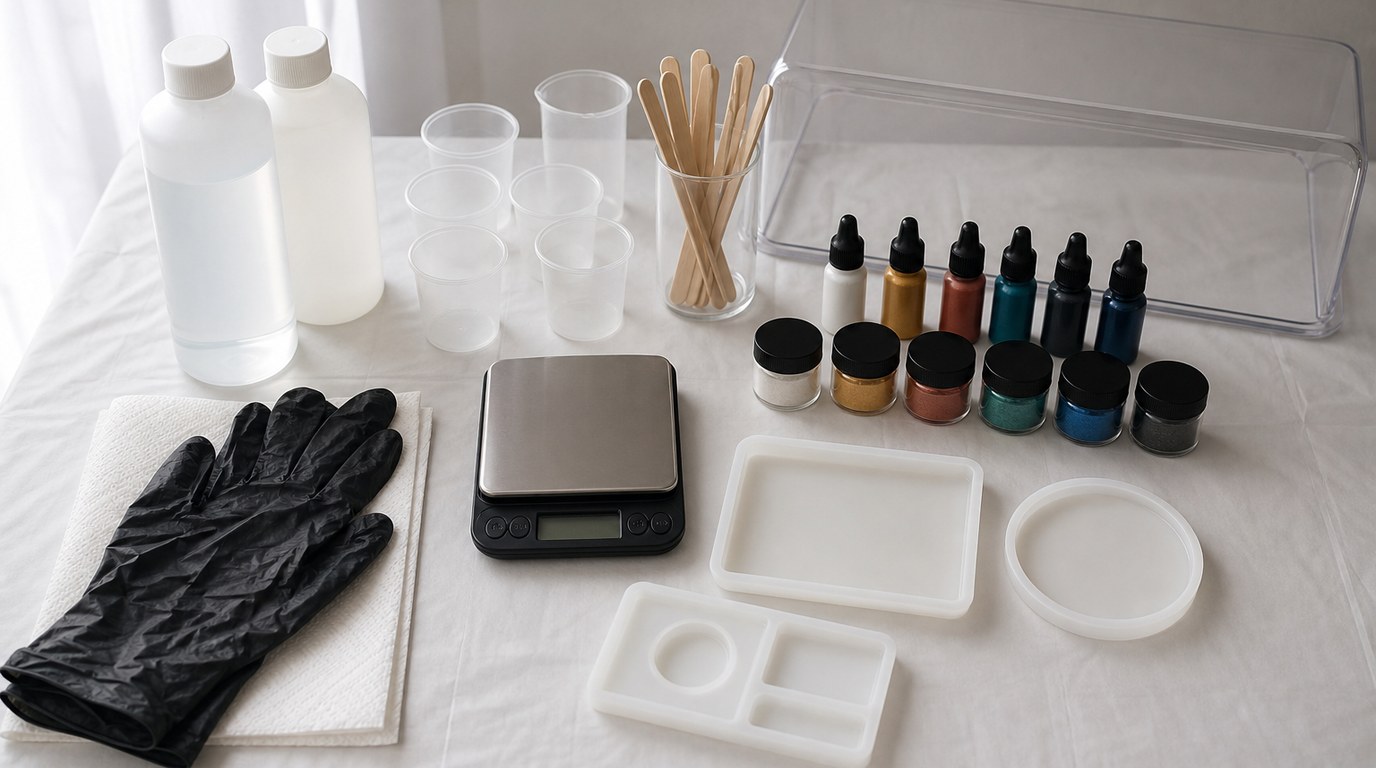
Before opening your resin, gather everything. You need two-part epoxy resin, resin-safe mica powder, resin-safe liquid pigments, silicone molds, mixing cups, stir sticks, disposable gloves, paper towels, a covered work surface, and a dust cover for curing. A small digital scale or marked measuring cups may be needed depending on your resin instructions.
Work in a well-ventilated area and follow the safety directions on your resin label. Wear gloves, avoid skin contact, and do not use kitchen tools you plan to reuse for food. Keep resin away from children and pets.
Set your mold on a level surface before pouring. Resin can run, drip, and self-level, so protect the table and keep the project still while curing.
Choose the Right Pigment for the Look You Want
Choose mica powder when you want shimmer, pearl, metallic swirls, or depth. Mica particles reflect light, so the color may look different depending on the angle. It is excellent for galaxy colors, marble effects, faux stone, and shiny coaster designs.
Choose liquid pigment when you want a smoother color with fewer visible particles. It can create transparent tints or stronger opaque color, depending on the product and amount used.
You can use both in one project. For example, make a solid blue base with liquid pigment, then swirl in silver mica for sparkle.
Step 1: Plan Your Color Design Before Mixing Resin
Plan your colors before combining resin and hardener. Once epoxy is mixed, the working time starts, and rushing often leads to bubbles, spills, or muddy colors.
Choose two or three colors for your first project. Decide which color will be the base, which will be the accent, and whether you want clear resin between them. Place pigments, cups, sticks, and the mold within reach. If you are trying a swirl, sketch the pour order quickly so you are not deciding mid-pour.
Step 2: Measure and Mix the Epoxy Resin Correctly
Read your resin instructions and measure the resin and hardener exactly as directed. Some epoxies are measured by volume, while others are measured by weight. Do not guess the ratio. Incorrect measuring is one of the most common reasons resin stays sticky or soft.
Pour both parts into a clean mixing cup. Stir slowly, scraping the sides and bottom, until the mixture looks consistent. Avoid whipping the resin, which adds extra bubbles. If your brand recommends a second-cup mix, pour the mixed resin into a fresh cup and stir again. This helps prevent unmixed streaks.
Step 3: Divide Resin Into Smaller Cups for Coloring
After the main batch is fully mixed, divide it into smaller cups for each color. This makes pigment control easier and keeps colors cleaner.
For a beginner project, use one larger cup for the main color and one or two smaller cups for accents. Leave some resin clear if you want translucent areas or softer color movement. Labeling is not necessary, but arrange the cups in pour order so you do not accidentally add the wrong color first.
Step 4: Add Mica Powder Pigment the Beginner-friendly Way
Add mica powder gradually. Start with a tiny scoop on the end of a stir stick, then mix it fully into one resin cup. Scrape the sides and bottom so no dry powder clumps remain.
Check the color by lifting the stir stick and letting resin drip back into the cup. If the shimmer is too weak, add a little more. Avoid dumping in a large amount at once. Too much mica can make resin thick, grainy, or harder to cure properly.
For swirls, mix mica thoroughly first, then pour gently. Do not rely on unmixed powder to create the effect.
Step 5: Add Liquid Pigment Without Overdoing It
Liquid pigments are concentrated, so start with one small drop or the smallest amount your product recommends. Stir slowly until the color is even. If you want a deeper shade, add another tiny amount and mix again.
The main warning with liquid pigment is overload. Too much added liquid can interfere with the resin chemistry, causing bendy, tacky, or uncured pieces. Always follow the pigment manufacturer’s maximum-use guidance when available.
If you are unsure, make a small test piece first. It is better to create a lighter successful project than a dark project that never cures.
Step 6: Pour the Colored Resin Into the Mold
Pour slowly into the lowest part of the mold and let the resin spread. For coasters or flat molds, start with your base color, then add accents in small streams or dots. Use a toothpick or stir stick to gently move the colors.
Do not overmix inside the mold. A few light passes can create pretty swirls; too much stirring turns the colors muddy. Leave a little space at the top of the mold if your resin domes or if you plan to add another layer later.
Check that the mold is still level before curing.
Step 7: Remove Bubbles and Let the Project Cure
Let the poured resin sit for a few minutes so bubbles rise. Pop surface bubbles with a toothpick, a gentle pass of warm air, or the method recommended by your resin brand. Be cautious with heat. Too much heat can damage molds, scorch resin, or create more bubbles.
Cover the project with a dust cover and leave it undisturbed. Follow the cure time on your resin instructions. Many pieces feel firm before they are fully cured, but demolding early can bend edges, leave fingerprints, or dull the surface.
Result Check: How to Know Your Colorful Epoxy Project Turned Out Right
Your project turned out well if it cures firm, releases cleanly from the mold, and has no sticky patches. The color should look evenly mixed where you wanted solid color, and swirled or separated where you planned that effect.
Small bubbles are normal for a first project, but there should not be large cloudy foam pockets. The surface should be smooth, not oily or soft. If the piece bends slightly right after demolding, let it cure longer on a flat surface before judging the result.
Common Beginner Mistakes and How to Fix Them Next Time
If the resin stays sticky, the most likely causes are incorrect resin ratio, poor mixing, or too much pigment. Next time, measure carefully, scrape the cup while stirring, and use less colorant.
If the colors look muddy, you probably stirred too much after pouring or chose too many similar colors. Limit the palette and make fewer swirl passes.
If you see many bubbles, stir more slowly and let the resin rest briefly before pouring. Warm the resin bottles slightly if your product allows it.
If the piece bends or warps, it may have been demolded early. Wait the full cure time and keep the mold level.
Easy Beginner Project Ideas Using Mica and Liquid Pigments
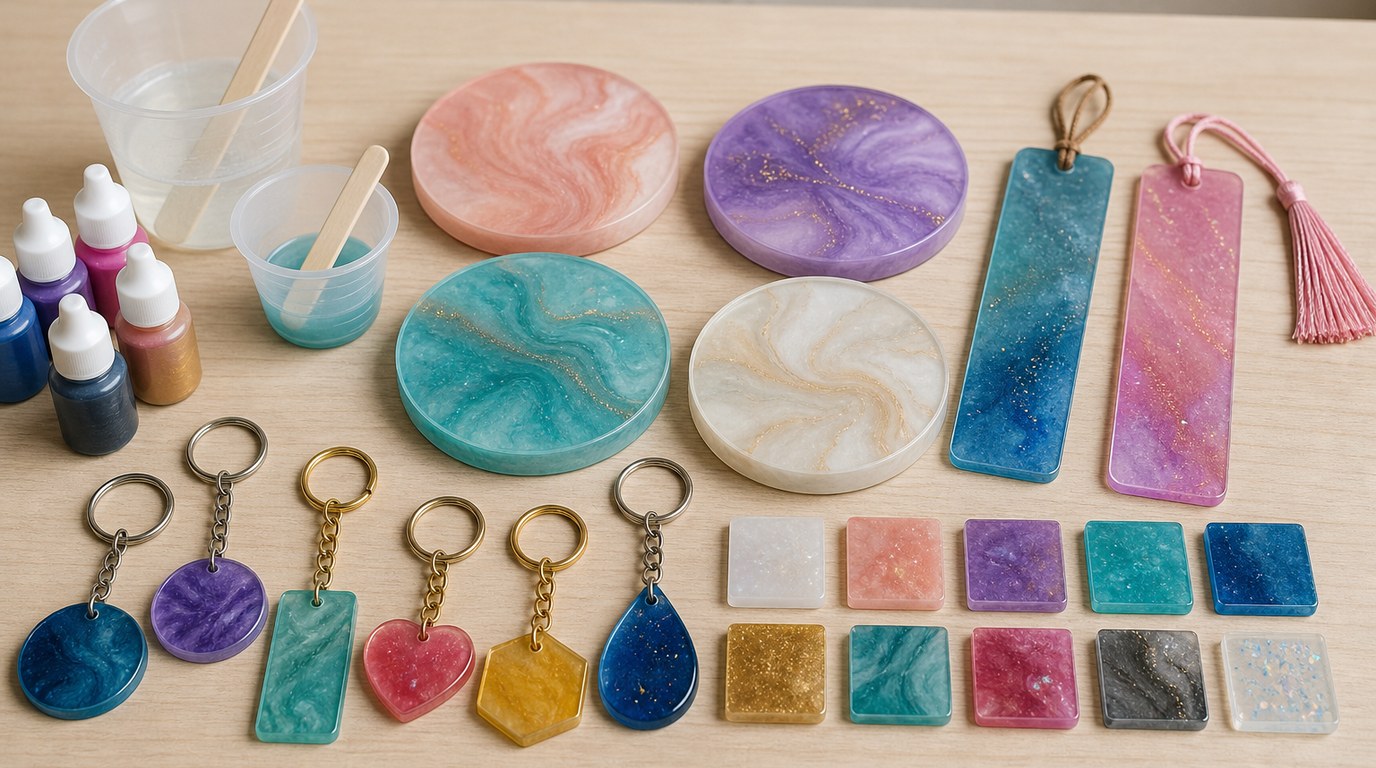
Start with small, flat projects because they use less resin and are easier to control. Coasters are great for testing mica swirls. Keychains and charms are good for bold liquid pigment colors. Bookmarks work well with transparent tints and a little mica sparkle.
You can also make sample color tiles before a larger project. Pour small amounts of tinted resin into a basic mold and label the pigment used. This helps you learn how each color cures before using it in a gift or finished piece.
FAQ
What Is the First Step Someone Should Take with Easy Diy Beginners Guide to Colorful Epoxy Projects Using Mica Powder Pigments and Liquid Pigments?
The first step is to choose a simple mold and plan your colors before mixing resin. Pick two or three pigments, prepare your cups and tools, and read the resin ratio instructions. Good setup matters because epoxy has a limited working time once mixed.
What Can Go Wrong When Following Easy Diy Beginners Guide to Colorful Epoxy Projects Using Mica Powder Pigments and Liquid Pigments Advice?
Common problems include sticky resin, muddy colors, excess bubbles, and soft finished pieces. These usually come from incorrect measuring, incomplete mixing, adding too much pigment, stirring too aggressively, or demolding too early. Most issues improve with smaller batches and more careful pigment dosing.
How Long Does It Usually Take to Work Through Easy Diy Beginners Guide to Colorful Epoxy Projects Using Mica Powder Pigments and Liquid Pigments?
The hands-on time for a small beginner project is usually 20 to 45 minutes, depending on the design. Curing takes much longer. Always follow your epoxy’s label, because cure time can range from several hours to a day or more before safe demolding.
How Can a Beginner Tell Whether Easy Diy Beginners Guide to Colorful Epoxy Projects Using Mica Powder Pigments and Liquid Pigments Worked?
It worked if the resin cures firm, the surface is smooth, and the color looks intentional. Mica should appear shimmery rather than clumpy, and liquid pigment should look evenly mixed. The piece should not feel sticky, oily, rubbery, or leave residue on your gloves.