Epoxy for wood is a two-part resin system used to coat surfaces, fill cracks, cast decorative sections, or bond pieces together. When mixed correctly, the resin and hardener cure into a hard, durable material that can protect wood, add depth, stabilize damaged areas, or create clear and colored design effects.
The most important step is choosing the right type of epoxy for the job. A thin coating epoxy is different from a deep-pour casting epoxy, and a quick adhesive epoxy is different from both. Good results also depend on dry, clean wood, accurate measuring, thorough mixing, and proper curing conditions.
What Epoxy Does for Wood
Epoxy is not one single product with one single purpose. It is a resin-and-hardener system that changes from liquid to solid through a chemical cure. On wood, that cured epoxy can serve several roles.
As a coating, epoxy creates a glossy, protective surface over tabletops, counters, art panels, and small craft pieces. As a filler, it can level cracks, knots, voids, and damaged areas. As a casting material, it can fill larger spaces, such as river table channels or deep inlays. As an adhesive, it can bond wood to wood or wood to other materials.
Think of epoxy as a material you choose by thickness, cure time, and depth. The right formula depends less on “wood” in general and more on what you need the epoxy to do.
Best Uses for Epoxy on Wood
Epoxy is especially useful when you want a strong, clear, or decorative finish that ordinary wood filler or varnish cannot provide. Common uses include sealing tabletops, filling knots, repairing cracks, making river tables, creating resin inlays, and adding a glass-like topcoat to wood art.
For tabletops and counters, coating epoxy can add shine and help protect against everyday wear. For live-edge slabs, casting epoxy can fill natural voids while preserving the shape and character of the wood. For cracks and knots, tinted epoxy can turn flaws into design details instead of hiding them.
Epoxy also works well when you want to combine wood with pigments, metallic powders, dried natural elements, or small embedded objects. However, it should be used with intention. It is not always the easiest or cheapest finish, and it requires more careful measuring and curing than many traditional wood finishes.
Types of Epoxy for Wood Projects
Choosing the wrong epoxy is one of the fastest ways to ruin a wood project. The main categories are coating epoxy, casting or deep-pour epoxy, penetrating epoxy, and epoxy adhesive.
Coating epoxy is made for thin layers. It self-levels, cures hard, and is often used on tabletops, bar tops, and art panels. Casting or deep-pour epoxy is designed for thicker pours, so it releases heat more slowly and reduces the risk of cracking, yellowing, or excessive bubbles in deep spaces.
Penetrating epoxy is thin and soaks into soft or damaged wood to help stabilize it. Epoxy adhesive is usually thicker and used for bonding rather than decorative pouring.
| Project goal | Best epoxy type | Why it fits |
|---|---|---|
| Glossy tabletop | Coating epoxy | Levels well in thin coats |
| River table | Deep-pour epoxy | Handles thicker pours |
| Rot or soft wood stabilization | Penetrating epoxy | Soaks into weak fibers |
| Joining parts | Epoxy adhesive | Strong gap-filling bond |
| Small cracks or inlays | Coating or casting epoxy | Depends on depth |
Always check the manufacturer’s maximum pour depth before buying.
How to Prepare Wood Before Applying Epoxy
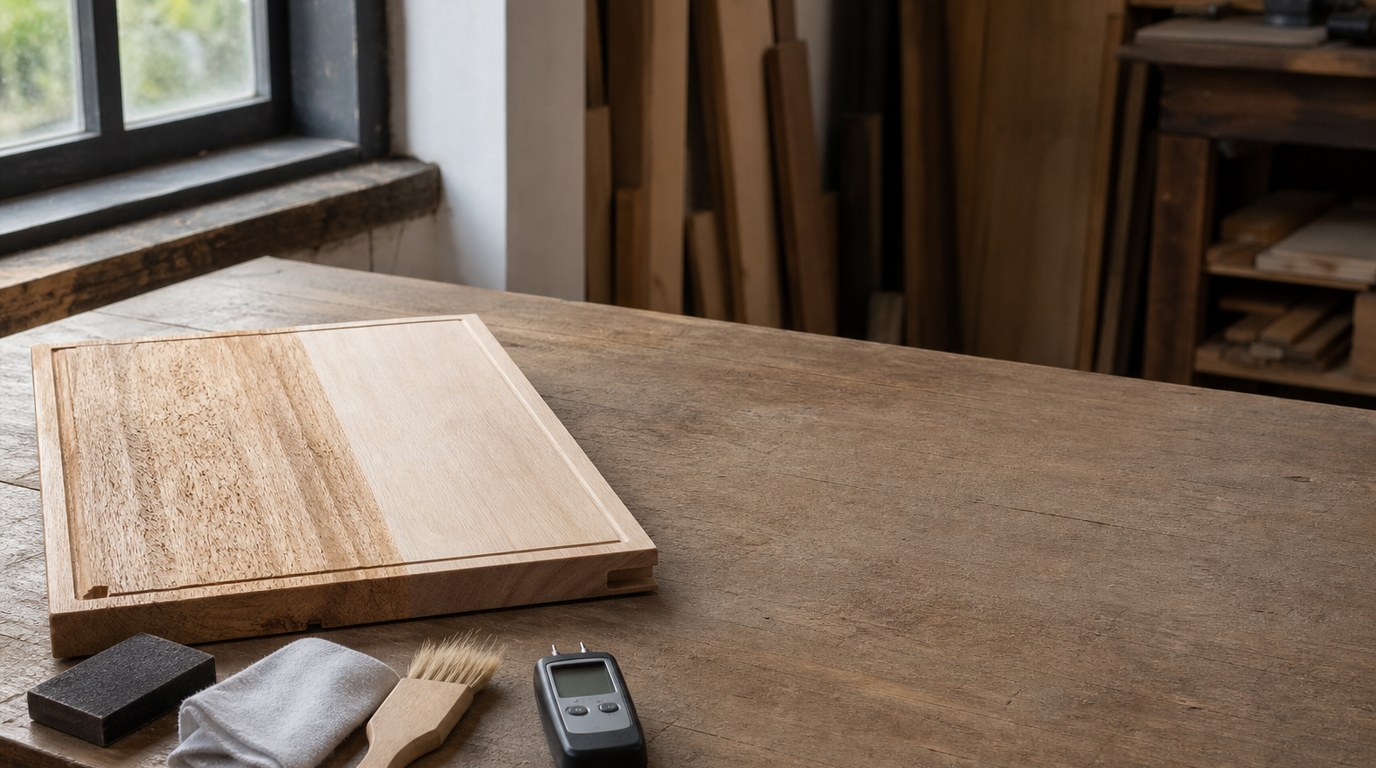
Good epoxy work starts before the resin is opened. Wood should be dry, clean, and stable. Moisture in wood can cause cloudiness, poor bonding, bubbles, or curing problems, so avoid applying epoxy to damp or freshly washed wood.
Sand the surface to remove loose fibers, old finish, dirt, and uneven spots. For coatings, a smooth but not overly polished surface helps epoxy bond. Remove all sanding dust with a vacuum, tack cloth, or lint-free cloth. Avoid oily rags or cleaners that leave residue.
Seal obvious leaks before pouring into cracks, knots, or river table forms. Epoxy can escape through tiny gaps, so use tape, caulk, or a properly sealed mold when needed. If the wood is very porous, a thin seal coat can help reduce air bubbles before the main pour.
Work in a clean, ventilated space, wear gloves, and follow the product’s safety instructions for temperature, mixing ratio, and cure time.
Basic Steps to Apply Epoxy to Wood
Start by reading the instructions for your specific epoxy. General epoxy advice is helpful, but the product’s mix ratio, working time, pour depth, and cure schedule always come first.
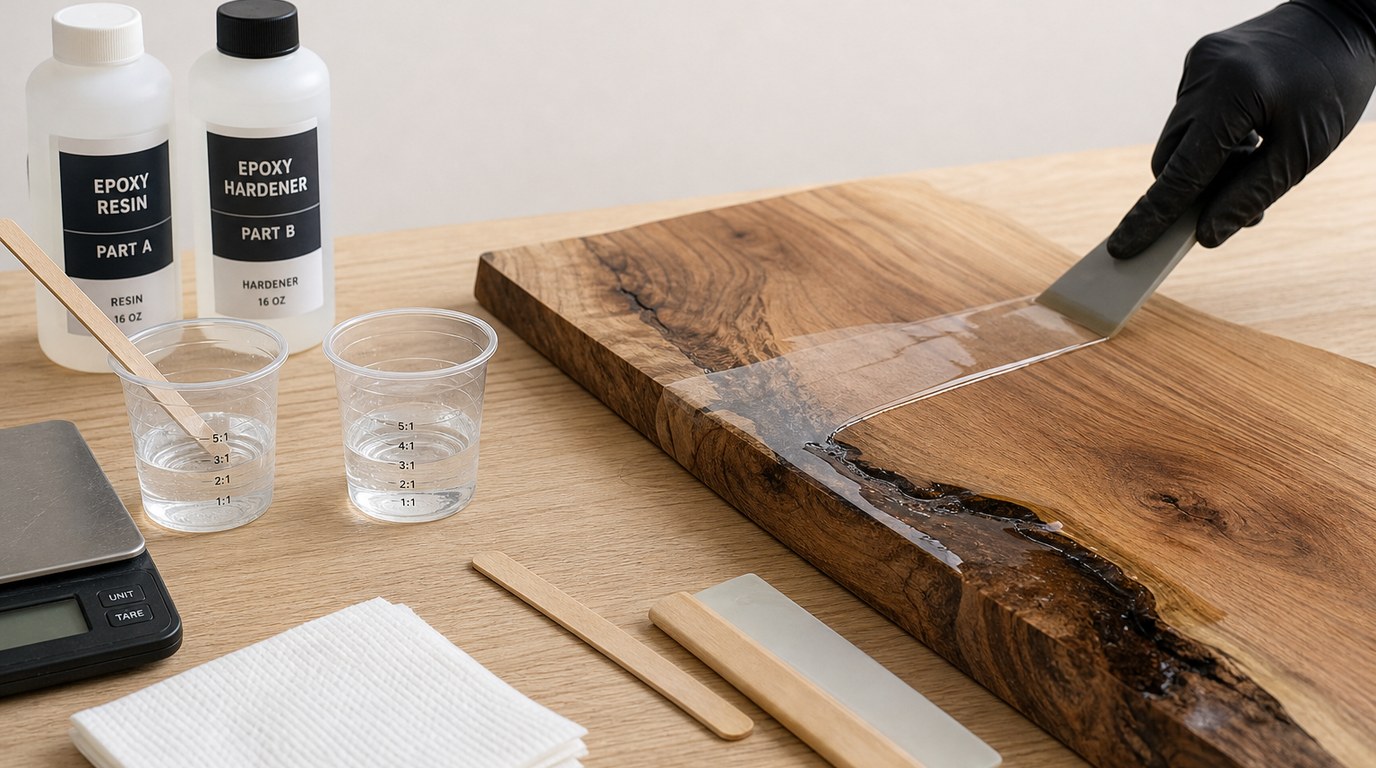
- Measure accurately. Use the resin-to-hardener ratio listed by the manufacturer. Guessing or “close enough” measuring can leave sticky or soft spots.
- Mix thoroughly. Scrape the sides and bottom of the mixing cup as you stir. Many failures come from unmixed resin clinging to the container. For better consistency, some makers pour the mixture into a second clean cup and stir again.
- Apply a seal coat if needed. On porous wood, brush or spread a thin layer first. This helps lock down air in the grain and reduces bubbles in the final coat or pour.
- Pour or spread the epoxy. For a coating, pour onto the surface and spread with a plastic spreader, foam brush, or gloved hand. For cracks or voids, pour slowly and allow the epoxy to settle.
- Remove bubbles. Use a heat gun or torch lightly and briefly, if the product allows it. Too much heat can scorch wood or damage the cure.
- Let it cure undisturbed. Keep dust, hair, and insects away while the epoxy cures. Do not sand or handle it aggressively until it has reached the recommended cure stage.
For multiple layers, follow the recoat window. Some epoxies allow the next layer while the surface is still slightly tacky; others require sanding after full cure.
Common Problems When Using Epoxy on Wood
Bubbles are one of the most common problems. They often come from porous wood releasing trapped air. A seal coat, slower pouring, and proper temperature control help prevent them.
Sticky or soft epoxy usually means the mix ratio was wrong, the resin was not mixed thoroughly, or the temperature was too low for proper curing. Always measure carefully and mix longer than feels necessary.
Leaks happen when cracks, knots, or molds are not sealed well. Test forms before pouring and seal the underside of slabs if epoxy can escape.
Cloudiness can come from moisture, cold conditions, or incompatible additives. Keep wood dry and use pigments designed for epoxy.
Uneven surfaces may occur if the project is not level. Check your work surface before pouring, not after the epoxy starts flowing to one side.
When Epoxy Is Not the Best Choice
Epoxy is not ideal for every wood project. If you want a natural, repairable finish, oil, wax, shellac, lacquer, or polyurethane may be simpler. Epoxy can scratch, yellow with UV exposure unless protected, and feel more plastic than traditional finishes.
It is also not the best shortcut for unstable wood. If a board is moving, wet, rotten beyond repair, or structurally weak, epoxy may hide the issue without truly solving it. Use epoxy when its strength, clarity, or filling ability fits the project.
FAQ
What Should a Beginner Know First About Epoxy for Wood?
A beginner should know that epoxy for wood is a two-part system, not a ready-to-use finish. Resin and hardener must be measured and mixed correctly. Also, choose the epoxy by project type: coating, filling, casting, stabilizing, or bonding.
What Matters Most When Evaluating Epoxy for Wood?
The most important factors are pour depth, working time, cure time, clarity, UV resistance, hardness, and intended use. Match those details to your project before buying. A tabletop coating epoxy and a deep-pour river table epoxy are not interchangeable.
What Mistakes Should Readers Avoid with Epoxy for Wood?
Avoid using damp or dusty wood, guessing the mix ratio, under-mixing, pouring too deep, and ignoring temperature requirements. Also avoid assuming bubbles can all be fixed later. Most epoxy problems are easier to prevent during preparation than repair after curing.
What Is the Next Logical Step After Learning About Epoxy for Wood?
Choose one specific project, then select an epoxy made for that application. Read the product instructions fully, prepare a small test piece, and practice measuring, mixing, and curing before using epoxy on an important tabletop, slab, inlay, or repair.