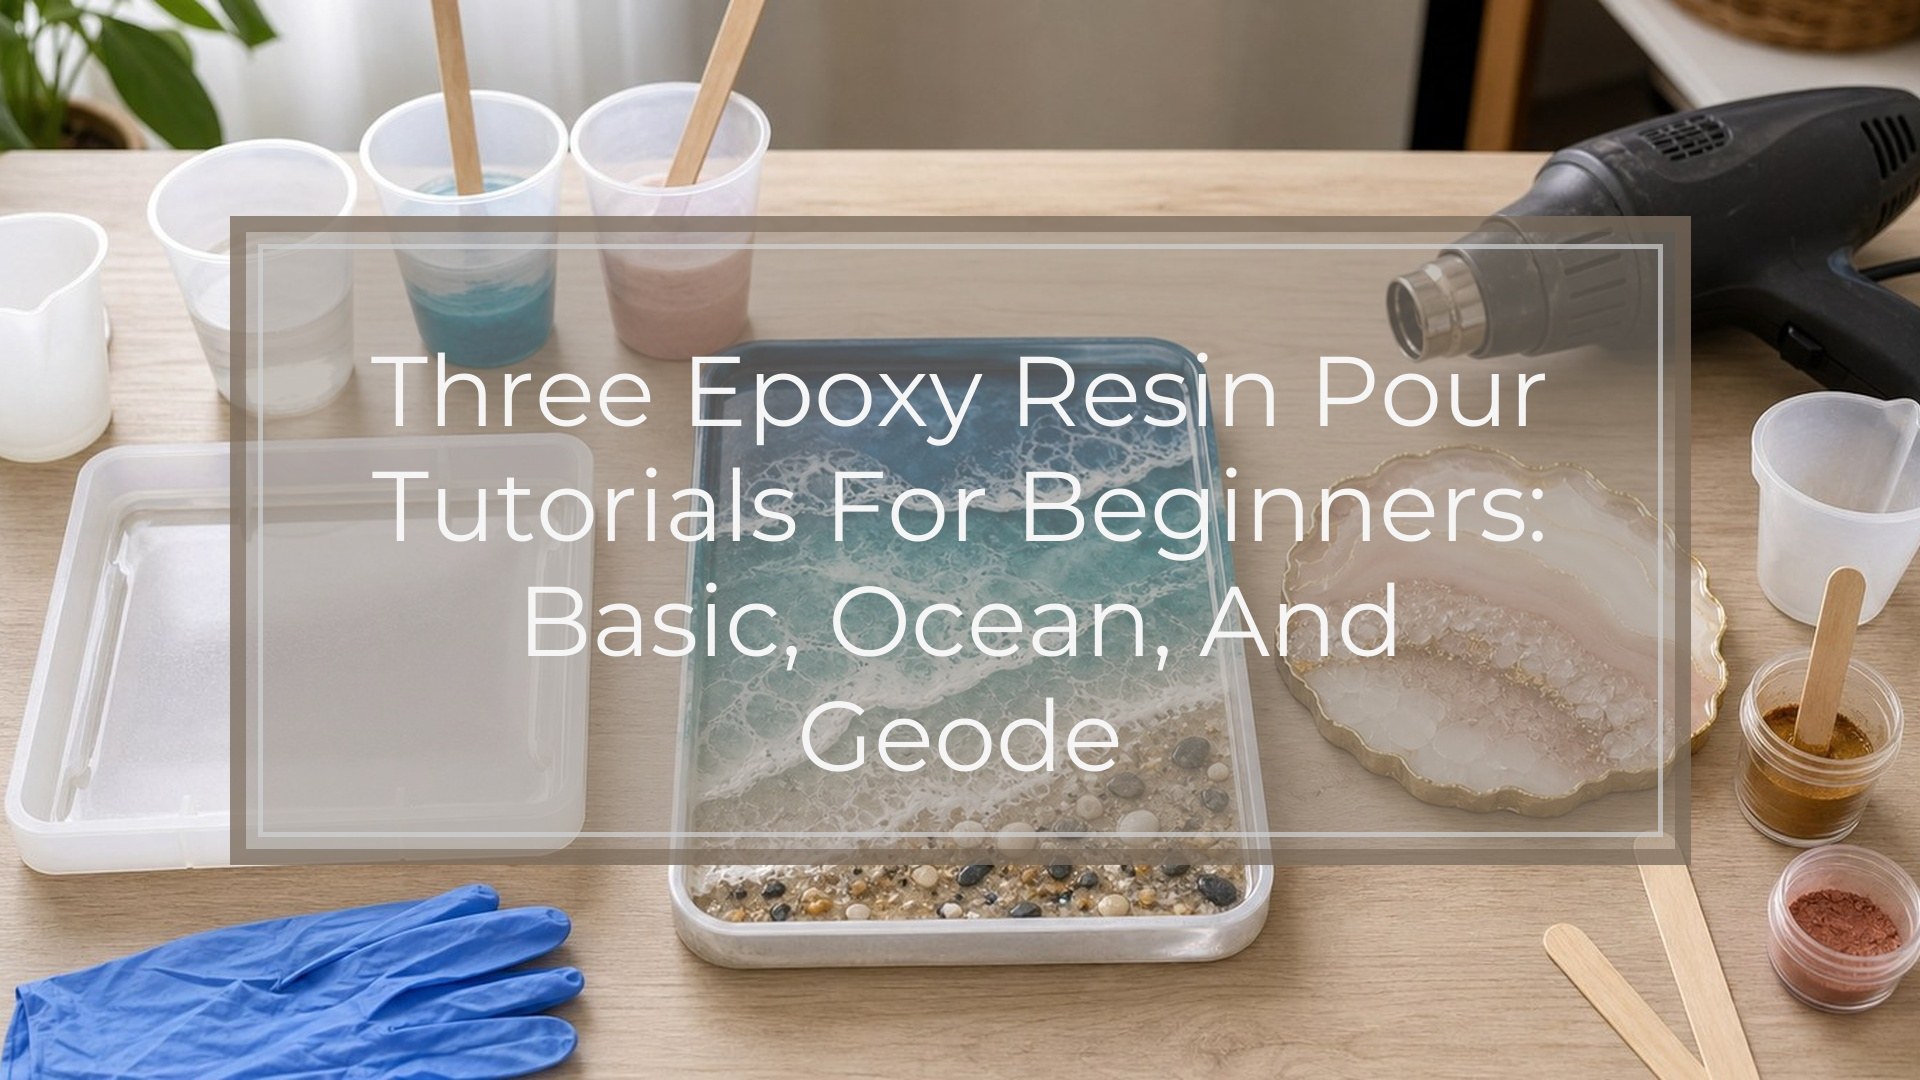
Epoxy resin pouring is easier to learn when you start with small, controlled projects. These three epoxy resin pour tutorials walk you through a basic two-color marble pour, an ocean wave pour, and a layered glitter geode-style pour. Each one uses beginner-friendly techniques, but they build in difficulty so you can practice mixing, coloring, pouring, removing bubbles, and judging cure time with confidence. Start with coasters, a small tray, or a practice panel before moving on to larger pieces.
Before You Start: Resin Pour Prerequisites
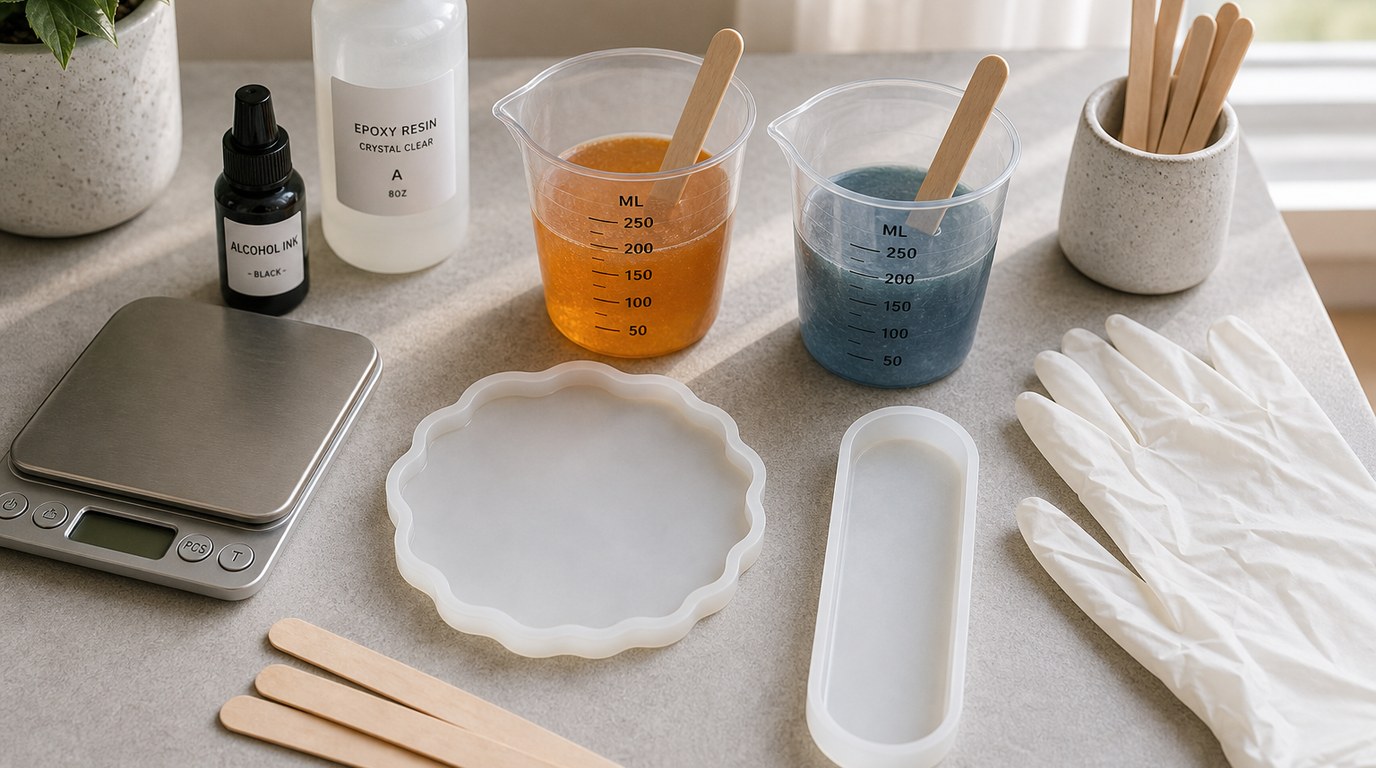
Before opening your resin bottles, set up a safe, clean workspace. Wear nitrile gloves, protect your table with a silicone mat or plastic sheet, and work in a well-ventilated area according to your resin manufacturer’s safety directions.
You will need:
- Two-part epoxy resin and hardener
- Measuring cups, mixing sticks, and small pour cups
- Silicone molds, a small tray mold, or a sealed art panel
- Resin pigments, mica powder, alcohol ink, glitter, or metallic paint
- A heat gun, torch, or toothpick for bubbles
- A dust cover, such as a clean plastic storage bin
Read your resin’s mix ratio and working time before you begin. Some resins use a 1:1 ratio, while others require exact weight or volume measurements. Inaccurate measuring is one of the fastest ways to end up with sticky or soft resin.
Tutorial 1: Basic Two-color Epoxy Resin Pour
This is the best first pour because it teaches measuring, mixing, tinting, and simple movement without too many variables. Use a coaster mold, small tray, or sealed panel.
Steps:
- Measure your resin and hardener. Follow the exact ratio on the label. Mix only enough to cover your mold or panel.
- Stir slowly and thoroughly. Scrape the sides and bottom of the cup for at least the manufacturer’s recommended mixing time. Avoid whipping air into the resin.
- Split the resin into two cups. Tint one cup with a light color and the other with a darker or contrasting color. Add pigment sparingly; too much colorant can affect curing.
- Pour the first color. Fill part of the mold or panel, leaving space for the second color.
- Add the second color. Pour beside, around, or through the first color to create natural marbling.
- Create movement. Drag a toothpick, skewer, or gloved fingertip gently through the colors. Do not overmix, or the colors may become muddy.
- Remove bubbles. Pass a heat gun or torch quickly over the surface, keeping it moving.
- Cover and cure. Protect the piece from dust and leave it undisturbed.
Your result should show soft ribbons, swirls, or cloudy blending. If the colors look flat, use slightly more contrast next time or pour from different heights for more movement.
Tutorial 2: Ocean Wave Epoxy Resin Pour
An ocean wave pour uses transparent blues, sandy tones, and white resin to imitate water washing onto a beach. It works well on a small art panel, tray, or coaster set.
Steps:
- Prepare your surface. If using a wood panel, seal it first so air does not escape into the resin. For a beach look, paint the bottom third tan and the rest pale blue, then let it dry.
- Mix your resin. Divide it into clear, light blue, dark blue, and white cups. Keep the blue portions transparent by using a small amount of pigment.
- Pour the beach area. Add clear resin over the tan section. You can sprinkle a tiny amount of fine sand or gold mica if desired.
- Pour the water. Add light blue near the shore and dark blue farther back. Blend the blues gently with a stir stick.
- Add the wave line. Pour a thin white line where the water meets the beach.
- Push the white resin. Use a heat gun on low to medium airflow to push the white resin across the blue. Work in short bursts so you create lacing instead of blowing resin off the piece.
- Add a second wave if needed. Place another thin white line slightly behind the first and repeat.
- Check the edges. Wipe drips from the underside before the resin thickens.
The key is restraint. Too much white resin creates a solid stripe instead of foam. If your first wave is heavy, leave it alone and adjust your next pour with a thinner line and less heat.
Tutorial 3: Layered Glitter Geode Epoxy Resin Pour
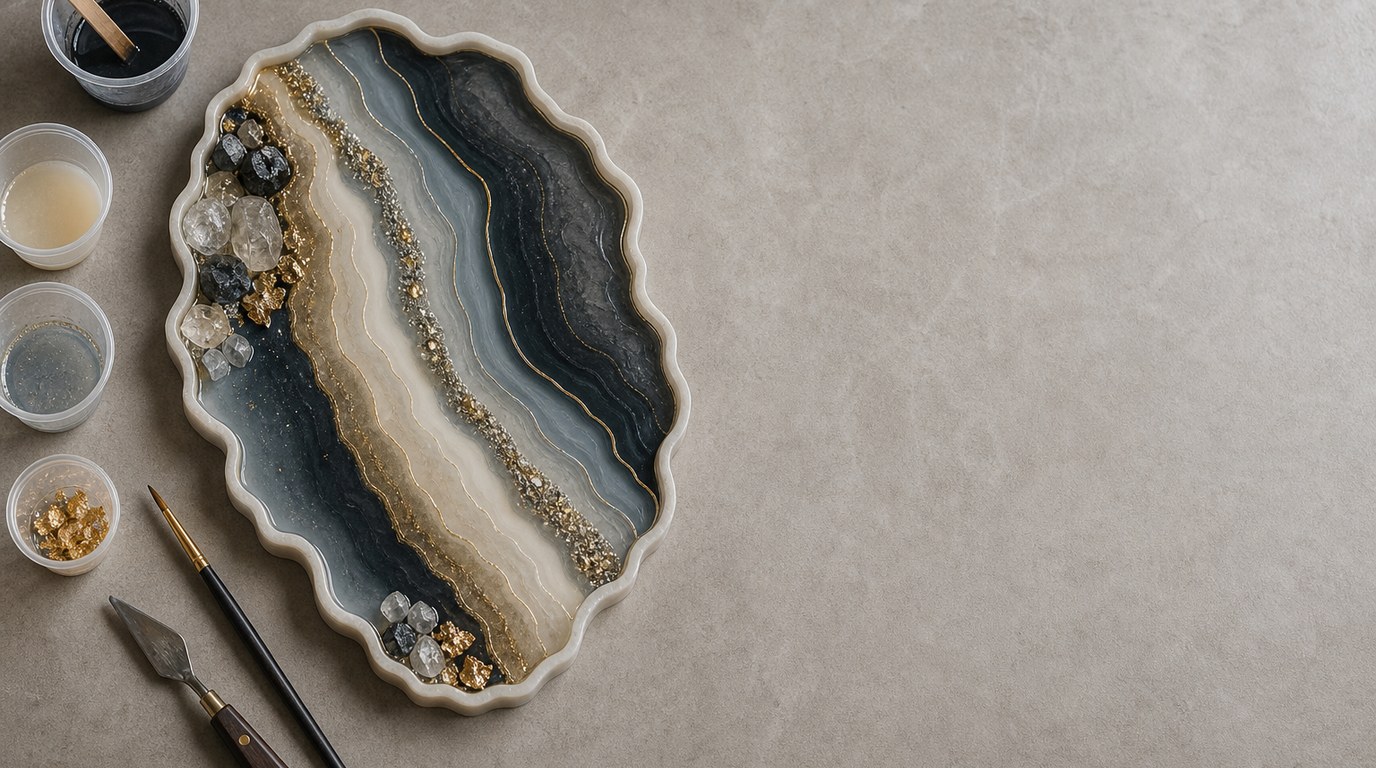
A glitter geode pour is built in layers, giving the piece depth and sparkle. Use a coaster mold, agate-style mold, tray, or small panel with a raised edge.
Steps:
- Plan your design. Choose a center area for “crystal” sparkle, then plan rings of clear, tinted, and metallic resin around it.
- Mix a small clear batch. Pour a thin clear layer first. This helps suspend glitter and adds depth.
- Add glitter to the center. Sprinkle chunky glitter, crushed glass made for resin, or fine mica flakes into the wet resin. Do not pile it higher than the mold allows.
- Mix tinted resin. Create two or three colors that work together, such as amethyst, clear lavender, and smoky gray.
- Pour rings around the glitter. Add each color in irregular bands. Geodes look more natural when the lines are uneven.
- Add metallic accents. Use gold, silver, or copper mica resin in thin lines between color bands. A toothpick gives more control than a large pour cup.
- Let the first layer partially cure if desired. For stronger depth, wait until the layer is firm but slightly tacky, then add a clear top layer.
- Finish with a flood coat. Pour clear resin over the surface to magnify the glitter and smooth the design.
Avoid adding too much glitter to every area. A strong focal point with clear space around it usually looks more polished than a fully packed sparkle surface.
Common Epoxy Resin Pour Mistakes and Fixes
Sticky or soft resin: This usually comes from inaccurate measuring, under-mixing, or adding too much pigment. Scrape your cup thoroughly and follow the exact ratio. If the piece stays sticky after the full cure window, you may need to remove the bad layer and repour.
Too many bubbles: Stir slowly, warm resin bottles in a lukewarm water bath before mixing, and use a quick pass of heat after pouring. Do not overheat molds, especially thin silicone molds.
Colors turned muddy: You may have overworked the design. Pour contrasting colors, move them only a few times, then stop.
Resin leaked from the mold or panel: Check for gaps before pouring. Seal wood, tape panel edges, and place molds on a level surface.
Dust or hair landed in the resin: Remove debris with tweezers while the resin is wet. For cured dust, sand lightly and add a clear top coat.
How to Know Your Resin Pour Is Finished
Your resin pour is ready when it is hard, smooth, and no longer tacky. Check the manufacturer’s cure time, then press a gloved finger lightly on the back or edge. It should not dent. Make sure the surface is clear of soft spots, bubbles are not rising, and the piece releases cleanly from the mold. Wait longer before sanding, packaging, or heavy use.
Which Resin Pour Tutorial Should You Try First?
If you are brand new, start with the basic two-color pour. It teaches the core skills with the least waste. Try the ocean wave pour next if you want to practice movement and heat control. Choose the layered glitter geode pour when you are ready to work in stages and build depth.
FAQ
What Is the Easiest Epoxy Resin Pour for Beginners?
The easiest epoxy resin pour for beginners is a basic two-color pour in a coaster mold. It uses a small amount of resin, needs only simple color mixing, and gives you practice with pouring, bubble removal, and curing without complicated layering.
How Long Does an Epoxy Resin Pour Take to Cure?
Most epoxy resin pours need 24 hours before demolding and up to 72 hours for a fuller cure, but timing depends on the brand, room temperature, humidity, and pour depth. Always follow the cure schedule printed on your resin instructions.
Can I Use Acrylic Paint in Epoxy Resin Pours?
You can use small amounts of acrylic paint in some epoxy resin pours, but it is safer to use resin pigments, mica powders, or colorants made for epoxy. Too much acrylic paint can add moisture and interfere with curing.
Why Did My Resin Pour Stay Sticky?
A sticky resin pour usually means the resin and hardener were measured incorrectly, not mixed long enough, or overloaded with pigment. Cool temperatures can also slow curing. If it remains sticky after the full cure time, the layer may need repair or removal.
Do I Need a Torch or Heat Gun for Resin Pours?
You do not always need one, but a torch or heat gun helps pop bubbles and move resin, especially for ocean waves. Use quick passes and keep the tool moving. For small molds, a toothpick and careful mixing may be enough.