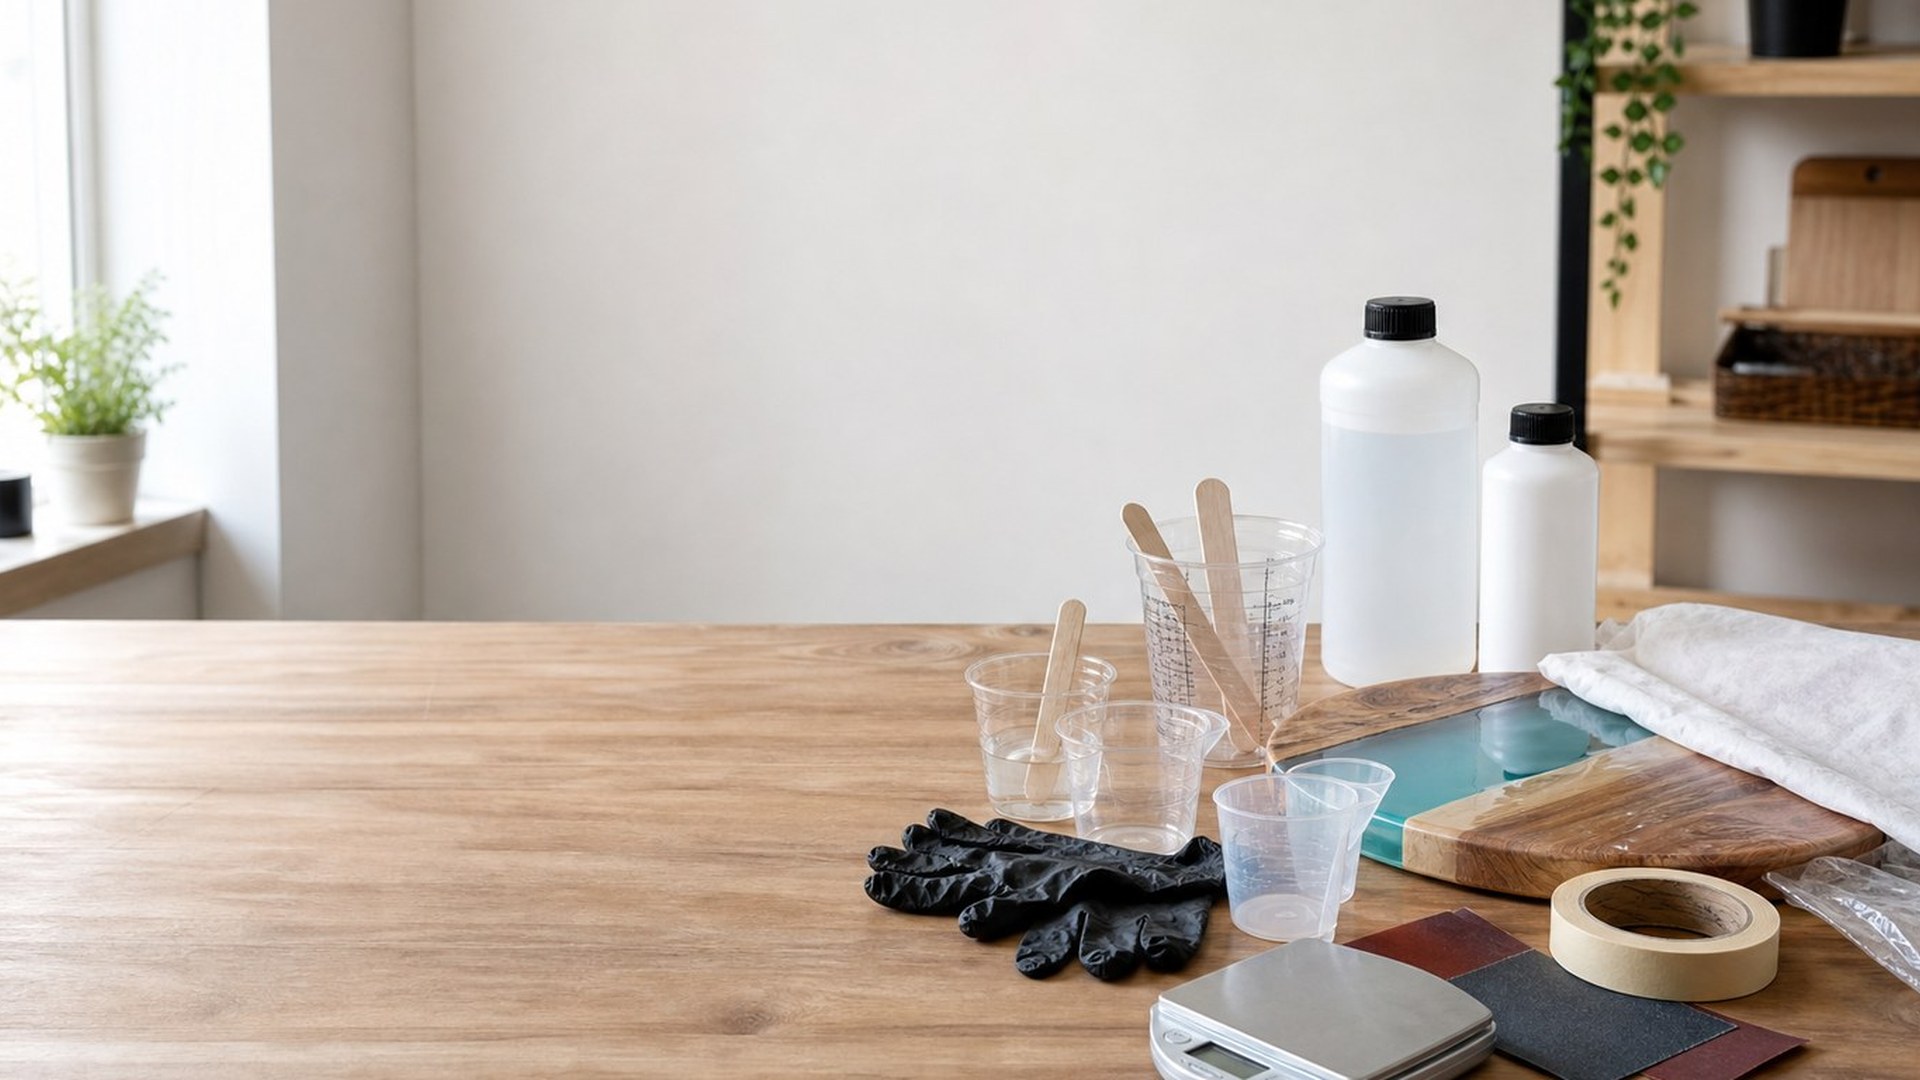
The basic tools for DIY epoxy projects are safety gear, accurate measuring supplies, mixing cups, stir sticks, silicone molds, small pouring tools, bubble-control tools, curing covers, and simple finishing supplies. For resin jewelry and accessories, you do not need a large workshop. You need a clean, level surface and tools that help you measure, mix, pour, cure, and finish resin without rushing.
Start with the essentials: nitrile gloves, eye protection, a respirator if required by your resin’s instructions, disposable or silicone cups, stir sticks, pipettes, toothpicks, molds, a dust cover, and fine sandpaper. Add colorants, inclusions, and polishing tools only after you can mix and cure small batches reliably.
| Tool category | Must-have starter tools | Optional upgrades |
|---|---|---|
| Safety | Nitrile gloves, eye protection, ventilation | Respirator rated for your resin |
| Measuring/mixing | Graduated cups, stir sticks | Digital scale if resin is weight-based |
| Pouring | Pipettes, toothpicks, silicone molds | Needle-tip bottles |
| Bubbles | Toothpicks, warm water bath for bottles | Heat gun, resin bubble remover |
| Curing/finishing | Dust cover, level tray, sandpaper | Polishing compound, mini drill |
Start with the Right Resin Project Setup
Think of epoxy work as five stages: measuring, mixing, pouring, curing, and finishing. Most beginner problems happen when one of those stages is rushed or skipped. Resin that stays sticky is often measured wrong or undermixed. Cloudy or messy pieces may come from dust, trapped bubbles, or overfilled molds.
For small projects like earrings, pendants, keychains, charms, and hair clips, you need a compact setup rather than heavy equipment. Choose a flat table, protect it with a silicone mat or plastic sheet, and keep tools within reach before opening the bottles. Epoxy has a working time, so setup matters as much as the tools themselves.
Safety Tools You Should Have Before Opening Resin
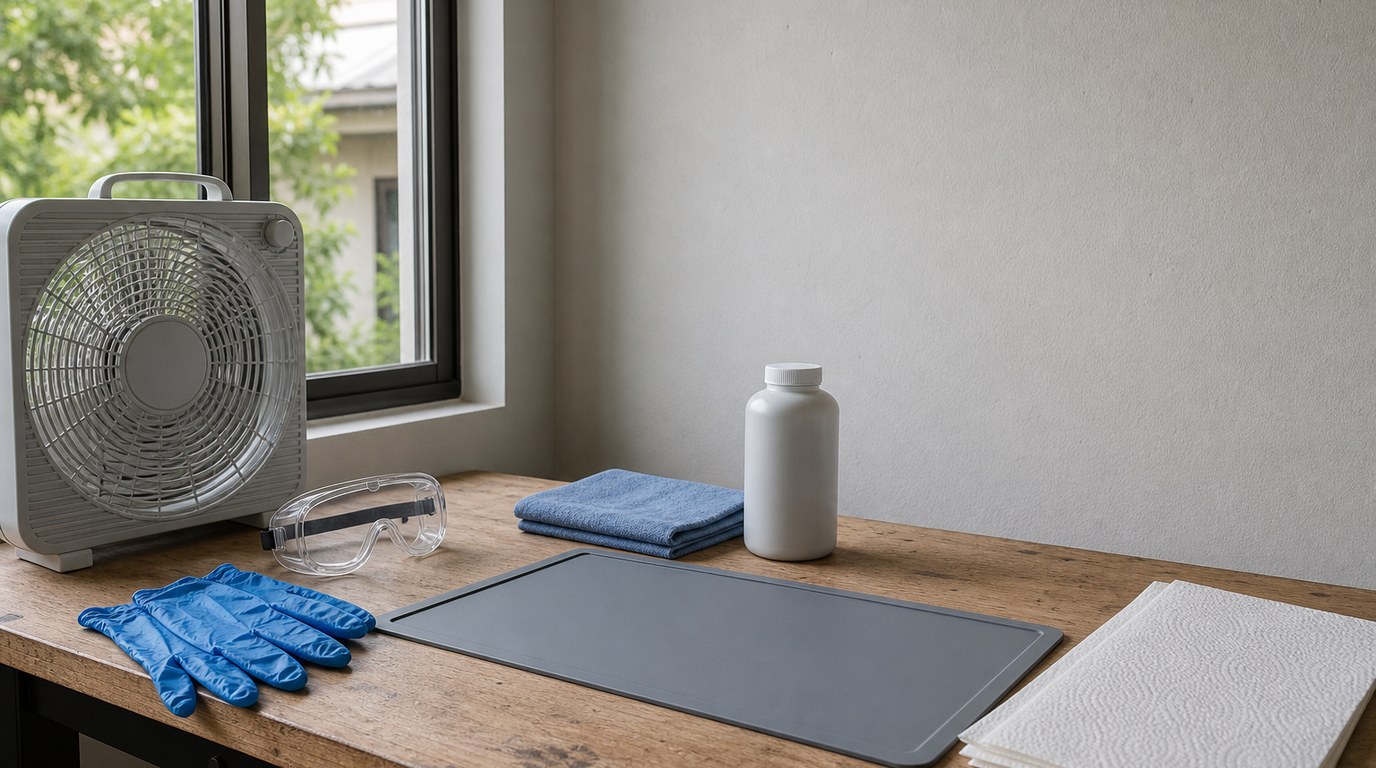
Safety tools are part of the starter kit, not an upgrade. At minimum, use nitrile gloves because epoxy can irritate skin and is difficult to clean off safely. Add safety glasses or goggles to protect your eyes from splashes while mixing or pouring.
Work in a well-ventilated area and follow the resin manufacturer’s safety instructions. Some products may recommend a respirator with appropriate cartridges, especially if ventilation is limited. Do not assume “low odor” means risk-free.
Keep paper towels, a trash bag, and a dedicated cleanup area nearby. Avoid using kitchen cups, food utensils, or surfaces used for food prep. Once a tool touches uncured resin, treat it as a craft-only tool.
Measuring and Mixing Tools
Measuring and mixing tools affect whether epoxy cures correctly. Most beginner resin kits use a specific ratio, such as 1:1 or 2:1 by volume. Use graduated mixing cups if your resin is measured by volume. If your resin instructions say to measure by weight, use a digital scale instead.
Use separate cups for Part A and Part B if needed, then combine them in a clean mixing cup. Stir sticks should have flat sides so you can scrape the bottom and walls of the cup. Undermixed resin often cures with soft spots, streaks, or tackiness.
For tiny jewelry batches, small silicone cups are useful because cured resin can often be peeled out. Disposable medicine cups also work, but they create more waste. Mix slowly, scrape often, and set a timer if your instructions specify a mixing time.
Pouring Tools for Jewelry, Charms, and Small Accessories
Small resin projects need control. A large cup can flood a pendant mold or spill over earring cavities, so use pipettes, droppers, or small spouted cups for detailed pouring. Pipettes are especially helpful for bezels, small charm molds, and narrow channels.
Toothpicks, bamboo skewers, and silicone detail sticks help guide resin into corners. They are also useful for nudging glitter, dried flowers, or tiny decals into position before the resin thickens.
Silicone molds are the easiest option for beginners because cured resin releases cleanly when the mold is flexible and in good condition. For open-back bezels, use strong tape designed for resin work to create a temporary backing and prevent leaks.
Bubble Control Tools
Bubbles are normal in epoxy, especially after mixing. The first bubble-control tool is patience: stir slowly instead of whipping air into the resin. Let the mixed resin sit briefly if your working time allows, then pop surface bubbles with a toothpick.
For small jewelry molds, a heat gun can help remove surface bubbles, but use it carefully. Too much heat can warp molds, push resin out of cavities, or damage inclusions. A lighter or torch is often too aggressive for tiny pieces and should be used only if the resin and mold manufacturer allow it.
A safer beginner option is warming closed resin bottles in warm water before measuring, which can make resin flow more easily. Keep water out of the resin.
Coloring and Embellishment Tools
You only need a few tools to add color and decoration. Use small scoops, toothpicks, or micro spatulas for mica powder, glitter, and pigment paste. For liquid colorants, use droppers so you do not add too much at once.
Start with resin-compatible colorants. Too much pigment can interfere with curing, especially in small molds. Add color gradually and mix fully before deciding you need more.
For embellishments, tweezers are helpful for placing dried flowers, foil flakes, tiny shells, stickers, or charms. Keep decorations dry and clean before embedding them. Moisture can cause cloudiness, bubbles, or poor results.
Curing and Storage Tools
Once resin is poured, it needs protection. A dust cover is one of the simplest and most useful tools for cleaner projects. Use a plastic storage bin, cake carrier, or clear container turned upside down over your pieces.
A level tray helps you move small molds without tilting them. Check the table with a small level if your pieces cure thicker on one side. Store resin bottles upright, tightly closed, and away from heat, sunlight, and children or pets. Label craft-only containers clearly so they never return to food use.
Finishing Tools for a Cleaner Final Piece
Even careful pours may need light finishing. Fine-grit wet/dry sandpaper helps smooth sharp edges, overfilled backs, or small imperfections. Start with a finer grit when possible and sand gently under water if suitable for your piece and materials.
A nail file or sanding stick works well on tiny earrings and charms. For shiny edges, use polishing pads or a resin-safe polishing compound after sanding. If you make pendants, earrings, or keychains, you may also need a small hand drill or pin vise for holes.
Jewelry findings require basic hand tools: flat-nose pliers, round-nose pliers, jump rings, earring hooks, bails, or keychain hardware.
What You Can Skip as a Beginner
You can skip pressure pots, vacuum chambers, large torches, expensive rotary tools, deep-pour equipment, and oversized molds when starting jewelry or small accessories. These tools can be useful later, but they are not necessary for learning basic resin handling.
Also skip huge pigment collections at first. A few mica powders, one white pigment, one black pigment, and simple glitter are enough to practice. Spend your first budget on safety gear, accurate measuring, and reliable molds instead.
Beginner Tool Kit Recommendation
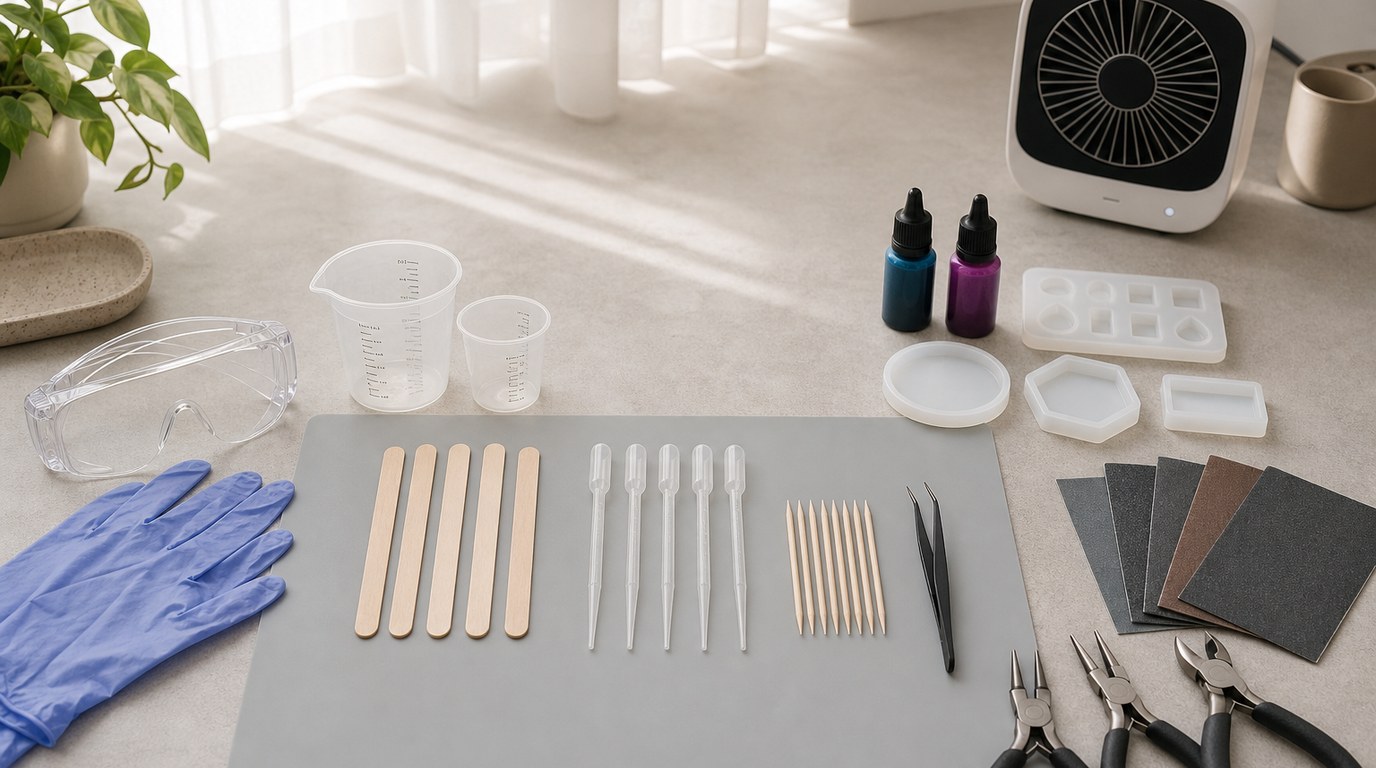
A practical beginner kit includes nitrile gloves, eye protection, ventilation supplies recommended by your resin brand, a silicone mat, graduated cups, stir sticks, pipettes, toothpicks, tweezers, small silicone molds, resin-compatible colorants, a dust cover, fine sandpaper, and basic jewelry pliers.
If you are buying slowly, prioritize in this order: safety gear, measuring and mixing tools, molds, pouring tools, curing protection, then finishing and decoration supplies. This keeps your first projects simple while still giving you the tools needed for clean, wearable results.
FAQ
What Should a Beginner Know First About Basic Tools for Diy Epoxy Projects?
A beginner should know that accurate measuring, thorough mixing, and safety gear matter more than decorative extras. For small resin jewelry, start with gloves, eye protection, measuring cups, stir sticks, molds, pipettes, and a dust cover before buying advanced tools.
What Matters Most When Evaluating Basic Tools for Diy Epoxy Projects?
The most important factor is whether each tool helps with a specific stage: measuring, mixing, pouring, curing, or finishing. Choose tools that match your resin’s instructions and the scale of your project. Small jewelry pieces need precision more than power.
What Mistakes Should Readers Avoid with Basic Tools for Diy Epoxy Projects?
Avoid using food utensils, guessing resin ratios, mixing too quickly, adding too much pigment, or curing projects uncovered. Also avoid buying advanced tools before you understand basic resin behavior. Many beginner issues come from poor setup rather than missing expensive equipment.
What Is the Next Logical Step After Learning About Basic Tools for Diy Epoxy Projects?
The next step is to make a small test project, such as a simple pendant, charm, or pair of earrings. Use a small batch, follow the resin instructions exactly, take notes, and practice clean measuring, slow mixing, careful pouring, and protected curing.