
Clean epoxy edges start before you pour. The tape you choose, how firmly you press it down, and when you remove it all affect whether your resin cures with crisp lines or messy ridges. For most resin crafts, use a quality painter’s tape or sheathing tape that matches the surface and job. Apply it to a clean, dry surface, smooth out bubbles, and burnish the resin-facing edge with a fingernail, scraper, or craft stick.
Do not rely on tape alone to hold a heavy flood coat. Pour slowly, keep resin away from weak seams, and check for leaks during the working time. Remove tape while the resin is still flexible for softer, cleaner edges, or after curing if you need it to act as drip protection.
Why Taping Matters for Clean Epoxy Edges
Tape does more than keep resin off areas you do not want coated. It controls flow, protects the underside of trays and panels, creates temporary dams, catches drips, and helps you define a straight visual edge. Good taping also reduces sanding, trimming, and scraping after the resin cures. For beginners, it is one of the easiest ways to make epoxy projects look intentional instead of messy.
Before You Start: Supplies and Setup
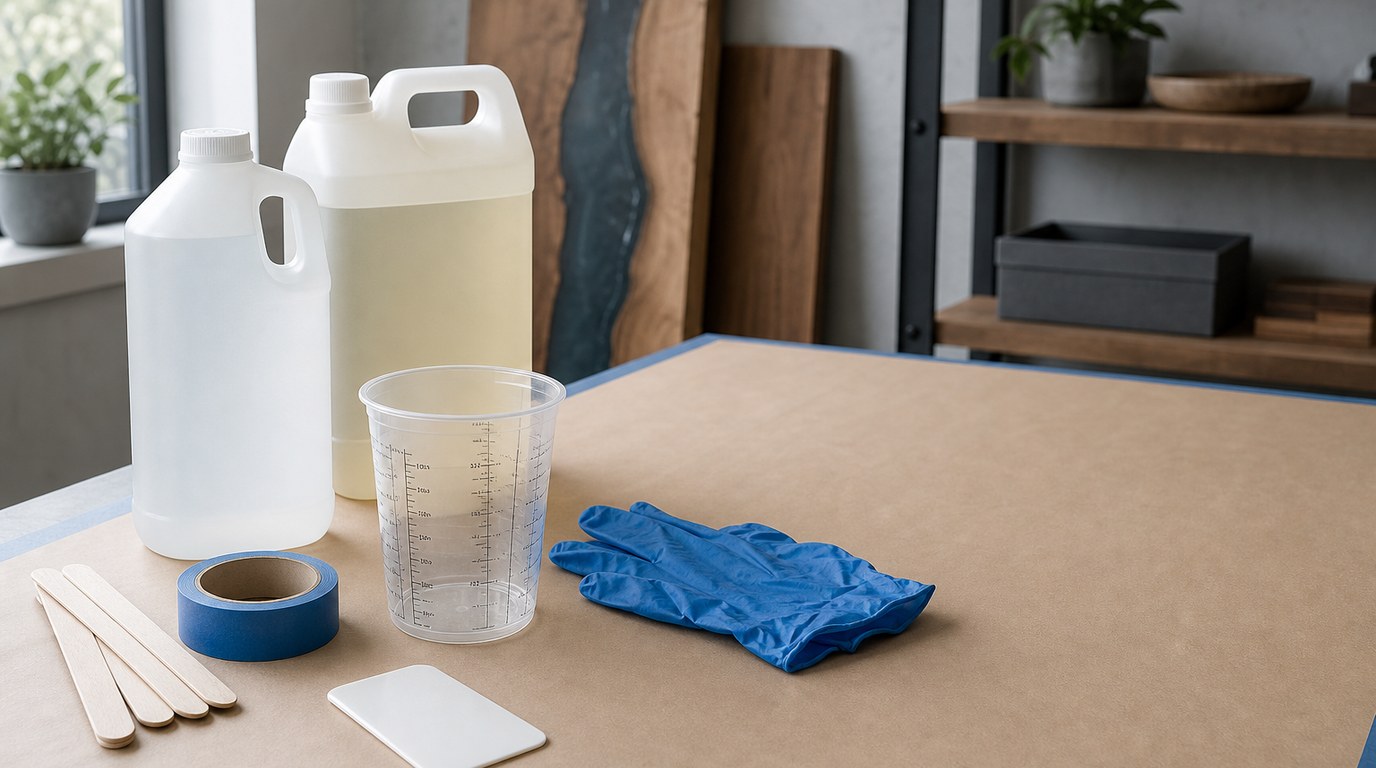
Gather everything before mixing epoxy, because your working time starts once resin and hardener are combined.
You may need:
- Painter’s tape, masking tape, packing tape, or sheathing tape
- Scissors or a craft knife
- A plastic scraper, old gift card, or craft stick
- Isopropyl alcohol and a lint-free cloth
- Nitrile gloves
- Level work surface
- Drop cloth, silicone mat, or plastic sheet
- Mixed epoxy resin and your usual pouring tools
Work in a dust-free, well-ventilated area and follow your resin’s safety directions. Make sure the project surface is level. If resin pools against one taped side, it can overwhelm the tape and leak.
Step 1: Choose the Right Tape for the Edge You Want
Different tapes solve different resin problems. Painter’s tape is useful for clean masking lines on wood, canvas boards, tiles, and many craft surfaces. Choose a good-quality tape rather than the cheapest roll, because weak adhesive can lift during the pour.
Packing tape or sheathing tape is better when you want cured resin to release from the tape, such as making a small dam or protecting the underside of a piece. Resin usually peels away from shiny plastic tape more easily than from paper tape.
Avoid very old tape. If it feels brittle, gummy, or dusty on the edges, it may leave residue or fail mid-pour.
Step 2: Clean and Dry the Surface Before Taping
Tape cannot seal well over dust, sanding powder, oil, wax, or fingerprints. Wipe the surface with a lint-free cloth. If the material allows it, use a small amount of isopropyl alcohol to remove grease, then let it fully evaporate before taping.
Do not tape over damp wood, uncured paint, fresh stain, or soft sealers. The tape may pull up the finish when removed. If you are unsure, test a small hidden area first. A clean, dry surface gives the adhesive the best chance to stay flat and block seepage.
Step 3: Apply Tape Straight, Smooth, and Slightly Beyond the Edge
Pull off a manageable length of tape instead of fighting a long strip. Line it up carefully, then press it down from one end to the other. For a straight masked line, keep steady tension on the tape without stretching it hard. Stretched tape can shrink back and create gaps.
For drip protection, wrap tape slightly beyond the underside edge so drips land on the tape instead of curing on the project. Overlap tape strips by at least a small amount at corners. If you need a sharp corner, cut the tape cleanly with a craft knife rather than tearing it.
Check for wrinkles, raised spots, or tunnels where resin could travel.
Step 4: Burnish the Tape Edge to Stop Resin Seepage
Burnishing means pressing the tape firmly into the surface, especially along the edge that will touch resin. This step is easy to skip, but it is one of the most important epoxy basics taping tips for clean edges.
Use a fingernail, plastic scraper, craft stick, or old gift card. Run it along the tape edge with steady pressure. Pay extra attention to corners, curves, textured surfaces, and overlaps. If the tape edge looks lifted or fuzzy, replace that section before pouring.
Do not press so hard that you damage paper, paint, or a delicate surface.
Step 5: Mix and Pour Epoxy Without Flooding the Tape Line
Even perfectly applied tape has limits. Mix epoxy according to the manufacturer’s ratio and instructions, then pour with control. Start away from the tape line and guide resin outward with a spreader or gloved finger.
Avoid dumping a large puddle directly against taped edges. Too much pressure can force resin under the adhesive. For coated panels, use thin layers rather than one heavy pour if the edge is important. For dams, build support behind the tape if the resin will be deep. Tape alone may bow, lift, or leak under the weight of a thick pour.
Step 6: Watch for Leaks and Fix Them Early
Stay near the project during the first part of the working time. Look under edges and around corners for shiny trails or drips. If you catch a leak early, wipe it with a gloved finger, paper towel, or craft stick.
For a small seep, press the tape back down and add another strip over the weak spot. For a larger leak, reduce the resin pressure if possible by moving resin away from that edge. Do not wait until the resin is thick and stringy; late fixes usually create rougher edges.
Step 7: Remove Tape at the Right Time
Tape removal timing depends on what the tape is doing.
If the tape is masking a visible line, many crafters prefer removing it when the resin is partially cured: no longer watery, but still flexible. This can leave a cleaner edge because the resin is not fully hard. Pull the tape slowly back on itself at a low angle.
If the tape is only catching drips underneath a panel, you can often remove it after the resin has cured enough to handle. The drips should come away with the tape or snap off more cleanly.
Do not yank tape straight upward. That can lift resin, tear soft edges, or pull finish from the surface.
Result Check: How to Know Your Epoxy Edge Is Clean
Inspect the edge after removing the tape and after the resin has cured. A clean epoxy edge should have:
- A straight or intentional line
- Minimal seepage under the tape
- No large cured drips on the underside
- No sticky tape residue
- No lifted paint, paper, or surface coating
- Only light sanding or trimming needed
If the edge looks neat from normal viewing distance, the tape did its job.
Common Taping Mistakes and How to Fix Them
Mistake: Resin leaked under the tape.
The tape may not have been burnished, the surface was dusty, or the pour was too heavy. Next time, clean better, press the tape edge firmly, and pour away from the tape line first.
Mistake: The tape lifted during the pour.
This usually means weak adhesive, moisture, texture, or too much resin pressure. Replace old tape and support dams with a firm backing.
Mistake: The tape left residue.
The tape may have stayed on too long, been low quality, or reacted with heat. Remove residue gently with a suitable cleaner after the resin cures, testing first.
Mistake: The edge is jagged.
The resin may have cured too hard before tape removal. Try removing tape earlier on your next project.
Quick Cleanup and Finishing Tips
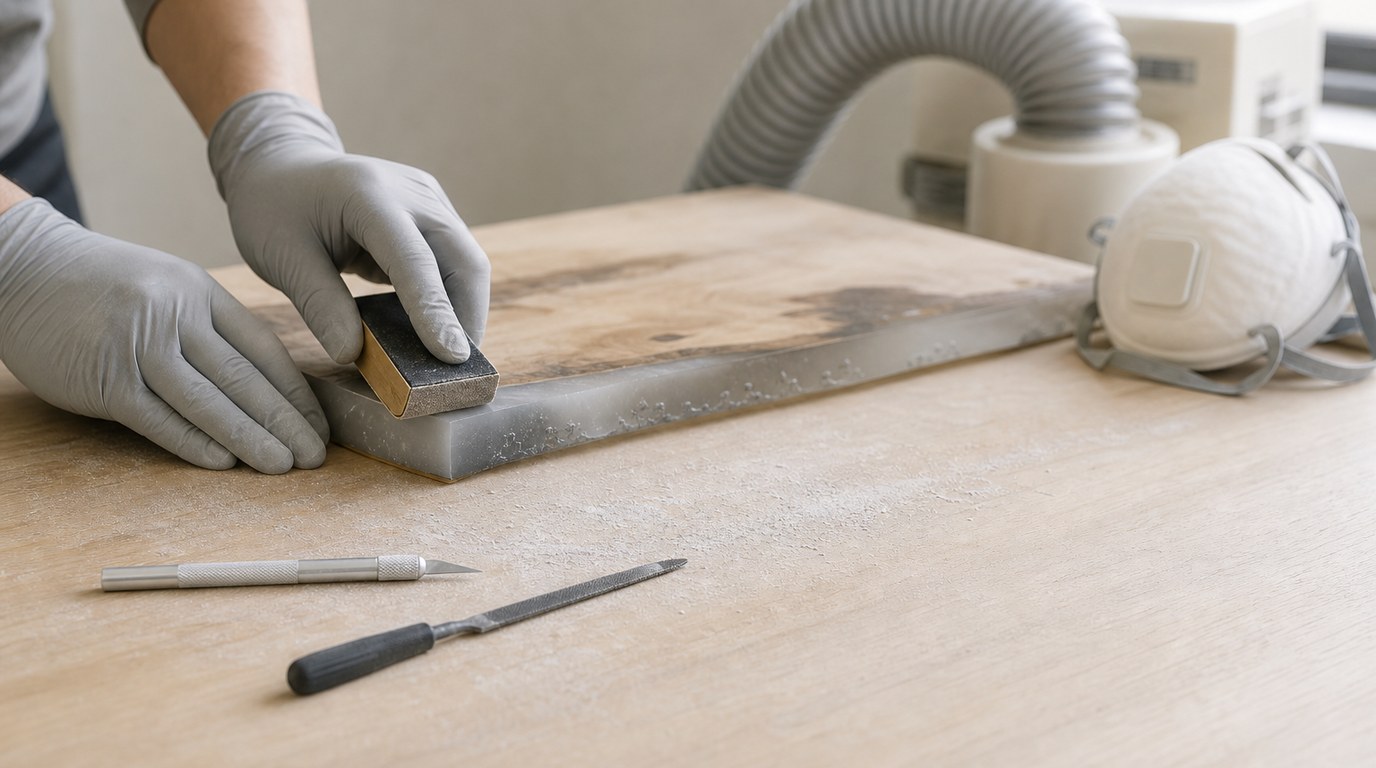
After removing tape, let the epoxy cure fully before aggressive cleanup. Trim tiny soft tags with a craft knife only when safe to handle. For cured rough spots, use fine sandpaper, a sanding block, or a small file. Sand lightly and protect yourself from resin dust with proper ventilation and a mask.
If the edge turns cloudy after sanding, polish it or add a very thin clear coat if appropriate for the project. Clean tools and work surfaces before drips harden.
FAQ
What Tape Works Best with Epoxy Resin?
Painter’s tape works well for many clean masking lines, especially on flat craft surfaces. Packing tape or sheathing tape is better when you want resin to release from the tape. The best choice depends on whether you are masking a line, catching drips, or building a temporary dam.
When Should I Remove Tape from Epoxy?
For visible masked edges, remove tape when the epoxy is partially cured but still slightly flexible. For underside drip protection, you can often wait until the resin has cured enough to handle. Always pull slowly at a low angle instead of lifting straight up.
How Do I Stop Epoxy from Leaking Under Tape?
Clean and dry the surface first, apply quality tape smoothly, then burnish the resin-facing edge firmly. Avoid pouring a heavy puddle directly against the tape. Check for leaks early and add a second strip of tape if you see a weak spot forming.
Can I Use Regular Masking Tape for Resin?
You can use regular masking tape for simple drip catching or low-risk projects, but it may not seal as cleanly as painter’s tape. It can also leave residue or tear. For crisp visible lines, use fresh, good-quality painter’s tape instead.
Why Did My Tape Leave a Rough Epoxy Edge?
The resin may have fully hardened before you removed the tape, or the tape edge may not have been smooth and burnished. Heavy resin buildup along the tape can also cure into a ridge. Next time, pour thinner near the edge and remove the tape earlier.