

Epoxy resin is a two-part material made by mixing resin and hardener. For best results, measure accurately, mix slowly and thoroughly, pour within the product’s working time, and cure in a clean, level, dust-free space. Most beginner problems—sticky spots, bubbles, cloudiness, soft cures, and uneven finishes—come from incorrect ratios, poor mixing, cold temperatures, moisture, or using the wrong resin for the project.
If you are new to resin crafting, start with small projects, follow the product label exactly, and avoid guessing on ratios, cure times, or pour depth. The answers below cover the most common epoxy resin FAQs beginners ask before making coasters, trays, jewelry, art pieces, tumblers, and decorative pours.
Quick Epoxy Resin Answers Before You Start
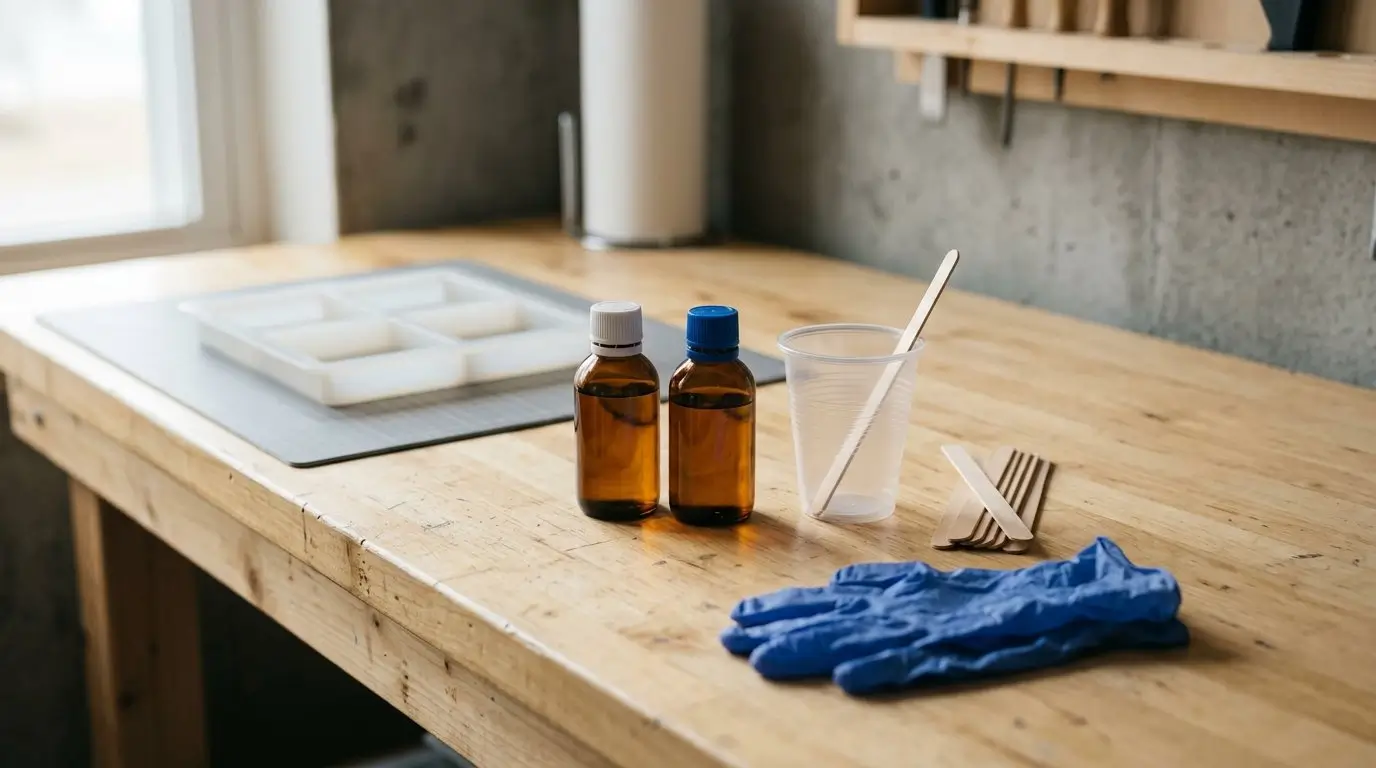
Epoxy resin is a resin-and-hardener system that cures through a chemical reaction. The resin by itself will not cure properly, and the hardener by itself will not create a finished project. They must be measured and mixed in the ratio listed by the manufacturer.
The product label is your most important instruction sheet. It tells you:
- Mix ratio
- Working time
- Demold time
- Full cure time
- Maximum pour depth
- Safety and ventilation directions
- Recommended pigments, molds, or surfaces
A common beginner mistake is assuming all epoxy resins behave the same. They do not. A coating resin made for thin glossy layers may overheat, trap bubbles, or cure poorly if poured too deep. A deep-pour resin may be too thin or too slow for a quick coating project. UV resin, casting resin, coating resin, art resin, and deep-pour resin each have different best uses.
It also helps to know three timing terms:
- Working time: How long you can mix, color, and pour before the resin thickens.
- Demold time: When the piece is firm enough to remove from a mold, if you are using one.
- Full cure time: When the resin has reached its final hardness according to the product directions.
For craft projects like coasters, trays, jewelry, ornaments, bookmarks, tumbler coatings, and small art pours, choose a resin designed for that project type. Then test it before committing to a large or sentimental piece.
Mixing, Measuring, and Curing Questions
Accurate measuring matters because epoxy cures only when the resin and hardener are combined in the correct proportion. Some products use a ratio by volume, such as equal parts resin and hardener. Others require measuring by weight. Do not switch between volume and weight unless the manufacturer gives instructions for doing so.
Use clean, dry mixing cups and stir sticks. Pour carefully, check your measurement at eye level, and scrape every bit from your measuring container if your instructions require it. While mixing, scrape the sides and bottom of the cup often. Unmixed resin stuck to the cup can leave soft or sticky streaks in your finished piece.
Many crafters use a “double-cup” method for important pours: mix in one cup, transfer the mixture into a second clean cup, then mix again briefly. This helps reduce the chance of unmixed material clinging to the sides of the first cup.
Do not add extra hardener to make epoxy cure faster. Epoxy is not like some materials where “more activator” means a quicker, stronger result. Too much hardener can cause soft, cloudy, sticky, or uneven curing.
Curing conditions matter too. Most epoxy works best in a stable room-temperature space, but the exact ideal temperature range depends on the product. Cold resin can be thicker, harder to mix, and more likely to hold bubbles. A cold room can slow the cure or leave the piece bendy longer than expected. Moisture and high humidity may also contribute to cloudiness or surface problems with some products.
If your resin stays sticky, bendy, or soft, the likely causes include:
- Wrong mix ratio
- Incomplete mixing
- Cold curing space
- Expired or poorly stored resin
- Too much pigment or alcohol ink
- Incompatible glitter, dye, sealer, or embedded object
- Pouring deeper than the resin allows
A small sticky patch on an otherwise cured piece may be fixable. If the area is wet, scrape away uncured resin and dispose of it according to the product guidance and local rules. If the area is tacky but mostly cured, wait until it is safe to handle, then sand or remove the problem surface as directed for your project. A properly measured and mixed flood coat can sometimes restore a smooth finish.
If the entire piece is soft, flexible, or wet throughout, it usually cannot be rescued cleanly. In that case, it is often better to remake it and correct the ratio, mixing, temperature, or additive problem.
Bubbles, Cloudiness, Color, and Finish Problems
Bubbles and finish flaws are some of the most common epoxy resin frustrations, especially for beginners. The good news is that many can be reduced with slower mixing, better surface prep, and the right resin for the project.
| Problem | Likely cause | Practical fix |
|---|---|---|
| Many tiny bubbles | Mixing too fast, cold resin, thick resin | Mix slowly, let bubbles rise briefly, warm bottles only if the label allows |
| Large trapped bubbles | Air caught in molds, corners, or embedded objects | Pour slowly, use a toothpick to release trapped air, seal porous items first |
| Sticky patches | Incomplete mixing or unmixed resin from cup sides | Scrape/remove sticky area if possible, then apply a correctly mixed coat |
| Cloudy or milky resin | Moisture, cold conditions, contaminated tools, incompatible pigments | Use dry tools, control room conditions, test pigments before a full project |
| Uneven or wavy surface | Unlevel table, moving project during cure, too little resin | Level the surface before pouring and cover the piece while it cures |
| Dull finish | Mold surface, sanding scratches, dust, under-mixed top coat | Clean molds, polish if appropriate, or add a properly mixed clear coat |
Bubbles form when air gets stirred into the resin or released from materials inside the project. Wood, paper, dried flowers, shells, and some stones can release air after pouring. Sealing porous items before embedding them can help reduce that effect.
Mixing slowly is one of the easiest bubble-control habits. Scraping the cup is important, but whipping the resin like cake batter adds extra air. Pouring in a thin stream can also help break some bubbles as the resin flows into the mold or onto the surface.
Heat can remove surface bubbles, but use it carefully. A heat gun or torch may be appropriate for some coating resins and art pours, but only if the resin, mold, and project materials can tolerate it. Too much heat can damage silicone molds, scorch inclusions, ripple the surface, or cause curing problems. Keep the heat source moving and do not overwork one spot.
Cloudiness usually points to moisture, low temperature, incompatible colorants, dirty tools, or contamination. Make sure cups, sticks, molds, pigments, and embedded items are dry and clean before you start.
For color, use resin-compatible mica powders, pigment pastes, dyes, alcohol inks, or glitter as directed. More colorant is not always better. Too much additive can interfere with curing, make the resin soft, or create unexpected streaks. When trying a new pigment, test a small batch first.
Safety, Storage, Cleanup, and Project Success Tips
Always read the product label and safety data sheet before using epoxy resin. Different brands have different handling instructions, so do not rely only on general advice. Follow the listed guidance for ventilation, gloves, eye protection, skin contact precautions, and workspace setup.
Work on a protected surface in an area where your project can sit undisturbed. Keep pets, children, dust, hair, and loose fibers away from wet resin. Cover curing projects with a clean box, lid, or dust cover that will not touch the surface.
Do not pour epoxy resin down drains. Uncured resin and hardener should be handled and discarded according to the product instructions and local disposal rules. For disposable cups and stir sticks, many makers allow leftover mixed resin to cure in the cup before discarding, if the product guidance and local rules allow it.
For cleanup, use the cleaning method recommended by the manufacturer. Some tools can be wiped while the resin is still uncured; others are easier to clean after flexible cured resin peels away. Avoid using favorite kitchen tools for resin, and keep resin equipment separate from food-use items.
Storage affects performance. Keep resin and hardener bottles sealed tightly, upright, and away from direct sunlight, heat, moisture, and extreme cold. Shelf life varies by brand and storage conditions. Yellowing, crystals, unusual thickening, graininess, or repeated poor curing can be signs that resin is old or was stored poorly. Some crystallized resin may be recoverable if the manufacturer provides instructions, but do not guess.
Beginner-friendly habits make a big difference:
- Start with small batches and simple molds.
- Test new pigments, glitters, flowers, stickers, and sealers.
- Label cups if you are using multiple colors.
- Keep your table level before pouring.
- Note the room temperature, cure time, and results.
- Use the correct resin for the project depth and style.
- Mix more carefully than you think you need to.
Resin crafting rewards patience. A few extra minutes spent measuring, mixing, sealing, and covering your project can prevent many of the problems that cause wasted materials.
FAQ
Why is my epoxy resin still sticky after curing?
Sticky epoxy usually means the ratio was wrong, the resin was not mixed thoroughly, or the room was too cold. If only the surface is tacky, remove or sand the problem area when safe and apply a properly mixed coat.
Can I fix bubbles after epoxy resin has cured?
Yes, some cured bubbles can be fixed by sanding the surface and adding a fresh clear coat. Deep bubbles inside a casting are harder to hide and may require remaking the piece.
How long does epoxy resin take to fully cure?
Most epoxy resins need longer than their working or demold time to fully cure. Check your product label, because full cure time varies by formula, pour depth, temperature, and project size.
Can I pour epoxy resin in thick layers?
Only if the resin is designed for thick or deep pours. Coating and art resins usually have lower pour-depth limits, and pouring too thick can cause overheating, bubbles, cracking, or poor curing.
What is the best epoxy resin for beginners?
The best beginner epoxy is one made for your exact project, with clear instructions and a simple mix ratio. Start with small coaster, tray, or jewelry projects before trying large pours or complex layers.