An epoxy resin tabletop transformation turns an existing table into a glossy, durable feature piece, but the result depends heavily on preparation. Start by choosing a stable tabletop, planning the look, cleaning and sanding the surface, and sealing anything porous. Then set up a level, dust-controlled workspace before measuring and mixing the resin exactly as directed. Pour slowly, spread evenly, remove bubbles, and protect the table while it cures. After curing, trim or sand drips, polish if needed, and check that the surface is hard, level, and fully bonded. The process is manageable for a careful DIYer, but timing, temperature, measuring accuracy, and surface prep matter more than speed.
Before You Start: Choose the Right Tabletop for Resin
The best tabletop for resin is sturdy, flat, cleanable, and not actively flexing. Wood, sealed MDF, laminate, concrete, and previously finished tables can work if the surface is sound. Avoid tables with loose veneer, deep water damage, oily contamination, or major movement, because epoxy will not fix structural problems.
Check that the legs and frame can handle the added weight. Resin also highlights flaws, so dents, uneven patches, and trapped dust may become more noticeable under a glossy coat.
Plan the Design Before Mixing Resin
Decide the look before opening the resin containers. Choose between a clear coat, tinted color, faux stone, ocean effect, metallic swirl, embedded objects, or a full flood coat over paint or stain.
Sketch the layout and test pigments on a small sample if possible. Epoxy has limited working time, so improvising mid-pour can lead to muddy colors, uneven coverage, or rushed decisions.
Step 1: Clean, Repair, and Sand the Tabletop
Remove hardware, pads, loose finish, wax, grease, and dust. Wash the tabletop with a suitable cleaner, then wipe with isopropyl alcohol after it dries. Fill cracks, screw holes, or gouges with wood filler, epoxy putty, or a compatible repair material.
Sand the surface so the resin has something to grip. For most tabletops, 120- to 220-grit sandpaper works well. Vacuum thoroughly, then tack-wipe or use a lint-free cloth. Do not pour over sanding dust.
Step 2: Seal Porous Surfaces and Protect the Edges
Porous wood, raw MDF, concrete, and open cracks can release air into the resin, causing bubbles. Apply a thin seal coat of epoxy or a compatible sealer and let it cure as directed. This step is especially important for live-edge wood and knotty surfaces.
Mask the underside edges with painter’s tape or sheathing tape to catch drips. If you want a raised resin layer, build a temporary dam around the tabletop and seal every seam to prevent leaks.
Step 3: Set up a Level, Dust-controlled Pour Area
Prepare the workspace before mixing. Place the table on a stable surface and check level in multiple directions. Resin flows toward low spots, so even a slight tilt can create thin edges and puddles.
Work in the temperature range recommended by the resin manufacturer, often around 70°F to 75°F. Cover floors, keep pets away, reduce airflow, and have a dust cover ready. Once resin is mixed, you do not want to search for tools.
Step 4: Measure and Mix the Epoxy Resin Correctly
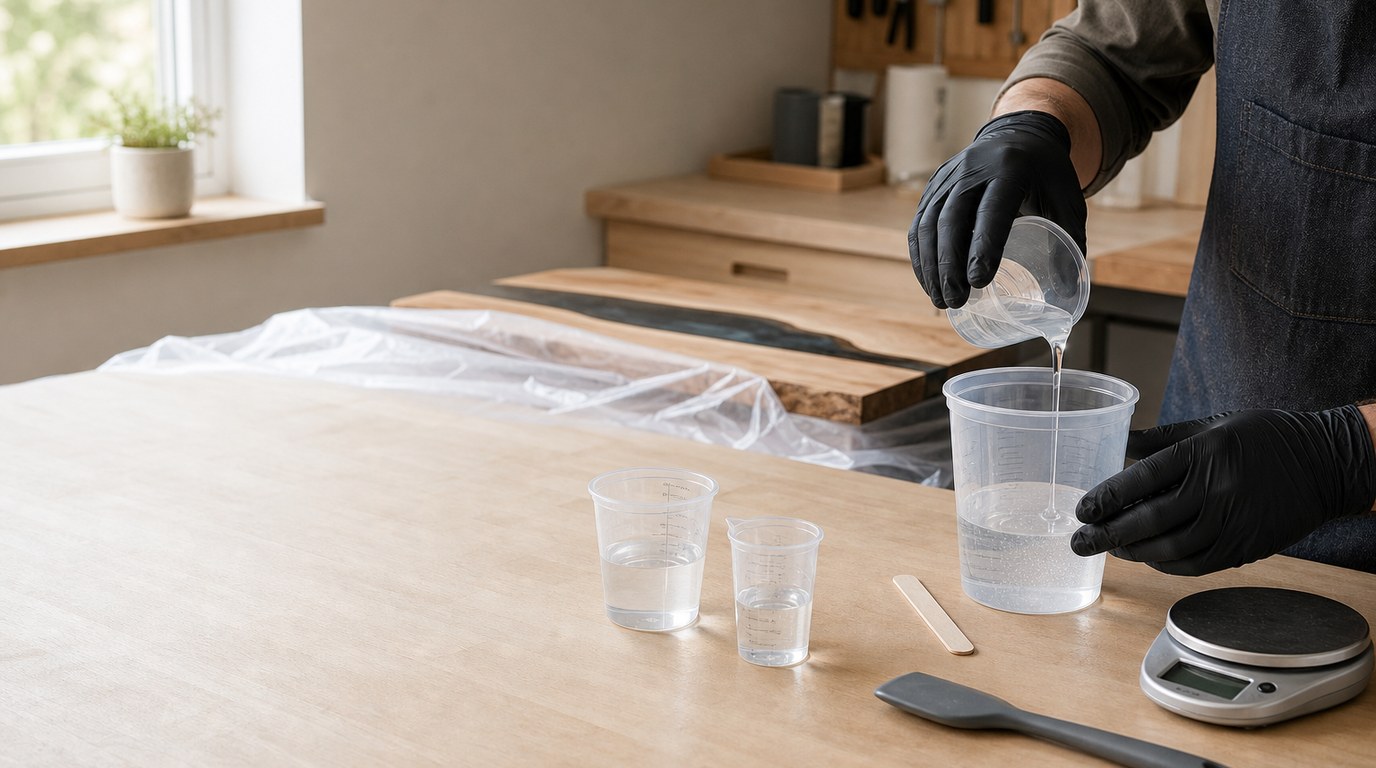
Read the product instructions, including mix ratio, working time, maximum pour depth, and cure time. Some resins mix 1:1 by volume; others require a different ratio. Do not guess.
Measure Part A and Part B accurately in clean containers. Mix slowly, scraping the sides and bottom for the full recommended time. Then pour into a second container and mix again for a cleaner blend. This “double-cup” method reduces soft or sticky spots caused by unmixed resin.
Avoid whipping air into the mixture.
Step 5: Add Color, Effects, or Embedded Elements
Add pigments, mica powder, alcohol ink, or resin dye only after the resin is fully mixed. Use small amounts, because too much colorant can interfere with curing. For a clear tabletop, skip pigments and focus on bubble control.
If embedding photos, shells, coins, fabric, dried flowers, or paper, seal them first so they do not release air or absorb resin unevenly. Arrange all elements before the pour and secure lightweight pieces so they do not float.
Step 6: Pour the Resin Across the Tabletop
Start in the center and pour in controlled ribbons or pools. Use a notched spreader, plastic squeegee, or gloved hand to move resin toward the edges. Keep the layer within the product’s recommended thickness.
For a flood coat, let resin roll over the edges naturally if you want coated sides. If you want clean, sharp edges, use a dam or brush resin carefully along the perimeter. Work steadily, but do not overwork decorative swirls.
Step 7: Remove Bubbles and Watch the First Hour
After spreading, pass a heat gun or torch quickly over the surface to pop bubbles. Keep it moving and do not hold heat in one place, or you may scorch the resin, damage pigments, or create ripples.
Check the tabletop several times during the first hour. Remove dust specks with a clean toothpick, watch for leaks, and pop new bubbles as they rise. Stop touching the surface once it begins to thicken.
Step 8: Let the Tabletop Cure Without Disturbing It
Cover the tabletop with a clean dust shield that does not touch the resin. Leave it level and undisturbed for the full cure period. Many resins become tack-free within 12 to 24 hours but need several days to reach handling strength.
Do not place objects on the surface too soon. Early pressure can leave dents, rings, or dull marks even when the tabletop feels dry to the touch.
Step 9: Finish the Edges and Final Surface
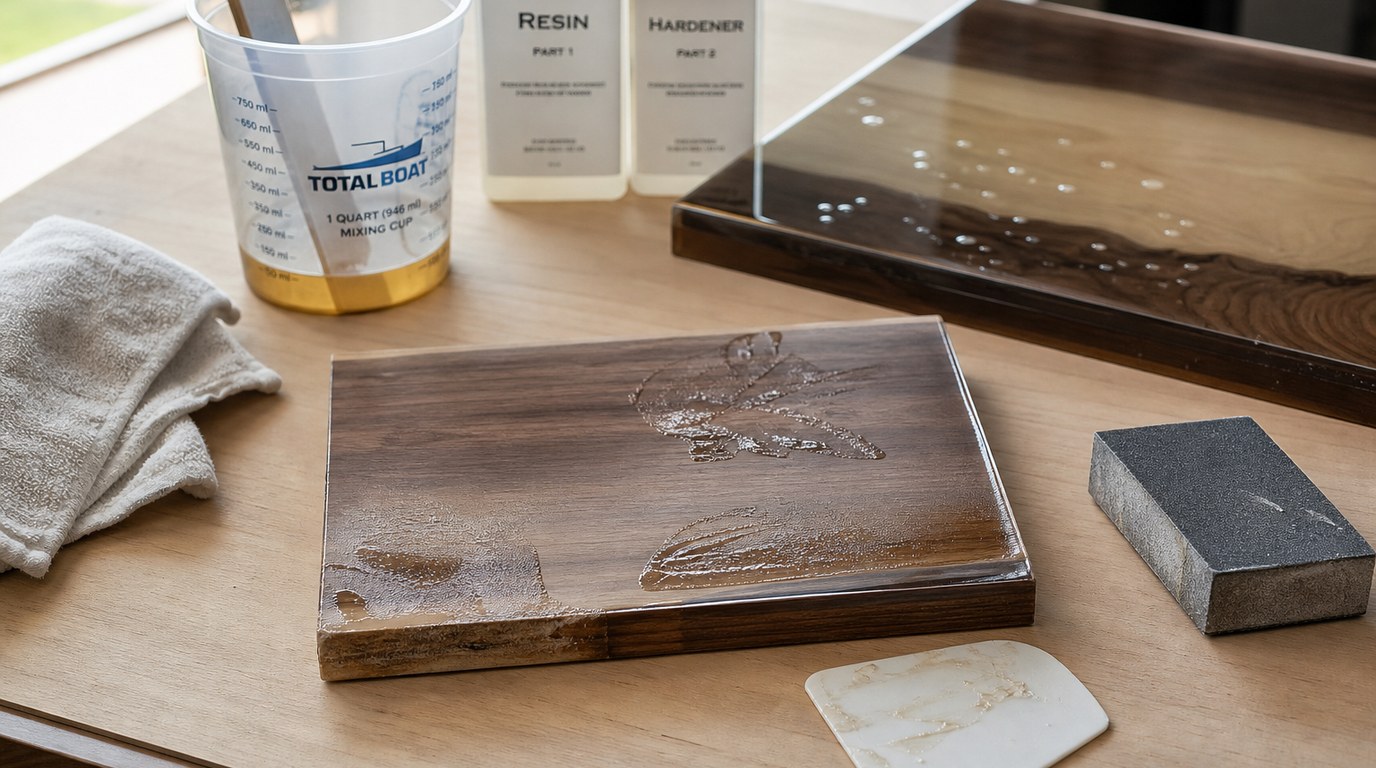
Once cured, remove tape from the underside. Trim drips with a sharp blade while they are slightly firm, or sand them after full cure. Use progressively finer sandpaper on rough edges.
If the top has minor nibs or uneven spots, sand and apply another thin coat according to the resin instructions. For a satin look, wet sand and polish less aggressively. For high gloss, polish with a compatible compound after full cure.
Result Check: How to Know Your Epoxy Resin Tabletop Transformation Worked
Your epoxy resin tabletop transformation worked if the surface is hard, clear or evenly colored, level, and firmly bonded. There should be no sticky patches, cloudy streaks, deep craters, or areas pulling away from the base.
Run your hand lightly across the top and edges. A few tiny dust specks are cosmetic, but soft spots, severe ripples, or peeling indicate a mixing, curing, or preparation problem that may need sanding and recoating.
Common Mistakes and Troubleshooting
Sticky areas usually mean inaccurate measuring, poor mixing, too much pigment, or low curing temperature. Scrape away uncured resin, clean the area, sand, and recoat only after the problem material is removed.
Bubbles often come from porous surfaces or aggressive mixing. Seal first, mix slowly, and use gentle heat. Fish eyes or bare spots usually mean oil, wax, silicone, or dust contamination; sand, clean, and repour.
Uneven thickness points to an unlevel table. If the cured surface is solid but wavy, sand high spots and apply a leveling coat. Leaks mean the dam or edge tape was not sealed well enough.
Safety and Care Tips for a Resin Tabletop
Wear nitrile gloves, eye protection, and work with ventilation recommended by the resin manufacturer. Avoid skin contact, and do not use food utensils or kitchen measuring cups for resin. Keep children and pets away during mixing and curing.
After curing, use coasters, trivets, and placemats. Many epoxy tabletops resist spills, but high heat, sharp knives, and abrasive cleaners can damage the finish. Clean with a soft cloth and mild soap.
FAQ
Can I Pour Epoxy Resin Over an Old Tabletop?
Yes, if the old tabletop is stable, clean, dry, and sanded. Remove wax, grease, loose finish, peeling veneer, and silicone residue first. Glossy factory finishes should be scuffed so the resin can bond. If the table has structural damage, repair that before pouring.
How Much Epoxy Resin Do I Need for a Tabletop?
Measure the tabletop length and width, then use the resin manufacturer’s coverage calculator for your desired thickness. A thin seal coat uses much less than a flood coat. Always mix slightly more than the exact estimate, especially if coating edges or filling cracks.
Do I Need to Sand Between Resin Coats?
Usually, yes, if the previous coat has fully cured past the recoat window. Sanding creates mechanical grip for the next layer. If the resin instructions allow a second coat while the first is still tacky, sanding may not be required. Follow that product’s timing.
Why Is My Epoxy Tabletop Still Sticky?
Sticky epoxy is commonly caused by inaccurate ratio, incomplete mixing, cold temperatures, or too much color additive. If only the surface is tacky, it may need more cure time. If patches remain soft, remove the uncured resin, sand, clean, and apply a properly mixed coat.
How Long Before I Can Use My Resin Tabletop?
Light handling may be possible after 24 to 48 hours, depending on the resin, but full cure often takes several days to a week. Wait for the manufacturer’s full cure time before heavy use, hot items, décor, or daily dining. Early use can leave permanent marks.