

Gold leaf works best in resin when you add it with control instead of dropping in large sheets. Mix and pour a thin first layer of resin, tear the leaf into small flakes or pieces, then place it gently into the wet resin with tweezers or a toothpick. Remove bubbles carefully, let the layer cure as directed, and seal the leaf under a second resin layer for depth and protection. The key is using small amounts, avoiding aggressive heat or airflow, and checking that the leaf is fully covered before the final cure.
What You Need Before You Start
Gather everything before mixing resin because your working time starts as soon as the resin and hardener are combined.
You will need:
- Two-part epoxy resin or UV resin suitable for your project
- Gold leaf sheets, flakes, or loose leaf
- Clean mold, bezel, coaster blank, tray, or art surface
- Mixing cups and stir sticks
- Tweezers, toothpicks, or a silicone tool
- Gloves and a protected work surface
- Small scissors or a dry brush, if using sheets
- Heat gun, torch, or alcohol spray only if approved for your resin
- Dust cover for curing
Work in a level, dust-free space. If you are using epoxy, follow the manufacturer’s mix ratio exactly. Incorrect measuring or rushed stirring can leave soft spots, bubbles, or cloudy areas around the gold leaf.
Choose the Right Gold Leaf for Resin
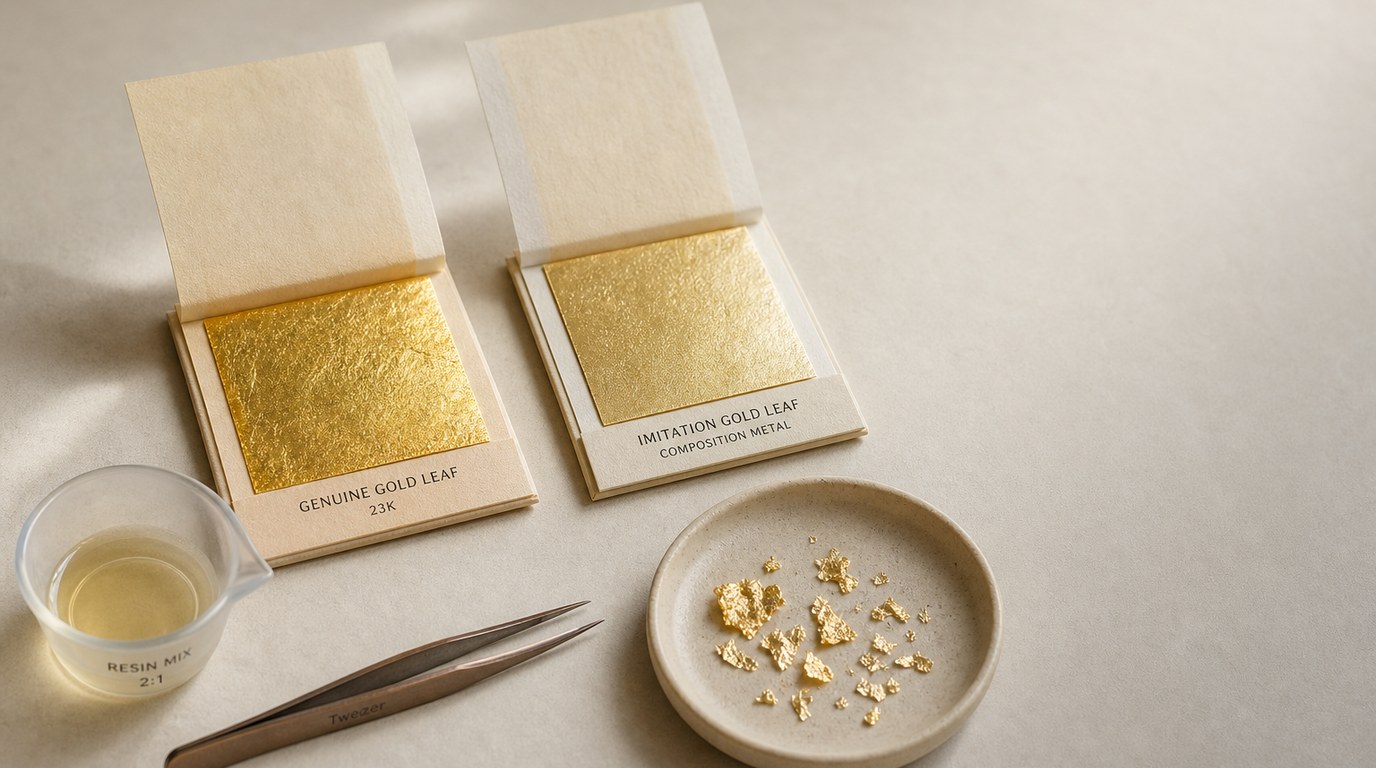
You can use real gold leaf or imitation gold leaf in resin. Real gold leaf is more expensive, but it resists tarnishing and keeps its color well. Imitation gold leaf, often made from copper and zinc alloys, is cheaper and widely used in resin art, but it can darken or discolor over time if exposed to air or moisture.
For most resin crafts, loose flakes or torn imitation sheets are easiest. Full sheets are beautiful but harder to control because they wrinkle, fold, and trap bubbles. If you want a floating, scattered look, use flakes. If you want bold metallic cracks or edges, tear sheets into irregular pieces.
Step 1: Mix and Pour Your First Resin Layer
Prepare your mold or surface so it is clean, dry, and level. Dust, fingerprints, or moisture can show through clear resin, especially near metallic embellishments.
Mix your resin according to the product instructions. Scrape the sides and bottom of the cup while stirring, but do not whip the mixture. Fast stirring adds bubbles that may collect around the gold leaf later.
Pour a thin first layer into the mold or onto the surface. This layer should be deep enough to hold the gold leaf but not so deep that every piece immediately sinks. For molds, a shallow base layer gives you more control over placement. Let the resin sit for a few minutes so the largest bubbles rise before adding the leaf.
Step 2: Tear or Separate the Gold Leaf
Gold leaf is extremely lightweight, so handle it gently and away from fans, open windows, or strong airflow. Put a sheet on a dry, clean surface and tear it into smaller pieces with tweezers, a dry brush, or gloved fingers. Do not worry about perfect shapes; irregular edges usually look more natural in resin.
For a delicate shimmer, make small flakes. For a dramatic design, keep a few larger torn pieces. Avoid dropping an entire sheet into wet resin unless you want a wrinkled, folded effect. Large sheets can trap air underneath and may clump into a thick metallic patch.
Step 3: Place Gold Leaf Into the Wet Resin
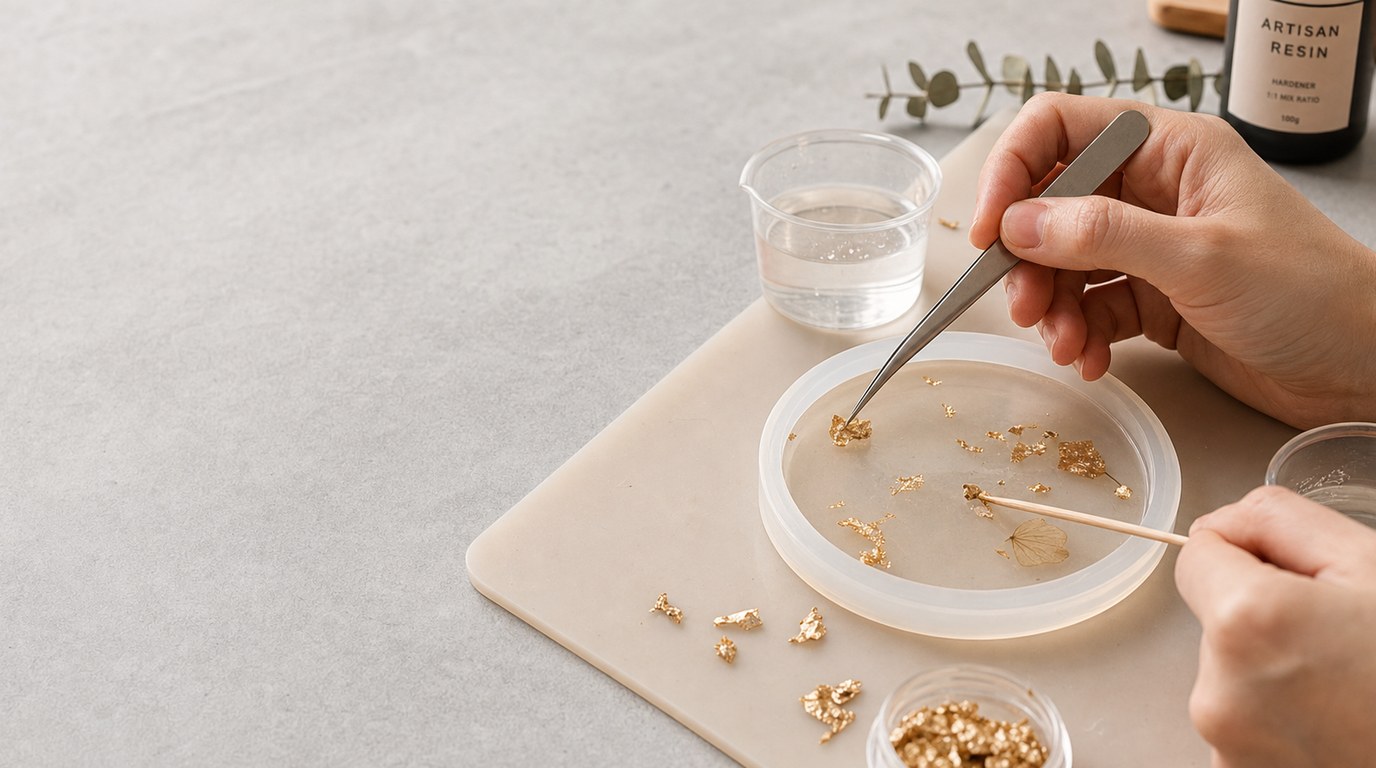
Use tweezers, a toothpick, or a silicone tool to place each piece into the wet resin. Touch the gold leaf lightly to the resin surface, then nudge it into position. Do not stir the leaf through the resin like glitter. Stirring can break it into muddy fragments, create bubbles, and make the design look uncontrolled.
If the leaf sits on top, gently press one edge down with a toothpick until the resin wets it. Once the piece is coated, it should relax into the surface. Leave some clear space between pieces if you want a floating look.
For coasters, trays, and jewelry, think about the viewing side. In a mold, the bottom may become the front after demolding, so place decorative pieces with that in mind. If you want the gold leaf near the face of the piece, add it early in a shallow layer. If you want it suspended deeper inside, use layers instead of one deep pour.
Step 4: Remove Bubbles Without Blowing the Leaf Around
After placing the gold leaf, check for bubbles along the edges and underneath larger pieces. Use a toothpick to tease bubbles out carefully. Pop surface bubbles with gentle heat only if your resin allows it.
Keep a heat gun or torch moving and use short passes. Too much force can push the leaf into piles or blow it to one side of the mold. Too much heat can also thin the resin, making the gold leaf sink or shift.
If your leaf is very close to the surface, skip strong airflow and use a toothpick instead. A controlled manual approach is slower, but it protects the layout.
Step 5: Add Depth with a Second Resin Layer
A second resin layer protects the gold leaf and makes it look suspended rather than stuck on the surface. Let the first layer reach the stage recommended by your resin instructions. Some projects work best when the first layer is tacky; others need a full cure and light surface prep before recoating.
Mix a fresh small batch of resin. Pour it slowly over the gold leaf so the resin flows around the pieces instead of dragging them. Start at one edge or corner and let the resin self-level.
Check that all leaf pieces are fully sealed. Any exposed imitation leaf can tarnish or lift later. If a piece floats upward, press it down gently with a toothpick and hold it until the resin settles.
Step 6: Cure, Demold, and Inspect the Finish
Cover the project while it cures to keep dust out. Do not move the mold during curing; vibration or tilting can shift the gold leaf before the resin firms.
When the resin has cured according to the instructions, demold or handle it carefully. Inspect the finish in bright light. A good result should have clear resin, visible metallic shine, no sticky areas, and no exposed leaf edges unless they were intentional. Check the sides and corners, too. If the surface feels soft or tacky, allow more curing time or review your mix ratio before making another piece.
Alternative Method: Applying Gold Leaf to Cured Resin
You can also apply gold leaf to cured resin for surface accents, repaired gaps, or metallic edges. Make sure the resin is fully cured, clean, and lightly scuffed if the adhesive needs grip. Apply a thin layer of leaf adhesive or compatible clear medium, wait until it becomes tacky, then press the gold leaf onto the area.
Brush away loose pieces after the adhesive sets. Seal the surface with a clear resin coat or compatible varnish. This method is useful for geode edges, tray rims, raised details, and adding gold after you see the cured design. Do not leave imitation leaf unsealed if the project will be handled or exposed to moisture.
Common Mistakes and How to Fix Them
Gold leaf clumps together: You probably added too much at once or stirred it into the resin. Use smaller pieces and place them one at a time. Separate clumps with a toothpick while the resin is still wet.
Gold leaf sinks: The resin layer may be too deep or too warm. Use a thinner first layer, wait a few minutes before placing the leaf, or build the design in stages.
Bubbles collect around the leaf: Large pieces can trap air. Press one edge into the resin first, then smooth the piece down slowly. Use a toothpick to release trapped bubbles.
The gold looks dull: The leaf may be buried in cloudy resin, overheated, or left exposed. Use clear, properly mixed resin and seal the leaf under a smooth topcoat.
Leaf sticks to tools: Slightly touch the tool to resin first, then pick up the leaf. Static and dryness make leaf hard to control.
Surface leaf lifts later: It was not sealed well. Add a compatible clear coat and cover all exposed edges.
FAQ
What Is the First Step Someone Should Take with Gold Leaf?
Start by choosing the look you want: scattered flakes, bold torn pieces, or surface accents. Then prepare a clean, level resin area and mix a small, accurate batch. Gold leaf is easiest to control when the first resin layer is thin and freshly poured.
What Can Go Wrong When Following Gold Leaf Advice?
The most common problems are clumping, sinking, trapped bubbles, dull shine, and exposed leaf edges. These usually happen from using pieces that are too large, stirring too aggressively, applying too much heat, or failing to seal the leaf under resin.
How Long Does It Usually Take to Work Through Gold Leaf?
The hands-on part can take 20 to 45 minutes for a small project, depending on how detailed the placement is. Curing takes longer and depends on your resin. Epoxy often needs many hours, while UV resin cures much faster in thin layers.
How Can a Beginner Tell Whether Gold Leaf Worked?
The gold leaf should look bright, intentional, and sealed inside or onto the resin. There should be no sticky areas, loose flakes, large trapped bubbles, or lifting edges. If the resin is clear and the leaf stays where you placed it, the technique worked.