
To embed items within epoxy, choose a resin that matches your project depth, seal anything porous, pour a thin base layer, position the object, then cover it with additional resin in controlled layers. The key is preventing moisture, air, and movement. Clean, dry objects embed best; wet flowers, oily materials, and unsealed paper often cause bubbles, cloudiness, staining, or cure problems.
For the cleanest result, work slowly. Mix the epoxy accurately, pour within the manufacturer’s recommended depth, remove bubbles before and after placing the item, and let each layer cure or gel as directed. Once cured, the object should be fully enclosed in hard, clear resin with minimal bubbles and no tacky spots.
Before You Start: Choose the Right Resin and Objects
Use the right epoxy for the thickness of your project. Casting or deep-pour epoxy is best for thick molds, paperweights, blocks, and larger embeds because it cures more slowly and handles depth better. Coating resin works for shallow trays, jewelry, badges, and surface embeds.
Every item you embed must be clean and completely dry. Moisture is one of the biggest causes of bubbles, cloudiness, and discoloration. Avoid fresh flowers, wet organic matter, oily objects, greasy metal, and unsealed paper. Porous materials such as wood, fabric, dried flowers, photos, and shells usually need sealing before they touch resin.
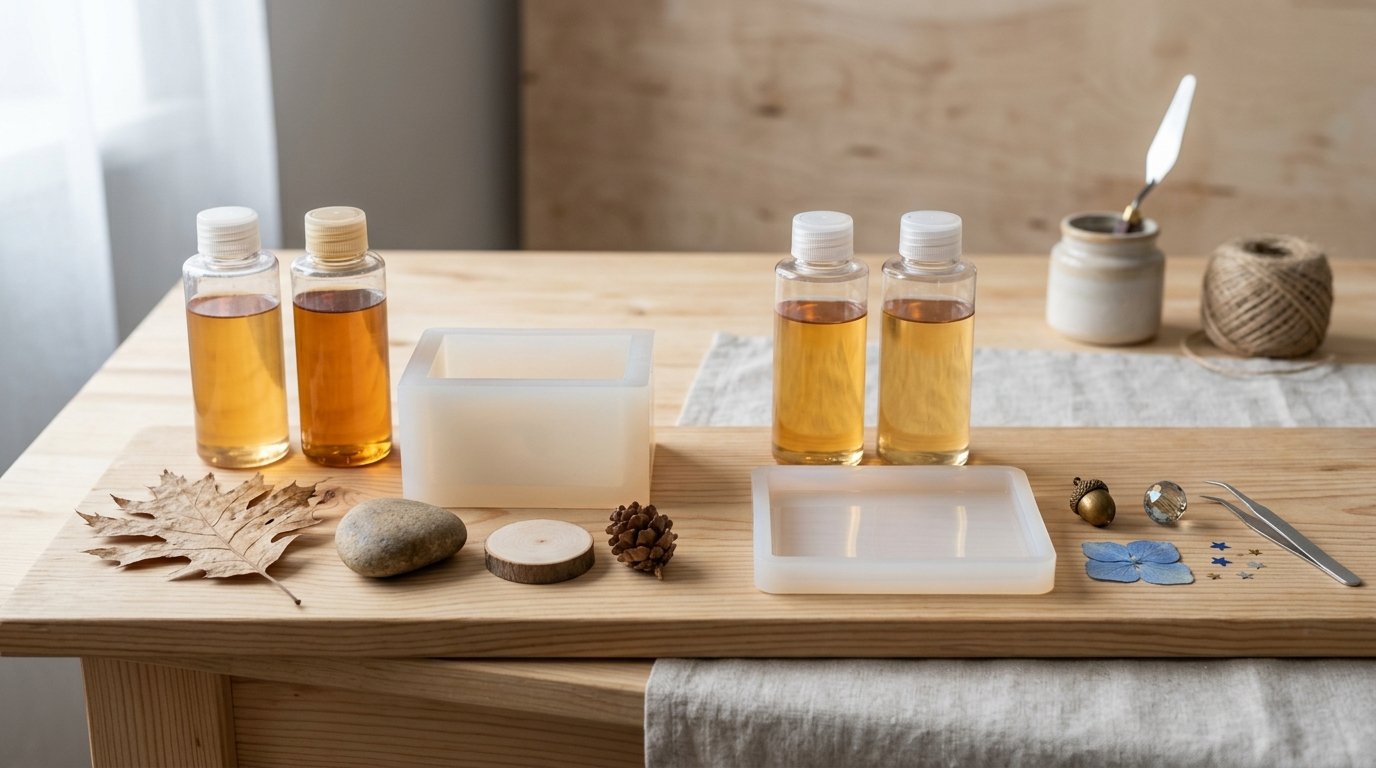
Supplies You’ll Need
Gather everything before mixing, because epoxy has a limited working time.
- Epoxy resin and hardener
- Mold or prepared surface
- Mixing cups and stir sticks
- Nitrile gloves
- Respirator if your resin requires one
- Level work surface
- Heat gun or small torch
- Tweezers
- Toothpicks or craft sticks
- Clear spray sealer, resin-safe sealer, or Mod Podge
- Items to embed
- Dust cover, such as a clean box or plastic bin
Work in a ventilated area and follow the safety instructions for your epoxy. Wear gloves, protect your table, and avoid touching uncured resin.
Step 1: Prepare and Seal the Items
Clean each item first. Remove dust, lint, oil, sand, or loose particles. If the object was washed, let it dry fully before sealing or embedding.
Seal paper, photos, labels, stickers, and book pages on both sides and all edges. Use clear spray sealer, Mod Podge, or another resin-compatible sealant. Apply thin coats and let each coat dry completely. Unsealed paper can turn translucent, darken, or release bubbles.
Dried flowers must be fully dehydrated, not just wilted. Wood should be dry and sealed to reduce bubbles. Shells should be cleaned, dried, and sealed if they are porous. Textured items, such as charms, bark, fabric, or dried botanicals, may trap air, so sealing helps close tiny pockets before resin is poured.
Step 2: Prepare the Mold or Surface
Clean the mold or surface so there is no dust, hair, or residue. If your mold or project type calls for mold release, apply it according to the product directions and let it dry.
Set the mold on a level surface before pouring. Resin will settle with gravity, so even a slight tilt can create an uneven finished piece. Arrange your items in the empty mold first and decide their final placement. Small positioning choices become permanent once the resin cures.
Step 3: Mix the Epoxy Carefully
Measure resin and hardener exactly according to the manufacturer’s ratio. Do not guess, and do not change the ratio to make the resin cure faster. Incorrect measuring is a common cause of soft or sticky resin.
Stir slowly and thoroughly, scraping the sides and bottom of the cup as you mix. Avoid whipping the resin, which adds extra bubbles. If your product recommends a double-cup mix, pour the resin into a second clean cup and stir again.
Check the working time before you begin. Also confirm that the epoxy is rated for your intended pour depth, especially for thick molds or large objects.
Step 4: Pour a Thin Base Layer
Pour a shallow first layer into the mold or onto the prepared surface. This creates a clear backing and gives the embedded item something to rest on instead of sitting directly against the bottom.
Keep the layer thin enough to control bubbles and within the resin’s recommended pour depth. Let the resin spread naturally, then guide it with a stir stick if needed. Use a heat gun or torch briefly to pop surface bubbles before placing the item. Do not overheat the resin; a quick pass is usually enough.
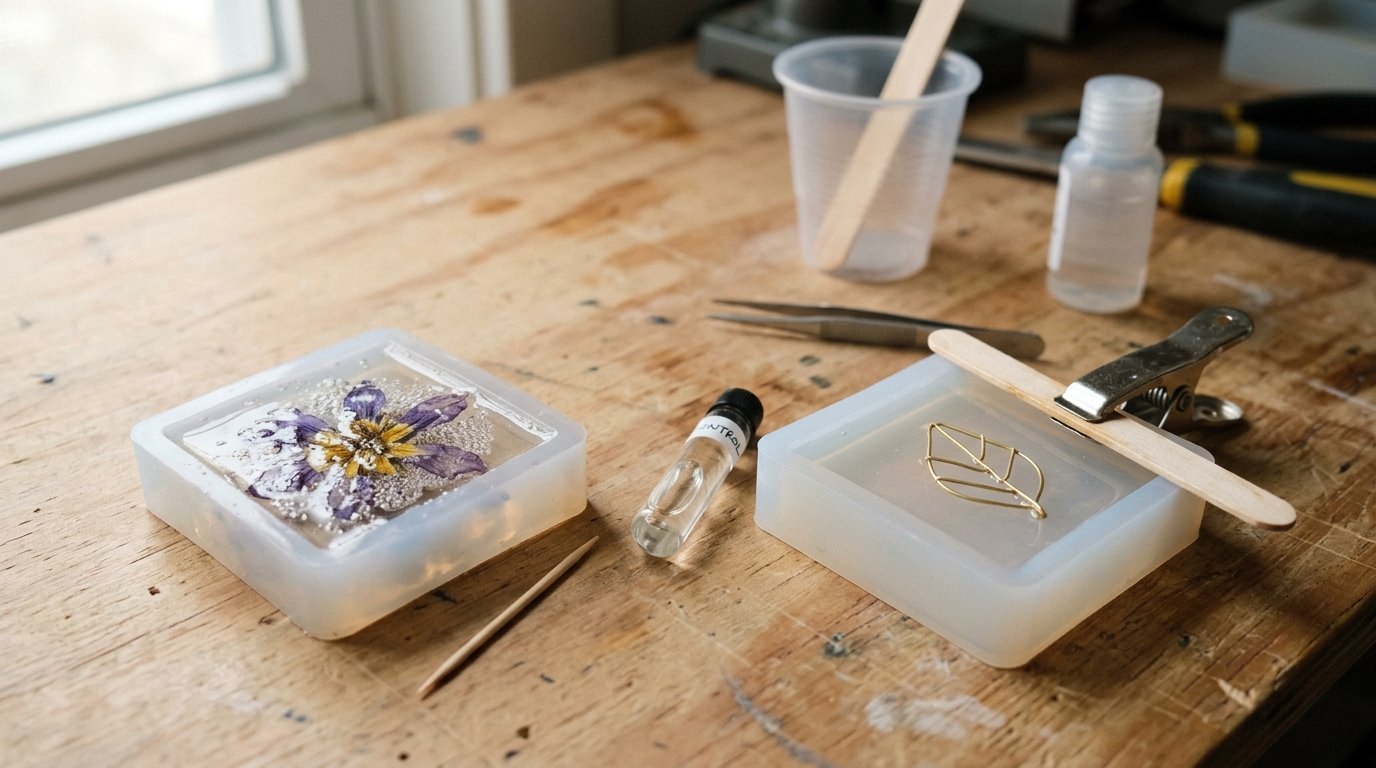
Step 5: Place the Items in the Resin
Place items while the base layer is still wet if you want them to bond immediately. If lightweight items are likely to float, wait until the base layer becomes slightly gelled or tacky, then position them so they are better anchored.
Use tweezers, toothpicks, or a craft stick for accurate placement. Check the orientation carefully, especially with photos, text, dried flowers, and objects with a front and back. Leave enough spacing between items so resin can flow around them.
Press textured pieces gently into the resin to help release trapped air. Watch for bubbles rising from edges, holes, and rough surfaces. Lightweight items may float upward, while heavy items may sink, so adjust timing and layering based on the object.
Step 6: Add Resin in Layers Until the Items Are Covered
Add more resin in stages rather than flooding the mold all at once. Layering reduces bubbles, overheating, and object movement. It also gives you more control over floating items.
For many embeds, let the first layer reach a tacky stage before pouring the next layer. This helps hold the object in place while still allowing the layers to bond. Always follow your resin’s recoat window; some epoxies require the next layer within a certain time, while others may need sanding if fully cured.
For deep embeds, use a deep-pour resin and build the piece according to the allowed pour depth. Leave enough clear resin above the object to create a smooth top. For domed pieces, add a final careful layer after the main embed is stable.
Step 7: Remove Bubbles and Let the Epoxy Cure
After each pour, remove bubbles while the resin is still fluid. Use a heat gun or small torch in quick passes over the surface. Keep it moving and do not hold heat in one spot. Too much heat can scorch resin, damage dried flowers, warp photos, or melt plastic embeds.
Use a toothpick to pull bubbles away from detailed areas, corners, holes, and textured objects. This is often safer than blasting delicate items with heat.
Cover the project with a dust cover and let it cure undisturbed. Follow the product’s cure time, not just the time when the surface feels dry. Moving or demolding too soon can bend, dent, or mark the resin.
Result Check: How to Know the Embed Worked
Your embed worked if the item is fully covered, the resin is hard, and the surface is not tacky. Bubbles should be minimal, with no large trapped pockets around the object. The resin should look clear, not cloudy or milky near the embed.
The object should not have shifted dramatically, floated to the top, or sunk out of view unless that was intended. The surface should be level and smooth. If needed, you can sand rough edges, polish the surface, or add a final clear coat once the resin is properly cured.
Common Mistakes and How to Fix Them
Bubbles around objects: The item was porous, textured, or placed too quickly. Seal porous items first, pour in thin layers, and use a toothpick to release trapped air.
Items floating: The resin was too fluid or the item was too light. Let the base layer gel slightly, anchor the item in stages, or pour thinner layers.
Paper turning translucent: The paper was not sealed well. Seal both sides and edges before embedding.
Flowers browning: The flowers were fresh or not fully dried. Use properly dried flowers only.
Cloudy resin: Moisture, overheating, or incompatible materials may be the cause. Keep objects dry and use the correct resin depth.
Tacky cure: This usually means an incorrect ratio, poor mixing, or cold conditions. Uncured resin may need removal. If it is stable but slightly tacky, you may be able to seal it under a properly mixed cured layer.
Visible layer lines: The previous layer cured too long. Recoat within the manufacturer’s window or sand lightly before adding more resin.
FAQ
Do You Have to Seal Items Before Putting Them in Epoxy?
You should seal porous items before putting them in epoxy. Paper, photos, wood, fabric, dried flowers, and shells can release air or absorb resin. Sealing helps prevent bubbles, dark spots, translucency, and discoloration. Nonporous items like clean glass or metal may not need sealing.
How Do You Keep Objects from Floating in Resin?
To keep objects from floating, pour a thin base layer first and let it become slightly tacky before placing the item. Then add resin in layers instead of one deep pour. You can also hold small items in position with tweezers until the resin starts to thicken.
Can You Embed Fresh Flowers in Epoxy?
Fresh flowers should not be embedded directly in epoxy. They contain moisture, which can cause bubbles, browning, rot, and cloudy resin. Dry flowers thoroughly first using silica gel, pressing, or another drying method. Once fully dry, seal delicate flowers before placing them in resin.
Why Are Bubbles Forming Around the Item I Embedded?
Bubbles form when air escapes from porous or textured items after they are placed in resin. Wood, dried flowers, shells, paper edges, and rough surfaces are common sources. Seal the item first, pour thinner layers, press gently to release air, and remove bubbles with a toothpick.
Can You Embed Photos or Paper in Epoxy Resin?
Yes, you can embed photos or paper in epoxy resin, but they must be sealed first. Coat both sides and all edges with a clear sealer and let it dry completely. Without sealing, resin can soak into the paper and make it translucent, blotchy, or discolored.