Making a large resin skull is mostly about controlling heat, bubbles, and mold support. The safest approach is to use a casting or deep-pour resin, brace the mold so it cannot spread, coat the details first, and then build the skull in smaller pours instead of one oversized batch. After the resin fully cures, demold slowly, trim the seam, sand the surface, and add any final finish. Bigger casts are less forgiving than small resin projects, so accuracy matters: measure exactly, stay within the resin’s pour-depth limits, and give each stage enough cure time to avoid cracks, voids, or soft spots.
What You Need Before You Start
Before mixing resin, gather supplies and set up a stable workspace. Large skull casts punish rushed prep.
You’ll need:
- A large silicone skull mold
- Casting resin or deep-pour epoxy rated for thicker pours
- The matching hardener
- Graduated mixing cups
- Stir sticks
- Nitrile gloves
- A respirator and ventilation if your resin requires them
- Heat gun or small torch for surface bubbles, if approved for your resin and mold
- Isopropyl alcohol and paper towels
- Mold release, if the mold maker recommends it
- Painter’s tape, rubber bands, towels, sand, rice, or a container to support the mold upright
- Craft knife or flush cutters
- Wet/dry sandpaper in multiple grits
- Optional pigments, wax, paint, or a display base
Check these prerequisites first:
- Confirm room temperature. Most casting resins cure best in a warm, steady room. Cold resin stays thick and traps bubbles.
- Make sure everything is dry. Moisture can cause cloudiness or cure problems.
- Read the resin’s maximum pour depth. If the skull is deeper than the rated thickness, plan layered pours.
- Test the empty mold. Large silicone molds can sag or bow. Support it in a bowl, box, or bucket before adding resin.
- Estimate total volume. Fill the mold with water, pour that into a measuring cup, then dry the mold completely.
Practical warning: do not use a fast coating resin for a large skull unless the label clearly allows deep casting. Large pours create more heat, and the wrong resin can yellow, crack, or distort the mold.
Step 1
Use this stage to prepare the mold, seal the details, and set yourself up for a cleaner full pour.
- Clean and inspect the mold.
Remove lint, dust, and cured resin bits. Check teeth, eye sockets, nasal cavities, and thin edges. If the mold has a seam, close it firmly with tape or bands without squeezing the shape out of alignment.
- Support the mold before pouring.
Nest it in a container lined with towels, sand, or rice so it stays upright and keeps its shape. Adjust the angle now. A large silicone mold can widen once filled.
- Mix a small starter batch exactly to ratio.
Measure slowly, stir for the full time on the label, and scrape the cup sides and bottom. If your resin benefits from double-cupping, transfer to a second cup and stir again to avoid unmixed streaks.
- Coat the fine details first.
Pour or brush a thin layer into the mold and rotate it so resin reaches the teeth, eye sockets, and recesses. This pushes out trapped air before the heavier fill. If you want a bone tone, tint this coat lightly with ivory, white, gray, or tan pigment.
- Release early bubbles.
Tap the mold, flex the silicone gently, or pass brief heat over the open top if the resin allows it. For detailed molds, tapping often works better than overheating the surface.
- Let the detail coat settle.
Wait long enough for bubbles to rise, but stay inside the resin’s recoat window unless you intentionally want firm layers.
Caution: Don’t start with one huge mixed batch just to save time. Large volumes heat faster in the cup than in the mold and can cure too quickly, yellow, or crack.
If something looks wrong now:
- Bubbles in teeth or eyes: rotate longer and use a thinner detail coat.
- Mold walls bowing outward: stop and add better support.
- Resin looks streaky: discard that batch and remix accurately.
Step 2
Now build the skull in controlled pours, monitor the cure, and finish the piece without damaging it.
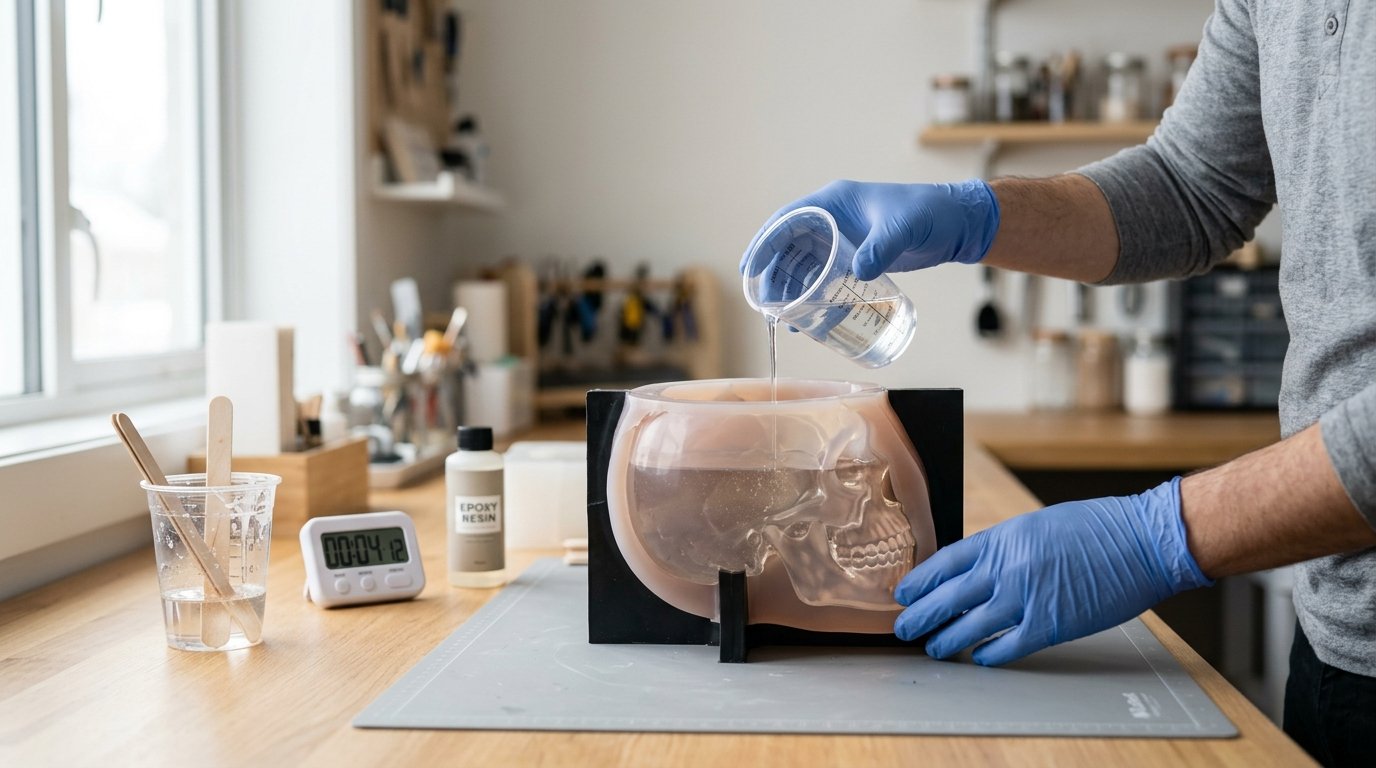
- Mix the main resin in manageable batches.
Divide the total volume into pours that stay within the product’s depth limit. Pour slowly down the inside wall of the mold instead of dropping resin straight into the center.
- Release bubbles after each pour.
Tap the sides, gently squeeze around undercuts, and use brief heat only on the exposed surface if safe. If the opening is narrow, use a long stir stick to coax bubbles up from deep pockets.
- Pour in layers when needed.
Some deep-pour resins allow thicker fills, but many skulls cure more safely in stages. Let each layer reach the manufacturer’s recommended recoat stage before adding the next. This helps reduce heat buildup, sink marks, and internal stress.
- Watch for overheating.
Feel near the outside of the mold during cure. Mild warmth is normal. If it becomes very hot, starts distorting, or produces sharp odor changes, the pour is too aggressive. Move it to a safe ventilated area and let it finish undisturbed.
- Top off carefully.
Check the fill level after 10 to 20 minutes. Resin can settle as bubbles escape. Add only a little more if needed; overfilling creates excess flash and more cleanup.
- Wait for a full cure before demolding.
A large skull may feel hard outside while staying soft in the center. Follow the full cure schedule, and add extra time in a cool room.
- Demold, trim, and sand.
Peel the mold away slowly around the teeth and jaw. Trim flash with a craft knife or cutters. Wet sand seam lines from medium grit to finer grit. If you want more definition, rub dark wax or paint into the recesses and wipe the high spots clean. If you prefer a glossy finish, apply a thin clear coat after sanding.
Caution: Never force an early demold. A partly cured large casting can warp, dent, or tear delicate details.
Common fixes:
- Sticky patch: usually from inaccurate measuring or poor mixing; scrape shallow areas and patch with fresh resin.
- Small void: fill with a matching tinted batch and sand smooth after cure.
- Cloudy area: often caused by moisture or overheating; surface haze may sand out, but deep clouding usually remains visible.
- Crack line: often caused by too much heat or an overly thick pour; patching may hide it, but strength may be reduced.
How to Check the Result
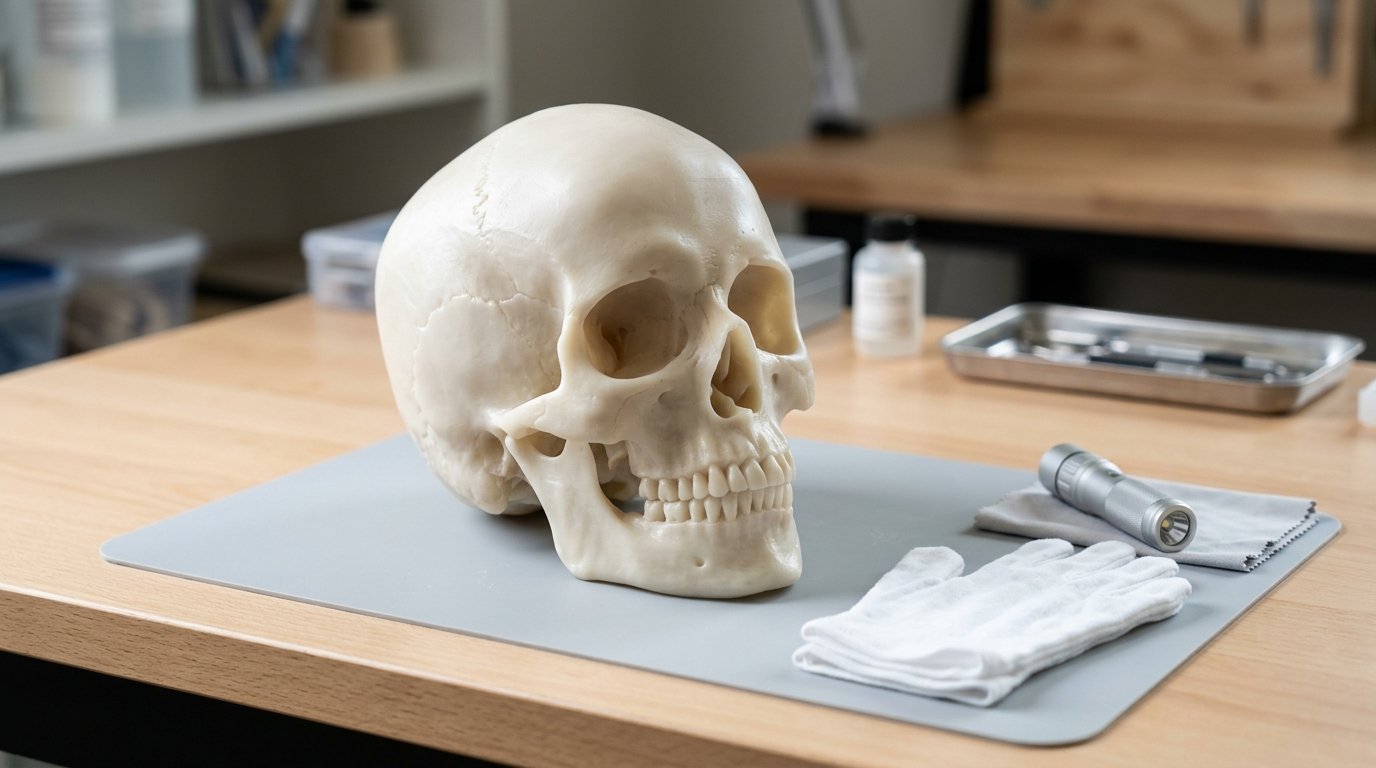
A successful large resin skull should be fully cured, evenly shaped, and well defined in the details.
Check it in this order:
- Press the thickest areas.
Press the base, crown, and jaw with your thumb. The resin should feel hard, not rubbery or dentable. If it still gives, let it cure longer.
- Look at the overall shape.
Set the skull on a flat surface and view it from the front, side, and top. It should not lean from a collapsed wall unless that was intentional. Bowed cheeks or a twisted jaw usually mean the mold was not supported well enough.
- Inspect fine details closely.
Teeth, eye sockets, seams, and the nasal cavity should be formed clearly. A few pinholes are fixable, but larger missing areas point to trapped air or poor first-coat coverage.
- Check for cure defects.
Look for yellow scorch marks, internal cracks, greasy spots, ripples, or wet-looking streaks. These often signal overheating, incomplete mixing, or bad measuring.
- Judge the finish.
Sanded seam lines should feel smooth. Pigment should look even unless you wanted a marbled effect. If you topcoated the skull, the surface should be uniform rather than patchy.
If your skull passes those checks, it is ready for display, painting, mounting, or seasonal decor use.
FAQ
What resin works best for a large skull mold?
A casting or deep-pour epoxy is usually best because it is designed for thicker pours and lower heat buildup. Avoid fast-curing coating resins unless the label specifically says they can handle deep casts.
Can I make a large resin skull hollow instead of solid?
Yes. Use a slush-casting method by rotating small batches around the inside of the mold and letting each coat firm before adding the next. This saves resin, reduces weight, and lowers heat, but it takes longer to build even walls.
How do I keep bubbles out of deep skull details?
Start with a thin detail coat, rotate the mold so resin reaches the teeth and eye sockets, pour slowly down the mold wall, and tap or flex the mold between layers. Brief surface heat can help, but don’t overdo it.
Why did my large resin skull crack or get too hot?
Usually because the resin was poured too thick, mixed in too large a batch, or was the wrong type for deep casting. Use a deep-pour resin, keep batches smaller, support the mold well, and pour in stages to reduce exotherm.