
Drying flowers is a wonderful way to preserve their beauty and memories. You can enjoy their colors and shapes long after their growing season has ended. Whether you want to save a special bouquet or create your own dried flower art, there are several easy methods that work well at home.
The best way to dry flowers is by hanging small bunches upside down in a warm, dry space like an attic or shed for 2-3 weeks. This simple air-drying method helps flowers keep their shape while they slowly lose moisture. For faster results, you can try using desiccants like silica gel or even kitty litter to draw moisture out of the blooms.
You don’t need fancy equipment to start drying your fresh flowers. Simple materials from around your home can help you transform beautiful blooms into lasting decorations. Just remember to check on your drying flowers regularly to make sure they’re not developing mold, especially if you live in a humid environment.
Essentials of Drying Flowers
Drying flowers is a wonderful way to preserve their beauty long after they’ve bloomed. The process helps maintain color and structure when done properly, allowing you to enjoy your favorite blooms for months or even years.
Understanding the Basics
When drying flowers, timing is everything! Pick your flowers in the morning after the dew has dried but before the day gets too hot. Choose blooms that are just past their prime but not wilted.
There are several methods you can use to dry your flowers:
- Air drying: Hang bundles upside down in a dark, dry area with good air circulation
- Silica gel: Cover flowers completely in silica gel in an airtight container for faster results
- Microwave drying: Use silica gel and a microwave for quick drying (1-3 minutes)
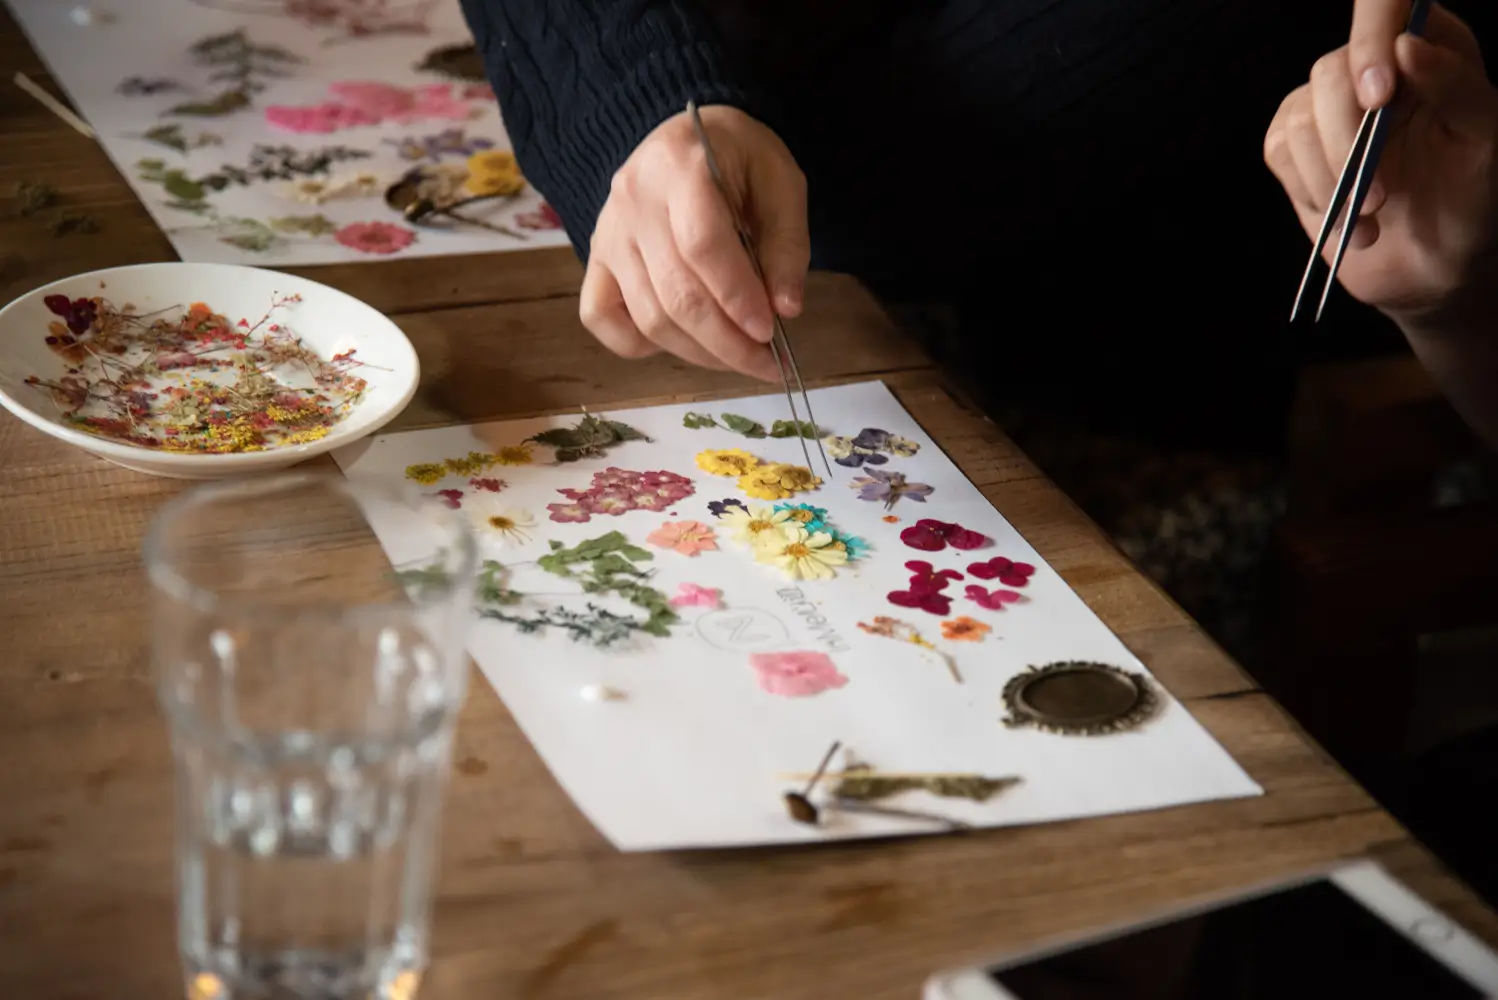
- Pressing: Place flowers between absorbent paper in heavy books
Silica gel is amazing for preserving the 3D shape of flowers. It wicks moisture away while helping flowers keep their form and vibrant colors.
Choosing the Right Flowers for Drying
Not all flowers dry the same way! Some preserve their color and form better than others.
Best flowers for drying include:
- Roses: Pick when half-open for best results
- Lavender: Perfect for beginners, dries beautifully with its scent intact
- Statice: Already naturally dry-looking, these retain their color perfectly
- Peonies: Choose fully open blooms and use silica gel for best shape retention
Flowers with high water content like tulips are trickier to dry. Darker colored flowers typically retain their color better than pale ones.
Try experimenting with different varieties to see what works best for you. You’ll be surprised at how many flowers can become lasting decorations for your home!
Techniques for Drying Flowers
Preserving flowers lets you enjoy their beauty long after they’ve wilted. There are several easy methods to dry flowers, each with its own unique results and level of difficulty.
Air Drying Method
Air drying is the simplest and most traditional technique for preserving flowers. Start by gathering your flowers when they’re just past their prime but not wilted. Remove excess leaves and cut stems to your desired length.
What you’ll need:
- String or rubber bands
- Dark, dry space with good air circulation
- Optional: clothes hanger
Bunch 5-8 stems together and secure them with string or a rubber band. Hang them upside down in a dark, dry place with good air circulation. A closet, attic, or unused room works well.
The drying process typically takes 2-3 weeks. You’ll know your flowers are ready when they feel dry and crisp to the touch. Once dried, they may be more fragile and slightly faded in color compared to fresh blooms.
Pressing Flowers Technique
Pressing creates beautiful flat specimens perfect for crafts, cards, and framed art. Choose flowers that are naturally flat or can be flattened easily.
Materials needed:
- Heavy books or a flower press
- Absorbent paper (parchment paper or coffee filters work well)
- Cardboard pieces (optional)
Place your flowers between two pieces of absorbent paper. Make sure petals are arranged how you want them to look when pressed. Put this between book pages or in a flower press.
Stack heavy books on top if using the book method. Check your flowers after about 2-3 weeks. They should be completely dry and paper-thin. Store pressed flowers between sheets of paper until you’re ready to use them.
Alternative Drying Methods
For quicker results, try using silica gel or microwave drying. Silica gel preserves the shape and color of flowers better than air drying.
Silica gel method:
- Place a layer of silica gel in a container
- Position flowers on top
- Gently cover with more silica gel
- Seal container and wait 3-7 days
Microwave drying:
- Sandwich flowers between paper towels
- Place in microwave with a glass of water
- Heat in 30-second bursts, checking between each
- Total time usually takes 1-3 minutes depending on flower type
You can also use kitty litter as a budget-friendly alternative to silica gel. Both these methods help maintain the flower’s natural shape and vibrant colors much better than air drying alone.
Preparing Flowers for Drying
Before you start the drying process, proper preparation of your flowers is crucial for achieving the best results. Taking time to clean and support your blooms will help them maintain their shape and color throughout drying.
Cleaning and Trimming
Start by selecting fresh flowers that are free from damage and in their prime. Flowers that are too mature might lose their petals during drying.
Remove any dirt or insects by gently shaking the blooms or using a soft brush. Be careful not to damage delicate petals.
Cut stems to your desired length, usually 6-8 inches works well for hanging methods. Remember that stems will shrink somewhat during drying.
Strip away leaves from the stems, as they tend to mold during the drying process. This helps air circulate better around your flowers.
For best results, harvest your flowers in mid-morning after the dew has evaporated but before the heat of the day.
Using Florist’s Wire for Support
Florist’s wire is essential for flowers with heavy heads like roses or tulips. Without support, these flowers can droop and lose their shape as they dry.
Choose a wire gauge appropriate for your flower type – 22-24 gauge works well for medium-sized blooms. Heavier blooms may need thicker wire.
Insert the wire through the base of the flower head and down the stem. For extra sturdy support, fold the wire in half and push both ends through.
You can also create a small hook at the end of the wire to hang your flowers upside down. This prevents them from sliding off during the drying process.
Wrap floral tape around the wire and stem to create a natural look. The tape helps hold everything together while concealing the wire support.
Creative Ideas for Dried Flowers
Once you’ve mastered drying your flowers, the fun really begins! Your preserved blooms can transform into beautiful decor and gifts that last for months or even years.
Making Dried Arrangements
Dried flower arrangements add a touch of natural beauty to any space. Start by selecting dried flowers with different heights, textures, and colors. Tall elements like dried grasses or eucalyptus make excellent backgrounds.
Group similar colors together or create contrast with complementary shades. You can place your arrangement in a simple vase or get creative with vintage containers, mason jars, or even hollowed-out books.
Try making a dried flower wreath by attaching your blooms to a wire or straw base using florist wire. These make lovely door decorations or wall hangings.
For a simpler project, create a swag by bundling dried flowers together with ribbon or twine. Hang these on walls, doors, or even above a bed for a dreamy effect.
Crafting with Dried Flowers
Dried flowers can enhance many craft projects! Press flowers between book pages or in a flower press, then use them to decorate handmade cards, bookmarks, or framed art.
Make your own potpourri by combining dried flower petals with essential oils and spices. Store in pretty bowls around your home for natural fragrance.
Try embedding dried flowers in candles or soap for beautiful handmade gifts. You can also add them to clear phone cases, jewelry, or coasters using resin.
Create custom wall art by arranging pressed flowers in shadow boxes or floating frames. These make wonderful personalized gifts that preserve special memories like wedding bouquets or anniversary flowers.
Don’t forget to save some dried petals for bath products! Mix them with Epsom salts for a luxurious soak.
Best Flowers for Drying
Some flowers hold their shape and color better than others when dried. The right blooms can create beautiful arrangements that last for months or even years without water.
Eternal Everlastings and Strawflowers
Everlastings are nature’s gift to dried flower lovers. These papery blooms retain their shape and vibrant colors long after being cut. You can identify them by their stiff, straw-like petals that rustle when touched.
Strawflowers are a top choice with their bright daisy-like appearance. They come in reds, yellows, oranges, and pinks that stay vivid after drying. To preserve them best, cut strawflowers when they’re only partially open.
Both these varieties need minimal effort to dry. Simply hang them upside down in a dark, dry place for about two weeks. The magic of these flowers is that they look almost the same dried as they do fresh!
Lavish Larkspur and Hydrangea
Larkspur adds height and delicate beauty to dried arrangements. These tall spikes come in purples, pinks, and whites that fade to a vintage palette when dried. Cut larkspur stems when about half the flowers are open for best results.
Hydrangeas are surprisingly easy to dry and maintain their puffy, cloud-like appearance. You can simply place them in a vase with a small amount of water and let them dry naturally as the water evaporates.
For more vibrant hydrangeas, cut them at peak bloom in late summer. The green varieties often dry to lovely jade and sage tones, while blue ones take on a vintage look. These make perfect focal points in dried arrangements.
Captivating Celosia and Amaranthus
Celosia offers dramatic shapes perfect for drying. The crested varieties (called “cockscomb”) have ruffled, brain-like blooms, while plume types feature feathery spikes. Both maintain their striking forms and rich colors when dried.
For best results with celosia, cut stems when seeds start forming underneath the combs. Hang them upside down in a cool, dark spot for about a month.
Amaranthus, with its dramatic cascading tassels, creates movement in dried arrangements. These striking flowers come in burgundy, green, and gold tones that dry beautifully. The long drooping varieties are called “love-lies-bleeding” and add elegance to any dried display.
Both celosia and amaranthus add texture and drama that few other dried flowers can match.
Tips for Prolonging the Life of Dried Flowers
Dried flowers can last for months or even years with proper care. The key is keeping them away from moisture and direct sunlight while handling them gently to preserve their delicate structure.
Optimal Storage Conditions
Keep your dried flowers in a warm, dry place. Moisture is their worst enemy! It can make stems weak and cause mold to grow. Never put them in bathrooms or kitchens where humidity levels are high.
Avoid direct sunlight which can fade the beautiful colors of your dried blooms. A display shelf away from windows works well. If you notice your arrangement starting to look dusty, don’t wash it! Instead, use a hair dryer on the cool setting from a distance to gently blow dust away.
Temperature matters too. Keep dried flowers away from heat sources like radiators or fireplaces. A stable room temperature is best for preserving their quality.
Preventive Care Techniques
Handle your dried flowers as little as possible. Each touch can cause petals to break or fall off. When you need to move them, support the whole arrangement rather than grabbing individual stems.
Try not to move your dried arrangements around too often. Find a good spot and let them be! If you’ve used silica gel to dry your flowers, you can refresh them occasionally with a light dusting of the same gel to absorb any moisture they may have picked up.
For extra protection, some people apply a light mist of hairspray to seal their dried flowers. This creates a protective barrier against humidity. Just spray from about 12 inches away to avoid soaking the petals.
Incorporating Dried Flowers into Home Decor
Dried flowers bring natural beauty and lasting charm to your home. They offer endless creative possibilities for adding color, texture, and personality to any space.
Designing with Color and Texture
When decorating with dried flowers, think about how their colors will complement your existing decor. Neutral-toned blooms like wheat, pampas grass, and bleached ruscus work beautifully in modern or minimalist spaces. For bolder looks, try vibrant dried options like bright yellow billy buttons or preserved red roses.
Mix different textures for visual interest. Pair fluffy hydrangeas with sleek eucalyptus or spiky thistle. Try arranging them in:
- Wall hangings: Create a simple wreath or more complex wall art
- Table centerpieces: Place in vintage bottles or modern vases
- Shadow boxes: Press and frame your favorite blooms
Remember to place dried arrangements away from direct sunlight to prevent fading. Good ventilation also helps maintain their beauty longer.
Seasonal Decor Ideas
Update your dried flower displays with the changing seasons. In spring, showcase delicate dried lavender and baby’s breath in small bud vases throughout your home. For summer, bright sunflowers and colorful wildflowers create cheerful arrangements.
Fall is perfect for:
- Wheat stalks and dried grasses
- Orange and red maple leaves
- Deep burgundy amaranthus
Winter calls for elegant dried eucalyptus, pine cones, and white statice. You can also add seasonal elements like cinnamon sticks or orange slices to holiday arrangements.
Try hanging small bundles of seasonal dried flowers in your kitchen or bathroom. They’ll add a subtle fragrance and visual interest to often-overlooked spaces. You can also incorporate dried flowers into wreaths for your front door to welcome guests with natural beauty all year long.
Growing Flowers with Drying in Mind
Planning your garden with flower drying in mind can make a huge difference in your final results. When you choose the right plants and care for them properly, you’ll harvest blooms that maintain their color, shape, and beauty through the drying process.
Selecting Varieties for Drying
Best flower types for drying:
- Globe amaranth
- Strawflower
- Statice
- Celosia
- Lavender
- Hydrangeas
- Roses
- Yarrow
Look for flowers with sturdy stems and naturally drier textures. Globe amaranth and strawflower have papery petals that hold their shape beautifully. Ornamental grasses like bunny tails and pampas grass add wonderful texture to dried arrangements.
Don’t forget herbs like lavender, rosemary, and thyme! They maintain their lovely scent even when dried. When shopping for seeds, check packet labels for varieties specifically noted as good for drying.
Colors matter too! Deep purples, blues, and pinks tend to fade less than bright reds and oranges. White flowers often develop a lovely cream or antique look when dried.
Gardening Techniques for Better Drying Quality
Water your drying garden less frequently than regular flowers. Plants grown slightly “thirsty” often develop sturdier stems and more concentrated colors that dry better.
Harvest timing is crucial. Pick flowers in mid-morning after dew has dried but before the heat of the day. For most varieties, harvest when blooms are not fully open – about 75% developed is perfect.
Avoid fertilizers high in nitrogen, which create lush but often fragile growth. Instead, choose balanced or low-nitrogen formulas to encourage sturdy stems and vibrant blooms.
Keep your drying flowers separate from plants that need lots of water. This makes it easier to give each what they need. Growing in full sun helps develop stronger stems and more vivid colors that will last through drying.
The Role of Dried Flowers in Sustainable Practices
Dried flowers offer a wonderful way to embrace sustainability in your home decor and gift-giving. They reduce waste and provide long-lasting beauty without the environmental impact of fresh flowers.
Eco-Friendly Benefits of Dried Flowers
Dried flowers are incredibly sustainable compared to fresh flowers. They don’t need constant replacement, which means fewer resources are used over time. When you choose locally grown and naturally dried flowers, you’re reducing the carbon footprint associated with importing fresh blooms.
Unlike fresh flowers that might last only a week, dried flowers can beautify your space for months or even years with minimal care. This longevity means less waste and more enjoyment from a single purchase.
Seasonal dried flowers also allow you to enjoy local blooms year-round. By drying flowers from your garden or local farms, you’re supporting sustainable agriculture and reducing the demand for greenhouse-grown flowers in winter months.
Water conservation is another major benefit. Dried flowers require no water once preserved, saving this precious resource.
Reusing Dried Flowers in Creative Ways
Once you have dried flowers, their usefulness extends far beyond simple arrangements. You can crush dried petals to create natural, biodegradable confetti for celebrations – a lovely alternative to plastic options.
Try incorporating dried flowers into homemade paper for cards or stationery. The embedded blooms add texture and beauty to your creations.
Dried lavender, roses, and other fragrant flowers make wonderful potpourri. Fill small fabric sachets with these flowers to freshen drawers and closets naturally without artificial scents.
You can also use dried flowers in crafting natural candles. Embed them in beeswax or soy wax for decorative, eco-friendly lighting options.
Don’t forget about culinary uses! Dried edible flowers like chamomile, roses, and hibiscus can flavor teas, baked goods, and even cocktails.
Packaging and Gifting Dried Flowers
Once you’ve successfully dried your flowers, presenting them beautifully can make them special keepsakes or thoughtful gifts. The right packaging enhances their beauty and helps protect their delicate nature.
Decorative Wrapping and Presentation
Wrap dried flowers in tissue paper or butcher paper for a professional look. Cut the paper into a triangle shape and wrap it around the bouquet with only the top open, just like flower shops do. This protects the delicate blooms while showing them off.
For single stems or small bunches, try using decorative envelopes or small gift boxes lined with tissue paper. This adds an elegant touch to your gift.
Clear cellophane wrapping works well too! It shows off the flowers while keeping them protected. Secure with a pretty ribbon or twine for a finished look.
Top tip: Include a small care card explaining how to maintain dried flowers and how long they typically last.
Creating Gift Bouquets
Mix different dried flowers for interesting textures and colors in your gift bouquets. Combine larger blooms like roses or sunflowers with smaller fillers such as baby’s breath or lavender.
Popular dried flower combinations:
- Lavender and roses for a romantic gift
- Sunflowers and wheat for a rustic look
- Eucalyptus and white flowers for an elegant arrangement
Add special touches to make your gift unique. Tie bouquets with decorative ribbon, twine, or lace. You can attach a small handwritten note or tag to make it personal.
For a complete gift, consider placing your dried bouquet in a decorative vase or container. Mason jars, vintage bottles, or small ceramic pots make perfect vessels for dried flower arrangements.