

Resin coasters are a fun, creative project that anyone can try at home. They make beautiful gifts or decorations for your own space. With some simple supplies and a bit of patience, you can create unique coasters that reflect your personal style.
Making resin coasters involves mixing epoxy resin, adding colors or decorative elements, pouring the mixture into molds, and letting it cure. The process is straightforward but requires some safety precautions. You’ll want to work in a well-ventilated area and wear protective gloves to keep the resin off your skin.
The best part about making resin coasters is how customizable they are. You can add different colors, glitter, dried flowers, or even photos to create one-of-a-kind pieces. Plus, they’re practical items that you and your guests will actually use during gatherings while enjoying cold drinks.
Understanding Resin for Crafting
Resin is an amazing material that lets you create beautiful, glass-like coasters for your home. Before you start pouring and mixing, it’s helpful to know what types of resin are available and which ones work best for coaster projects.
Types of Resin
When making coasters, you’ll typically work with epoxy resin. This type comes as two separate components—a resin and a hardener—that you mix together to start the curing process.
Clear Resin is perfect for showcasing colorful designs or embedding objects like dried flowers or photos. It cures to a crystal-clear finish that looks like glass.
EasyCast Clear Casting Epoxy is popular among beginners because it’s forgiving and relatively easy to work with. It has a longer working time, giving you about 30 minutes to mix colors and pour before it starts setting.
Brilliant Resin offers excellent UV resistance, which means your coasters won’t yellow over time when exposed to sunlight. This makes it ideal for pieces you plan to display near windows or in bright areas.
Each type has different curing times, ranging from 24-72 hours. Always read the manufacturer’s instructions before starting your project!
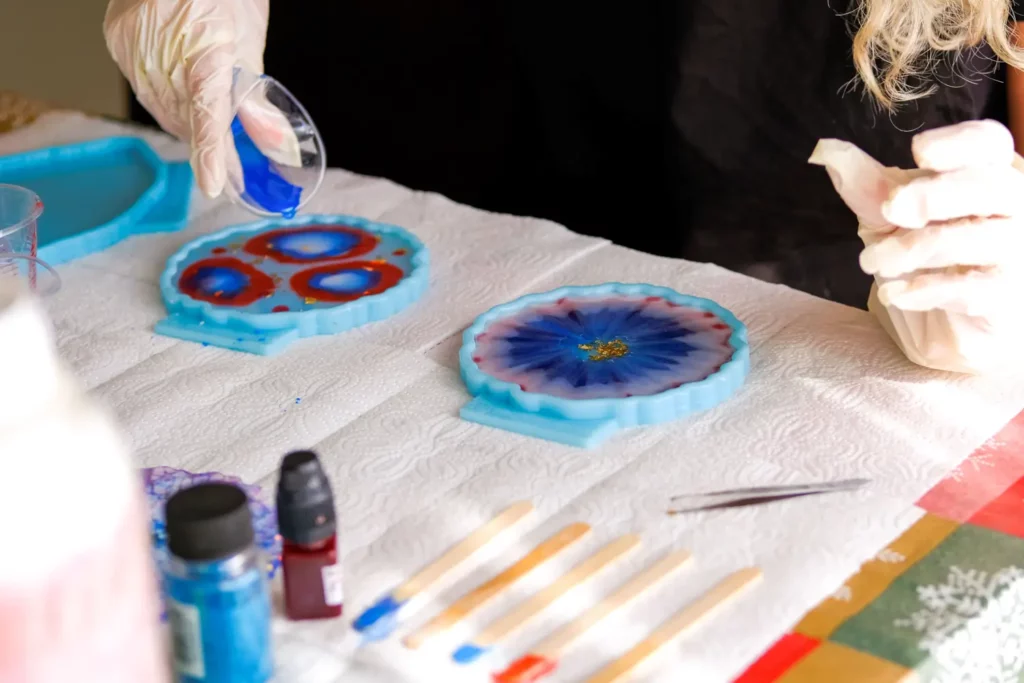
Essential Materials and Tools
Before diving into your resin coaster project, you’ll need to gather specific supplies. Having everything ready will make the creative process smoother and more enjoyable.
Choosing the Right Mold
Silicone molds are perfect for resin coasters because they’re flexible and allow for easy removal of your finished piece. Look for circular or square molds specifically designed for coasters, usually 4-4.5 inches in diameter.
Many craft stores offer molds with interesting textures or patterns that can add unique details to your coasters. If you’re a beginner, start with simple shapes before trying more complex designs.
Remember to check if your mold has a shiny interior surface – this will give your coasters a glossy finish on that side. Some molds come with built-in holes for hanging, which you can use or fill in as desired.
It’s worth investing in quality molds as they can be reused many times and will give you better results!
The Importance of Paper Towels and Toothpicks
Paper towels and toothpicks might seem like minor supplies, but they’re incredibly useful when making resin coasters.
Keep plenty of paper towels handy for cleaning up small spills and drips before they harden. They’re also perfect for wiping your tools between uses to prevent cross-contamination of colors.
Toothpicks are your secret weapon for precision work! Use them to:
- Pop tiny air bubbles that form in your resin
- Create swirl patterns in colored resin
- Move small embellishments like glitter or dried flowers into place
- Reach into corners of your mold for detailed work
Having these simple tools within reach will help you avoid frustration and achieve professional-looking results in your resin coaster projects.
Preparing Your Workspace
Before you dive into creating beautiful resin coasters, setting up your workspace properly is crucial. A well-prepared area will keep you safe and make the crafting process much more enjoyable.
Safety First
Working with resin requires careful attention to safety. Always wear nitrile gloves to protect your skin from direct contact with epoxy resin, which can cause irritation or allergic reactions.
A respirator mask is essential, especially if you’re working indoors. Resin fumes can be harmful when inhaled. Make sure your workspace has good ventilation—open windows or use a fan to circulate air.
Cover your work surface with a silicone mat or plastic sheet. Resin is very sticky and difficult to remove once cured.
Wear protective eyewear to shield your eyes from splashes. Keep your work area away from children and pets, as uncured resin is toxic.
Have paper towels and rubbing alcohol nearby for quick cleanup of spills or drips. Remember, safety comes first!
Organization Tips
Arrange all your supplies before mixing any resin. This includes your resin components, mixing cups, stir sticks, colorants, and molds.
Create designated zones on your workspace:
- Mixing area (keep this clear of decorative elements)
- Pouring station (where your molds will sit)
- Decoration area (for arranging items to embed)
- Tools section (for heat guns, tweezers, etc.)
Use small containers for organizing tiny embellishments like glitter, dried flowers, or other decorative elements. Label your measuring tools to avoid cross-contamination between resin parts.
Keep a dedicated trash bag nearby for disposable items. Position your heat gun or torch within reach but away from flammable materials.
A level surface is absolutely essential for creating even coasters. Use a bubble level to check your work area before pouring.

Mixing Your Resin
Mixing resin properly is one of the most critical steps in creating beautiful coasters. Getting this part right ensures your project cures properly and looks professional.
Understanding Resin Mixture Ratios
Most epoxy resins come as two separate components – resin and hardener. These must be mixed in the exact ratio specified by the manufacturer, usually 1:1. Read your product instructions carefully as ratios can vary between brands.
Pour both parts into a clean mixing cup, measuring precisely with marked mixing cups or a digital scale for accuracy. Incorrect ratios can result in tacky surfaces or resin that never fully hardens.
Mix thoroughly for 3-5 minutes, scraping the sides and bottom of your container. Look for a clear, streak-free mixture. Poor mixing is a common cause of cloudy or uncured spots in your finished coasters.
Work in a room that’s between 70-80°F (21-27°C) for ideal results. Temperature affects how quickly your resin cures and its viscosity while working.
After mixing, let your resin sit for 2-3 minutes to allow air bubbles to rise to the surface before pouring.
Designing Your Coasters
The design phase is where your resin coasters truly become unique. You can create stunning effects by choosing different elements to embed in your resin mixture.
Adding Sea Glass and Glitter
When adding sea glass to your resin coasters, place pieces in a pattern that pleases you before pouring your resin. You can create a border effect with larger pieces or scatter smaller fragments throughout for a more random look.
Glitter adds sparkle and dimension to your coasters! Try using different sizes of glitter for varied effects:
- Fine glitter: Creates a subtle shimmer throughout
- Chunky glitter: Makes bold statements and catches light dramatically
- Metallic glitter: Adds luxury and depth to your designs
Mix glitter types for more interesting results! For example, a sea-themed coaster might combine blue fine glitter with silver chunky pieces and clear sea glass.
Remember to distribute your materials evenly in the mold. Too much clustering can create weak spots in your finished coaster.
For a professional finish, make sure sea glass pieces are completely covered by resin to create a smooth surface that won’t catch on cups.
Pouring the Resin
Pouring resin is where your coaster creation really comes to life! This step requires patience and attention to detail to achieve professional-looking results.
Preventing Air Bubbles
Air bubbles can ruin the look of your beautiful resin coasters. Before pouring, warm your resin bottles in warm water for about 10 minutes. This makes the resin thinner and helps bubbles rise more easily.
Pour your mixed resin slowly into your molds from a low height. A thin, steady stream works best rather than dumping it all at once.
After pouring, use a heat gun or torch held 6-8 inches away from the surface to pop bubbles. Move the heat source in quick, sweeping motions rather than focusing on one spot too long.
Tap the sides of your molds gently or place them on a vibrating surface to help stubborn bubbles rise to the top. Work in a warm room (around 75°F) as cold temperatures can make resin thicker and trap more bubbles.
Layering Techniques
Layering resin creates depth and allows you to embed items securely. Pour a thin base layer of resin (about 1/8 inch) into your molds first and let it cure until tacky—usually 2-4 hours depending on your resin type.
When embedding items, gently press them into this tacky layer. This prevents floating and keeps everything in place exactly where you want it.
For beach-style coasters, add your “sand” elements first, then place shells or other decorations on top before adding more resin.
Pour additional layers in thin applications rather than one thick pour. This reduces heat buildup that can cause cracking and allows you to create distinct color separations.
Wait until each layer is at least tacky before adding the next. For perfectly clear layers, wait until each layer is completely cured.
Curing the Resin
After pouring your resin into the coaster molds, it’s time for the curing process. This is when your liquid resin turns into a solid, durable coaster!
The curing time varies depending on the type of resin you’re using. For most epoxy resins, you’ll need to wait between 24 to 72 hours for a full cure. Based on experience, many coasters are firm enough to remove from silicone molds after about 36 hours.
Place your molds on a flat, level surface during curing. Make sure the area is dust-free and at room temperature. Extreme temperatures can affect how your resin cures.
If you’re using UV resin instead of epoxy, the process is different. You’ll need a UV lamp to cure the resin. Simply place your molds under the lamp according to the manufacturer’s instructions.
For clear resin coasters, be extra careful about dust during curing. Even tiny specks can be visible in the finished product!
Don’t rush the curing process. While it might be tempting to remove your coasters early, a fully cured resin will be more durable and less likely to scratch.
Once cured, gently remove your coasters from the molds. If they need a little help, carefully flex the silicone mold to break the seal around the edges.
Demolding and Finishing Touches
After your resin has fully cured, it’s time to remove your creation from the mold and add those special final touches. These steps will transform your project from good to amazing!
Sanding and Polishing
Begin by carefully removing your coaster from the mold. Gently flex the silicone mold edges and slowly peel it away from your hardened resin coaster. If it’s stuck, don’t force it! Try placing it in the freezer for 15-20 minutes as this helps the resin contract slightly.
Check the edges of your coaster for any sharp bits or uneven areas. You can smooth these with sandpaper, starting with 220 grit and working up to 600 or even 1000 grit for a super smooth finish. Always sand in a circular motion.
For a glossy finish, apply a thin layer of resin on top or use a specialized resin polish. If you prefer a more matte look, stop at the fine sanding stage. Remember to wear gloves during this process to avoid fingerprints!
Final Inspection
Hold your coaster up to the light to check for any imperfections you might have missed. Look for air bubbles, uneven spots, or debris that may have gotten trapped in the resin. Small imperfections can be fixed with a tiny drop of resin.
Test the flatness of your coaster by placing it on a level surface. It shouldn’t rock or wobble when you press on different edges. If needed, you can sand the bottom to create a perfectly level base.
Add felt or cork backing to protect surfaces from scratches. Simply cut the backing material to size and attach it with a strong adhesive. This also prevents your beautiful coasters from sliding around on tables!
Troubleshooting Common Issues
Making resin coasters can be fun, but sometimes things don’t go as planned. Here are solutions to the most common problems you might face during your resin crafting journey.
Dealing With Bubble Formation
Bubbles are probably the most frustrating issue in resin work! They can ruin the smooth, glass-like finish that makes coasters beautiful. To prevent bubbles, work in a warm room (around 75-80°F) but avoid overheating your resin as this can cause it to cure too quickly.
Before mixing, warm your resin bottles in warm water for 5-10 minutes. This makes the liquid thinner and bubbles rise more easily.
After pouring, use a heat gun or torch held 3-4 inches away from the surface to pop bubbles. Move it quickly across the surface—don’t hold it in one spot too long!
You can also try the “straw technique” – blow gently through a straw to direct your breath at large bubbles to break them.
Fixing Sticky Resin
If your coasters remain sticky after the full cure time (usually 24-48 hours), don’t panic! This is a common issue with simple solutions.
First, check if you measured your resin and hardener exactly according to instructions. Incorrect ratios are often the culprit. If measurement was correct, your resin might just need more time to cure fully. Give it another 24 hours before handling.
Make sure your workspace isn’t too cold or humid, as both conditions can interfere with proper curing. Ideal temperature is 70-75°F.
For already sticky coasters, you can try applying a thin “seal coat” of properly mixed resin over the surface. This new layer often helps the previous layer cure completely.
Creative Applications
Resin art doesn’t have to stop at coasters! Your creativity can flow into beautiful jewelry pieces and other decorative items using the same techniques you’ve mastered for coasters.
Beyond Coasters: Jewelry Making and More
Once you’ve gotten comfortable with making resin coasters, you can easily transfer these skills to jewelry making. Try creating small pendants using leftover resin from your coaster projects! Simply pour into smaller silicone molds and add tiny decorative elements like dried flowers or small shells.
Keychains are another fun project to try. Use small circle or square molds, embed miniature charms, and attach a keyring once cured.
Wall art is a natural progression from coasters. Use larger molds to create stunning decorative pieces that showcase your favorite colors and techniques.
Don’t forget about practical items too! Small trinket dishes for rings and earrings work wonderfully with resin. You can even make custom phone grips by pouring resin into specialized molds.
The beauty of resin crafting is how versatile it is. The pouring, coloring, and curing techniques you’ve learned making coasters will serve you well in all these creative applications!
Caring for Your Resin Coasters
Your beautiful resin coasters need proper care to keep them looking their best! Here are some simple tips to help them last longer.
Always wash your resin coasters by hand using warm water and mild soap. Avoid the dishwasher, as the heat and harsh detergents can damage the resin finish.
After washing, dry your coasters with a soft cloth. This prevents water spots and keeps them looking shiny.
Don’t use:
- Abrasive scouring pads
- Harsh chemical cleaners
- Sharp objects on the surface
Keep your coasters away from extreme heat. Hot mugs are fine, but don’t place them directly on heat sources or in direct sunlight for long periods.
For stubborn stains, try a gentle wipe with a soft cloth and a tiny bit of mild cleaner. Never scrub aggressively as this can scratch the surface.
If your coasters get minor scratches, you can often restore their shine with a small amount of furniture polish applied with a soft cloth.
Store your resin coasters flat or stacked carefully to avoid warping. Felt pads between stacked coasters can prevent scratching.
With these simple care steps, your handmade resin coasters will continue to protect your surfaces and look gorgeous for years to come!