Making resin jewelry is a simple beginner project when you keep the process small and controlled. The basic workflow is: choose a jewelry mold or bezel, measure and mix resin accurately, add color or inclusions, pour carefully, remove bubbles, let it cure fully, then sand or assemble the piece. Start with easy projects like stud earrings, pendants, or small charms rather than deep molds. Work in a clean, level, dust-free area and follow the resin maker’s safety and curing directions exactly. If you measure well, avoid overfilling, and give the piece enough time to cure, you can make clear, glossy jewelry at home without advanced equipment.
What You Need Before You Start
Gather everything before you open the resin. Once mixed, you will have limited working time.
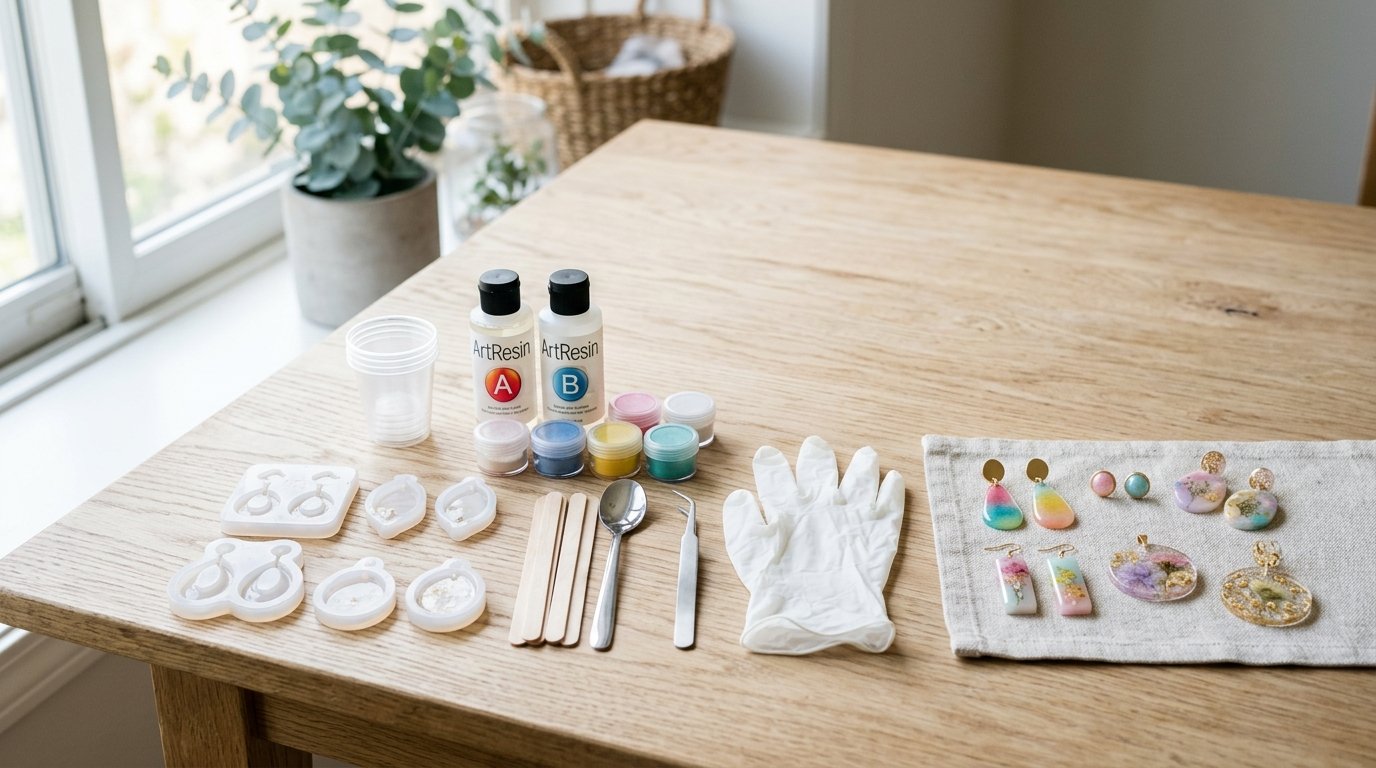
You’ll need:
- Jewelry resin: a clear epoxy resin labeled for casting or jewelry use
- Silicone molds or bezel trays: pendants, earrings, rings, or charm shapes
- Measuring cups: marked clearly for equal or specified resin ratios
- Mixing sticks: wood sticks or silicone stirrers
- Gloves: nitrile is best
- Respirator or strong ventilation: especially if your resin brand recommends it
- Protective surface covering: silicone mat, freezer paper, or plastic sheet
- Toothpicks or pin tools: for placing flowers, glitter, or foil
- Heat tool, mini torch, or spray alcohol: for surface bubbles, if your resin allows it
- Colorants and fillers: mica powder, resin dye, glitter, dried flowers, foil, tiny charms
- Sandpaper or nail buffer: for smoothing rough edges
- Jewelry findings: jump rings, earring posts, bails, chains, or cords
- UV lamp only if using UV resin: do not use epoxy resin under a UV lamp
Set up in a dust-free, level room between the temperature range listed on the resin label, often around 70–75°F. Cold rooms make resin thick and bubble-prone.
Caution: never guess the mixing ratio. Some resins are 1:1 by volume, others are not. Using the wrong ratio is one of the fastest ways to end up with soft or sticky jewelry.
If you are a true beginner, start with clear resin in a shallow mold. Deep pours, heavy inclusions, and multiple colors are harder to control.
Step 1
1. Prepare Your Mold, Decorations, and Workspace
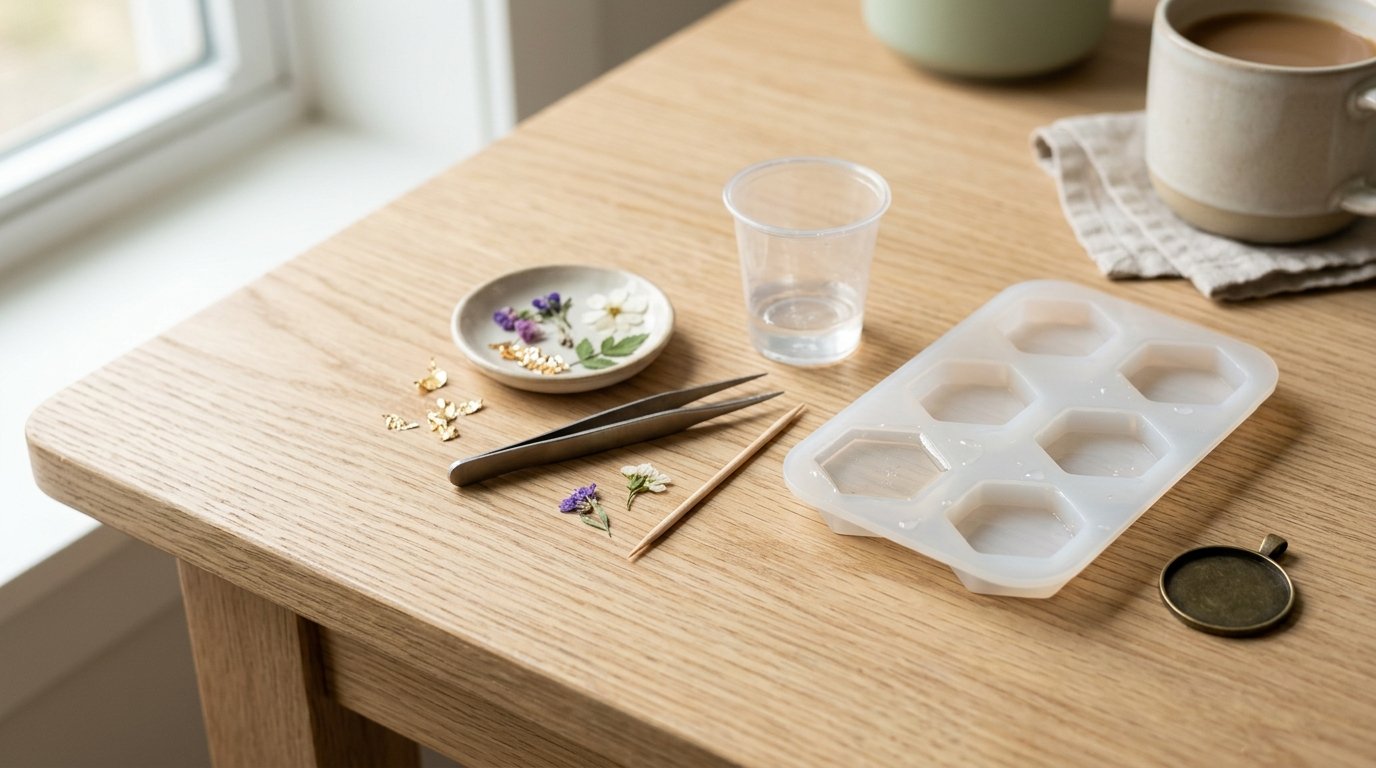
Cover your table, put on gloves, and place your mold on a flat tray or board so you can move it without spilling. Check the mold for dust, lint, or leftover cured bits. Even tiny specks will show through clear resin.
Lay out your add-ins before mixing:
- dried flowers pressed completely flat and dry
- glitter or mica in very small amounts
- foil flakes
- tiny printed images sealed first
- small metal charms
If you are using a bezel tray with no back, seal the bottom first with strong packing tape or bezel tape so resin cannot leak out. Press the tape down firmly around the edges.
Next, warm the resin bottles slightly if the room is cool. A short bath in warm water can help thin the resin and reduce bubbles. Dry the bottles completely before opening them so water does not get into the mixture.
2. Measure the Resin Exactly
Pour Part A and Part B into separate marked cups if needed, then combine according to the manufacturer’s instructions. Measure carefully at eye level. For small jewelry batches, mix only what you can use within the resin’s working time.
3. Stir Slowly and Completely
Mix for the full time listed on the label, usually 3 to 5 minutes. Scrape the sides and bottom often. Stirring too fast whips in bubbles; stirring too little leaves unmixed resin that cures in sticky patches.
Caution: do not switch brands of resin parts or add random craft paint. Use only colorants labeled safe for resin, and keep add-ins light so you do not throw off the cure.
4. Let the Mix Rest Briefly
After mixing, let the cup sit for a minute or two if your resin allows it. Many bubbles will rise on their own. This short pause makes pouring cleaner and gives you time to check that the mixture looks uniform, not streaky.
Step 2
1. Pour a Base Layer and Place Inclusions
For pendants or earrings, pour a thin first layer into the mold or bezel. Use a toothpick to guide resin into corners. Do not fill to the top yet.
If you want flowers, foil, or tiny shapes suspended neatly, place them into this shallow layer first. That keeps them from floating or sinking as much. Press decorations down gently with a toothpick so trapped air can escape from underneath.
For paper photos or printed art, make sure they are fully sealed and completely dry before embedding. Unsealed paper can darken, blur, or release bubbles.
2. Fill to the Final Height
Add the rest of the resin slowly until the mold is just below the rim, or slightly domed if your mold and resin type support doming. For bezels, stop before the resin spills over the edge. Overfilling causes drips, rounded backs, and more sanding later.
Pop visible surface bubbles with a toothpick. Then use a quick pass of a heat tool or torch only if the resin manufacturer says it is safe. Keep the heat moving and do not overdo it.
Caution: too much heat can warp silicone molds, scorch dried flowers, or create ripples on the surface.
3. Cover and Cure Undisturbed
Place a dust cover over the piece, such as a clean plastic container or box. Leave it on a flat surface for the full cure time listed on the label. Many epoxy resins are firm enough to demold in 12 to 24 hours but need longer to reach full hardness.
Do not keep touching the surface “to check.” Every touch can leave marks or introduce dust.
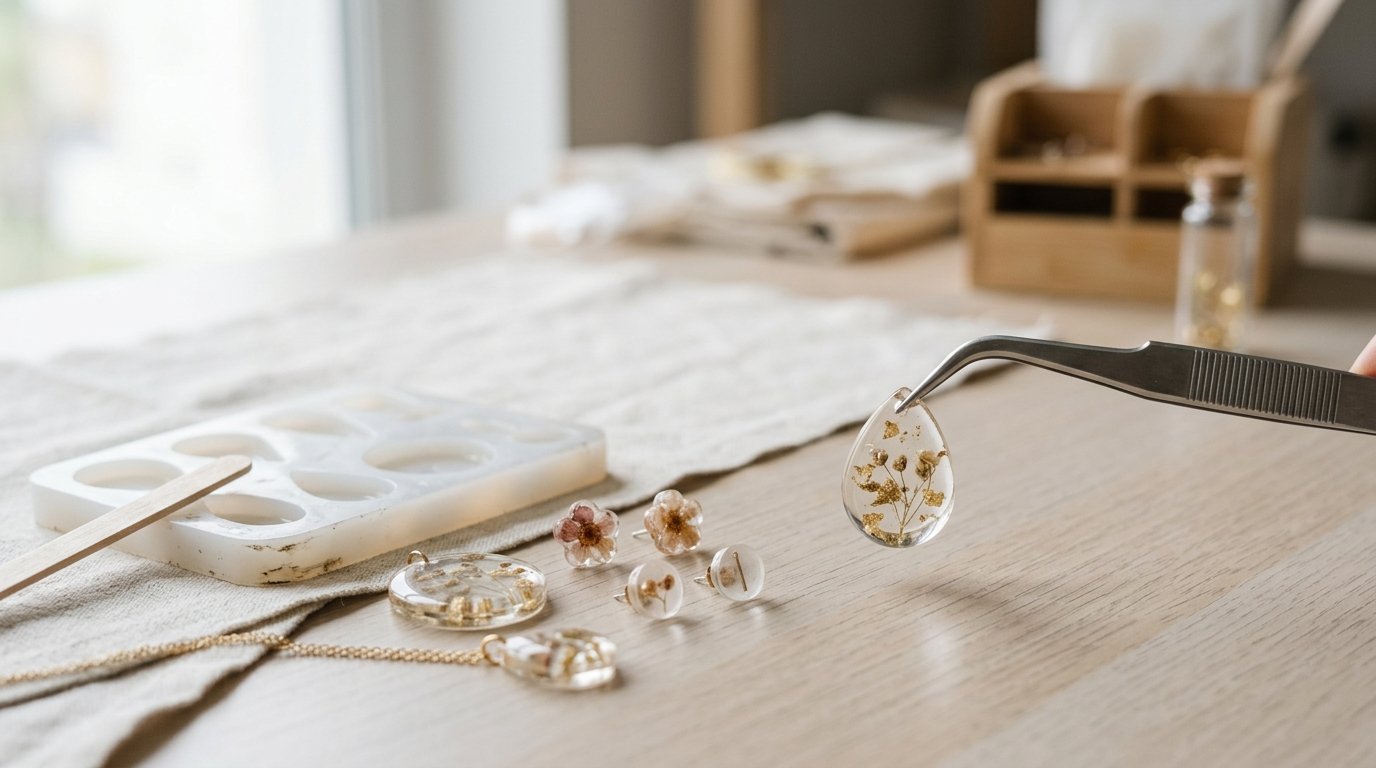
4. Demold, Sand, and Assemble
Once fully cured, flex the silicone mold gently and release the piece. If you used a bezel, remove the backing tape carefully.
Trim or sand any sharp edges with fine-grit sandpaper or a nail buffer. Wet sanding can reduce dust on fully cured pieces, but dry the jewelry completely afterward. If the front lost some gloss from sanding, add a very thin top coat of resin or resin-safe gloss finish.
Attach findings:
- glue on earring posts
- add a jump ring and chain to a pendant
- connect charms to hooks or key rings
If your piece has small flaws, you can often fix them with a second thin coat rather than starting over.
How to Check the Result
A successful resin jewelry piece should look and feel finished, not just hard enough to remove from the mold.
Check these points:
- Surface: It should be glossy or evenly matte if intentionally sanded, with no wet or sticky spots.
- Shape: Edges should be smooth, with no major overflow drips, sharp ridges, or sagging.
- Clarity: Clear resin should look transparent, not cloudy from moisture or poor mixing. Colored resin should look even, not streaky.
- Inclusions: Flowers, glitter, and foil should sit where you intended, without large trapped bubbles underneath.
- Firmness: Press with a fingernail in an unseen spot. Fully cured jewelry should feel solid and resist denting.
- Wearability: Findings should be secure, centered, and comfortable to wear.
If the piece is slightly rough but otherwise cured, sand and top-coat it. If it is still bendy, sticky, or rubbery after the full cure window, the usual causes are wrong ratio, incomplete mixing, low room temperature, or too much added pigment. Small surface tack can sometimes be coated over after cleaning, but badly under-cured resin usually needs to be discarded rather than worn.
FAQ
What Resin Is Best for Making Jewelry?
For most beginners, a clear two-part epoxy resin made for jewelry or small castings is the easiest choice. It cures with a glossy finish and works well in molds and bezels. Use UV resin only for very small, thin pieces and fast projects.
How Long Does Resin Jewelry Take to Cure?
It depends on the brand. Many epoxy jewelry resins can be demolded in 12 to 24 hours and reach full cure in 48 to 72 hours. Always check the label, because cooler rooms and deeper pours can slow curing noticeably.
Why Is My Resin Jewelry Still Sticky?
Sticky resin usually comes from an incorrect mix ratio, incomplete stirring, low temperature, or too much colorant. If only the surface is tacky, clean it and add a thin fresh coat if the base cured. If the whole piece is soft, remake it.
Can You Put Dried Flowers or Photos in Resin Jewelry?
Yes, but both must be fully dry first. Pressed flowers should be flat and moisture-free. Photos or printed paper should be sealed before embedding so ink does not bleed and paper does not release bubbles or darken inside the resin.
Do I Need a Pressure Pot to Make Resin Jewelry?
No, not for simple beginner jewelry. You can make pendants, earrings, and charms with careful mixing, slow pouring, and basic bubble removal. A pressure pot is more useful for highly detailed pieces or when you want the clearest possible finish with fewer bubbles.