

Making resin molds can open up a whole new world of creativity for your crafting projects! Whether you want to create custom jewelry, decorative items, or unique gifts, knowing how to make your own molds gives you endless possibilities.
Making your own resin molds is actually simpler than most people think – you’ll need silicone mold-making material, an object to copy, and some basic tools like mixing cups and sticks. The process involves creating a model (or using an existing object), preparing it properly, mixing and pouring silicone over it, and allowing it to cure before removing your new mold.
You can use various materials to make molds, but two-part liquid silicone is popular because it captures fine details and releases resin easily. Many crafters start with pre-made molds, but once you learn this skill, you’ll be able to bring your unique ideas to life and create shapes and designs that aren’t available in stores.
Understanding Resin Mold Making
Creating your own resin molds opens up endless possibilities for crafting unique pieces. The process involves selecting the right materials and understanding how different resins work together to create perfect molds.
Types of Resin for Mold Making
Epoxy resin is popular for beginners because it’s easy to work with and has a longer curing time. This gives you plenty of time to remove bubbles and make adjustments before it hardens. Epoxy creates clear, hard results that are perfect for jewelry and decorative items.
Polyurethane resin (PU resin) cures much faster than epoxy, making it great when you need quick results. It’s more durable and impact-resistant, ideal for functional items that might get regular use. PU resin comes in different hardnesses, so you can choose one that suits your project.
Both resins have their strengths:
- Epoxy: Clear results, UV-resistant, longer working time
- Polyurethane: More durable, faster curing, better for detailed molds
Remember to work in a well-ventilated area as resins can produce fumes during curing.
Choosing the Right Silicone Mold Materials
Silicone molds are essential for resin casting because they’re flexible and allow for easy removal of your finished pieces. When selecting silicone for mold making, consider the following options:
Platinum-cure silicone is high-quality and produces detailed molds. It’s more expensive but doesn’t shrink much and has excellent tear resistance. This type works well for intricate designs and can be used many times.
Tin-cure silicone is more budget-friendly and good for beginners. It’s slightly less durable but still creates great molds for most projects.
Consider the hardness level too:
- Softer silicone (Shore A 10-20): Best for complex shapes with undercuts
- Medium silicone (Shore A 25-35): Good all-purpose choice
- Firmer silicone (Shore A 40+): Better for simple shapes and longer-lasting molds
Your silicone molds should be clean and completely dry before pouring in resin to ensure the best results.
Essential Tools and Materials
Getting started with resin mold making requires some basic supplies. Having the right tools will make your creative process smoother and help you achieve professional-looking results.
Safety Equipment
First things first – safety should never be an afterthought when working with resin! Always wear nitrile gloves to protect your skin from irritation. Resin can cause nasty reactions and is difficult to remove once it gets on your hands.
A respirator mask is essential when working in enclosed spaces. Even in well-ventilated areas, it’s a good idea to have protection from fumes.
Don’t forget eye protection! Safety glasses shield your eyes from accidental splashes. Working in a well-ventilated area is also crucial – open windows or use a fan to keep air flowing.
Lastly, consider a work surface cover like silicone mats or wax paper to protect your tables from spills and drips.
Mixing and Measuring Supplies
Accurate measuring is vital for perfect resin results! Use graduated mixing cups with clear measurement markings to get precise resin-to-hardener ratios.
Mixing sticks are must-haves for thoroughly blending your resin. Wooden craft sticks work well, but silicone or plastic tools can be cleaned and reused.
Small plastic pipettes are handy for adding tiny amounts of colorant or removing air bubbles. They give you much better precision than pouring directly.
Digital scales help measure components by weight instead of volume for the most accurate results. Some resin brands specifically recommend weight measurements.
For making the actual molds, silicone mold material is your best friend. It captures fine details and releases finished pieces easily without damage.
Designing Your Mold
Before you start mixing silicone, you need a well-designed mold concept. Good design saves materials and ensures your finished resin piece releases easily.
Creating a Mold Frame
A mold frame holds your silicone while it cures around your original object. You can use items from around your house like plastic containers, LEGO bricks, or cardboard boxes lined with tape.
Make sure your frame is at least 1/2 inch larger than your object on all sides. This gives you enough silicone thickness for durability.
Tips for effective mold frames:
- Use hot glue to seal corners and prevent leaks
- Apply a release agent (like petroleum jelly) to help remove your cured silicone later
- Secure your original object to the bottom with a small amount of clay or adhesive
- For complex shapes, consider a two-part frame that can be disassembled
Remember that your frame needs to be completely sealed. Even tiny gaps will let liquid silicone escape!
Incorporating a Parting Line
A parting line is where your mold will separate to release your finished resin piece. For simple shapes, you might not need one. For complex objects, it’s essential.
To create a parting line:
- Embed your object halfway in clay
- Pour silicone to create the first half
- Add registration keys (small indentations) before the silicone cures
- Apply release agent on the cured first half
- Pour the second half of silicone
Good parting lines follow the natural contours of your object. Try to place them along edges where they’ll be less noticeable in your final piece.
For objects with undercuts (areas where resin would get trapped), carefully plan your parting line to allow for easy removal.
Preparing Your Workspace
Before you jump into making your resin molds, it’s important to set up a proper workspace. A clean and organized area will help you create better molds and make the process more enjoyable.
First, find a flat, stable surface to work on. Cover this area with a non-stick material like silicone mats, wax paper, or plastic sheeting to protect against spills and drips.
Make sure your workspace has good ventilation. Open windows or use a fan to help move air through the room. This is important because resin can give off fumes that you don’t want to breathe in for too long.
Keep all your supplies within reach. This includes your resin, hardener, measuring cups, stirring sticks, and any decorative elements you plan to use.
Essential items for your workspace:
- Protective covering for your table
- Disposable gloves
- Paper towels or rags
- Small containers for mixing
- Release agent for your molds
- Good lighting
Temperature matters when working with resin! The ideal room temperature is between 70-75°F (21-24°C). Too cold and your resin might not cure properly.
Always have a release agent ready for your mold making. This prevents your resin from sticking to the mold and makes removal easier. Common release agents include cooking spray, petroleum jelly, or commercial mold release sprays.
Keep cleaning supplies handy. Rubbing alcohol works well for cleaning up uncured resin from tools and surfaces.
Remember to tape off any areas you want to protect from accidental resin contact. It’s easier to prevent messes than to clean them up later!
Mixing the Silicone
Properly mixing silicone is a crucial step in creating high-quality molds for your resin projects. Getting the right consistency ensures your molds will capture every detail and last through many uses.
Calculating Silicone Amounts
Before you start mixing, you’ll need to figure out how much silicone you need. Measure your object and container to estimate the volume. Most silicone mold kits come with Part A and Part B that need to be mixed in specific ratios, usually 1:1 by weight or volume.
To calculate accurately, weigh your mixing container first. Then add Part A according to your estimated needs. Most small projects need between 100-300 grams total. It’s always better to mix a little extra than to run short during pouring!
Don’t forget to consider the size of your container. You’ll want at least a half-inch border around your object. Use this simple formula: length × width × height = volume in cubic inches. Then convert to the units your silicone uses.
The Mixing Process
Start by gathering all your materials: silicone parts, mixing cups, and stirring sticks. Put on gloves to protect your hands – silicone is sticky and hard to remove from skin!
Pour Part A and Part B into your mixing container according to the manufacturer’s ratio. Mix thoroughly but gently for 3-5 minutes. Scrape the sides and bottom of your container to ensure everything blends evenly.
Watch for streaks or swirls of different colors – these indicate incomplete mixing. Continue until you have a uniform color throughout.
For professional results, consider vacuum degassing your mixture. This removes air bubbles that could affect your mold quality. If you don’t have a vacuum chamber, tap your container gently on your work surface several times to help bubbles rise to the top.
Work quickly but carefully – silicone begins curing as soon as the parts are mixed. You typically have 15-30 minutes of working time before it becomes too thick to pour properly.
Pouring and Curing
Once you’ve prepared your materials, it’s time for the exciting part – pouring and waiting for your mold to cure. This stage requires patience and careful attention to timing to get the best results.
Pouring the Silicone
Start by mixing your silicone according to the package instructions. Most two-part silicones need equal amounts of each component. Stir thoroughly but gently to avoid creating air bubbles.
Pour your silicone slowly into the mold container. Try pouring in a thin stream from one spot to help the silicone flow naturally around your object. This reduces trapped air bubbles.
For complex items with small details, consider pouring a thin layer first. Let it partially set, then add the rest. This “detail coat” helps capture fine features.
If you notice air bubbles, gently tap the container on your work surface. You can also use a toothpick to pop visible bubbles before the silicone starts to set.
Understanding Resin Curing Times
Curing times vary widely depending on your silicone type and room temperature. Most silicone molds take 24-48 hours to fully cure. Be patient!
Temperature affects cure time significantly. Warmer rooms (around 75°F) speed up curing, while cooler temperatures slow it down. Some crafters use heating mats to speed up the process.
Check your product’s instructions for demolding time. Removing your mold too early can cause deformation or tearing.
The best test for readiness? Gently press a fingernail into an inconspicuous area. If it leaves a mark, give your mold more time to cure.
Once fully cured, carefully remove your object. Your new silicone mold is now ready to use for resin casting!
Demolding Your Creation
Getting your resin piece out of the mold can be so exciting! This is called demolding, and it’s important to do it right to protect both your creation and your mold.
Wait the full cure time. This is super important! If your resin isn’t fully hardened, your piece might warp or bend when removed. Some thin pieces might need extra time beyond what the package says.
Sometimes resin can stick stubbornly to your mold. Here’s a simple trick: put your mold in the freezer for 10-15 minutes before demolding. The cold temperature makes the silicone contract slightly, which helps release your piece.
Be gentle when removing your creation. Start by carefully pulling the silicone mold away from the edges of your resin piece. Work slowly around all sides before attempting to remove the entire piece.
For deep or complex molds, you might need to flex the silicone more. Bend it carefully in different directions to break the vacuum seal that can form.
If you’re still having trouble, try these helpful tips:
- Use a small amount of mold release spray next time
- Gently blow air between the mold and resin with a straw
- Press from the back of the mold for stubborn areas
- Use a toothpick to carefully separate edges (be careful not to scratch!)
Remember that each mold is different. Some designs are naturally easier to demold than others, especially those without deep details or undercuts.
Finishing Touches
The final steps in your resin mold creation process can make all the difference in your project’s appearance. Proper finishing techniques help bring your casting to life with shine and character while fixing any minor imperfections.
Adding Shine and Details
Once your resin cast has cured completely, you can sand it to create a smooth surface. Start with coarse sandpaper (around 400 grit) and work your way up to finer grits (1500-2000). Always sand in water to prevent dust and achieve better results.
For a glass-like shine, polish your piece with a polishing compound or even use a simple household spoon to buff the surface. This works surprisingly well for smaller pieces!
Want to add some flair? Try these decorative options:
- Mica powders: Mix into clear resin for metallic or pearlescent effects
- Alcohol inks: Create beautiful swirls and patterns by dropping onto wet resin
- Embedded elements: Press dried flowers, glitter, or small charms into partially cured resin
Correction Tips and Fixes
Nobody’s perfect, and resin work sometimes needs fixing. If you spot bubbles in your finished piece, you can often fill them with a tiny drop of resin and cure again.
For uneven surfaces, light sanding followed by a thin layer of fresh resin can create a level finish. Work in a dust-free environment when applying this “doming” layer.
Did your piece cure with a tacky surface? This usually happens when:
- Mixing ratios were incorrect
- The temperature was too low during curing
- The resin was past its shelf life
Fix tackiness by wiping with isopropyl alcohol and applying a thin final coat of properly mixed resin. Remember that patience is key—rushing the finishing process rarely leads to good results!
Resin Casting Techniques
Once you have your mold ready, it’s time to dive into the actual casting process. Proper casting techniques can make the difference between a stunning piece and a disappointing result.
Pouring Techniques for Resin
Start by mixing your casting resin according to the manufacturer’s instructions. Always measure carefully – most resins require exact ratios to cure properly. Before pouring, make sure your mold is clean and dry.
For bubble-free results, pour your resin in a thin stream from about 12 inches above the mold. This gives bubbles time to pop as the resin falls. You can also use a pipette for precise placement in small or detailed areas.
When filling deep molds, consider pouring in layers. Allow each layer to partially set before adding the next. This helps prevent heat buildup that can cause cracking or warping in larger pieces.
For embedded items, pour a thin base layer first, let it gel slightly, then place your objects and cover with more resin.
Creating Special Effects
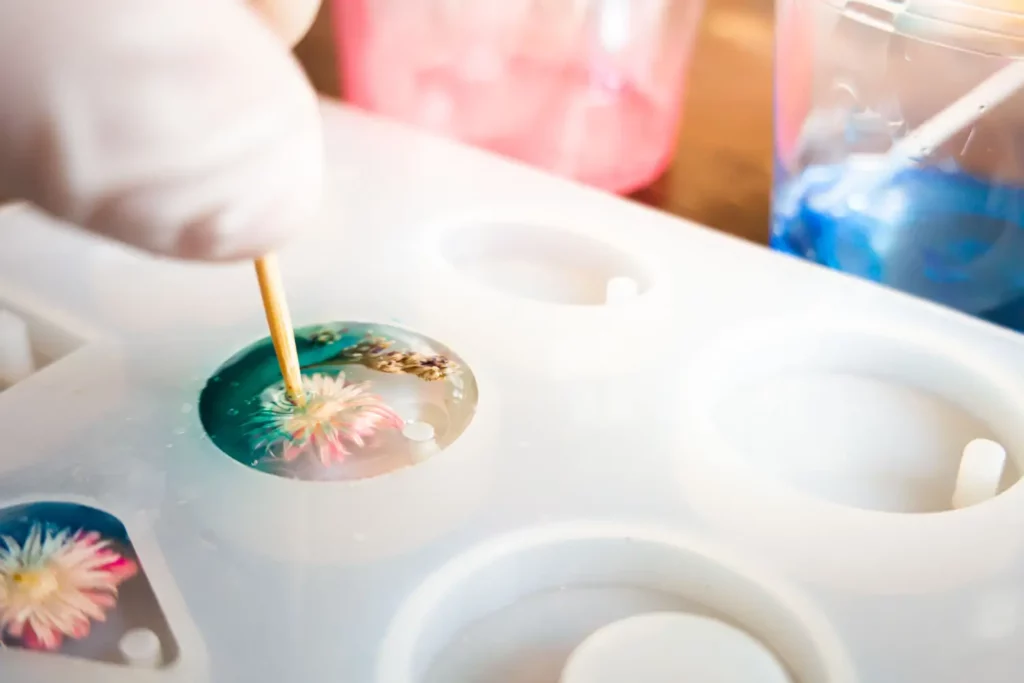
You can create amazing effects by adding various materials to your epoxy resin. Try mixing in a few drops of alcohol inks for vibrant, flowing color patterns. Swirl them gently with a toothpick for marble effects.
For a sparkling finish, mix in fine glitter or mica powder. Remember that a little goes a long way – start with small amounts and add more if needed.
Creating cells and lacing effects is easy with silicone oil. Add just 1-2 drops per ounce of resin and stir gently.
For a geode look, pour different colored layers and add crushed glass or crystals between them. You can also create ocean scenes by adding blue inks and white resin “waves.”
Try using a heat gun or torch briefly over the surface to pop bubbles and create interesting movement in colored resins.
Projects and Ideas
Ready to put your new resin mold skills to work? Here are some fun projects to try!
Coasters are perfect for beginners. You can add mica powders, dried flowers, or small trinkets to make each one unique. They’re useful and make great gifts too!
Jewelry is another popular option. Try making pendants, earrings, or even statement rings. Custom jewelry molds let you create pieces that match your style perfectly.
Decorative Items like paperweights, small sculptures, or bookends can brighten up your home. You can embed photos, small toys, or natural elements like leaves.
Keychains are practical and fun to make. Try using silicone molds in simple shapes like circles or squares, then add colorful resin and personal touches.
Project Difficulty Guide:
| Project | Difficulty | Time Required |
|---|---|---|
| Coasters | Beginner | 1-2 hours |
| Earrings | Beginner | 30 minutes |
| Bookmarks | Beginner | 45 minutes |
| Decorative Bowls | Intermediate | 2-3 hours |
| Custom Figurines | Advanced | 4+ hours |
For your first resin casting project, try something small with a simple mold. This helps you learn the basics without wasting materials.
Don’t forget that your resin molds can be reused many times! You might make matching sets or create gifts for friends using the same mold in different colors.
Maintenance and Care for Resin Molds
Taking care of your silicone molds is super important if you want them to last! With proper cleaning and storage, your molds can serve you for many projects to come.
Cleaning Your Molds
For uncured resin, first scrape out as much as possible. Then wipe the remaining residue with isopropyl alcohol or acetone. Be gentle to avoid damaging the mold surface!
Some crafters use adhesive putty or the sticky side of tape to pick up tiny bits of cured resin. This method works great for those hard-to-reach spots.
Storing Your Molds Properly
Keep your silicone molds in a cool place away from direct sunlight. Sunlight can damage the silicone over time and reduce its flexibility.
Flat molds should be stored flat, while shaped molds might need support to maintain their form. Some crafters use plastic containers to keep dust away.
Things to Avoid
- Don’t use sharp objects that could scratch or tear the silicone
- Avoid extreme heat which can warp your molds
- Don’t stack heavy items on top of your molds
Regular maintenance will keep your mold making supplies in great shape. A well-cared-for silicone mold can bring back that perfect shine for your resin pieces time after time!