

Flowers bring so much joy with their colors and scents, but sadly, they don’t last forever in their fresh state. Wouldn’t it be wonderful to keep their beauty for months or even years? You can preserve flowers at home using several simple methods that capture their charm for the long term. The most effective ways to preserve flowers include air drying, pressing, using silica gel, or even drying them in the microwave or oven.
Preserving flowers lets you keep special memories alive, whether they’re from your garden, a wedding bouquet, or a thoughtful gift. Different techniques work better for different types of blooms. For example, pressing works well for flat flowers and foliage, while hanging works better for roses and other flowers with sturdy stems.
Don’t worry if you’ve never tried preserving flowers before – it’s easier than you might think! With basic materials from craft stores and a little patience, you can create beautiful keepsakes. Plus, preserved flowers make wonderful decorations or can be used in crafts like resin jewelry, scrapbooks, or framed artwork.
Understanding Flower Preservation
Flower preservation is a wonderful way to keep your special blooms looking beautiful long after they would normally wilt. It’s all about removing moisture from natural flowers while maintaining their shape and color.
There are several methods you can use to preserve your favorite flowers. Each technique works differently but aims for the same result – keeping those precious petals looking their best!
Common preservation methods include:
- Hanging flowers upside down in a ventilated area
- Using silica gel to dry flowers
- Pressing flowers between heavy books
- Freeze-drying (a professional method)
- Preserving in resin
Dried flowers maintain much of their original appearance but with a more vintage feel. They’re perfect for crafts or home decor that can last for years!
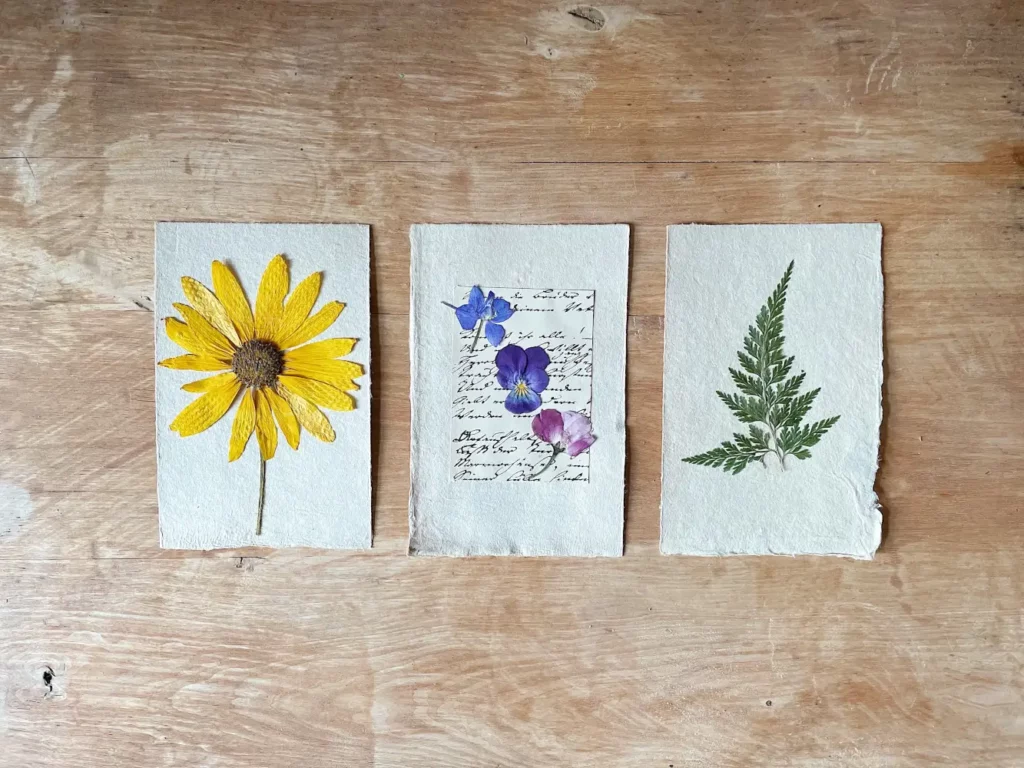
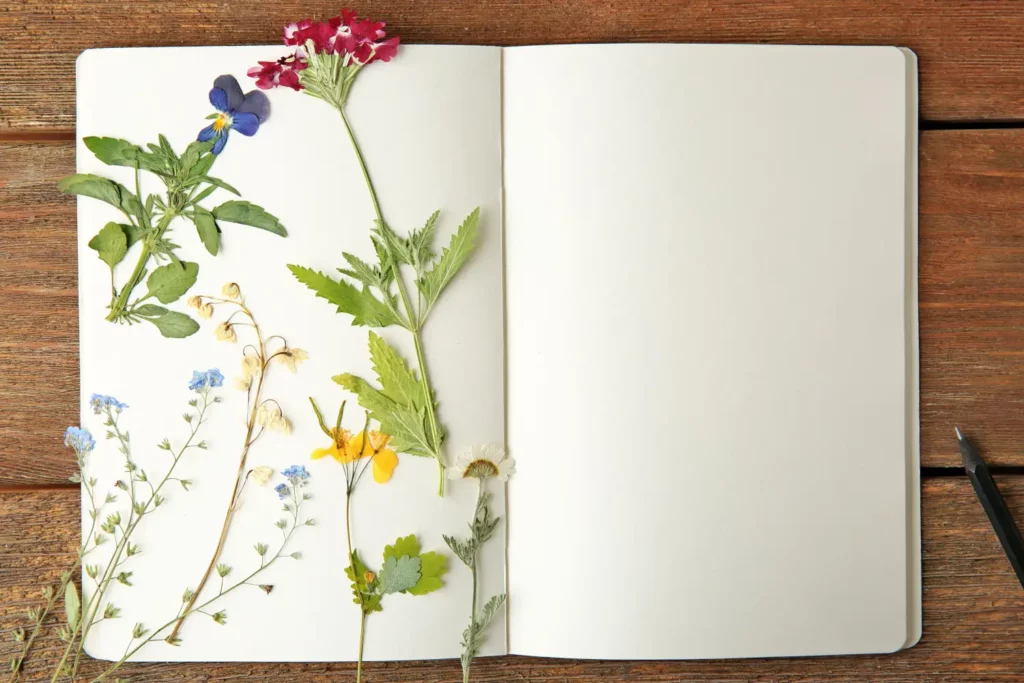
Pressed flowers become flat but keep their color beautifully. You can use these in art projects, journals, or framed displays.
Preserved flowers often look most like fresh blooms. Some preservation methods use special solutions to replace the natural moisture in flowers with substances that help them maintain their shape and vibrance.
The best time to start preserving your flowers is when they’re fresh but not fully bloomed. This gives you the best results since younger blooms hold their color better during the preservation process.
Choosing Flowers for Preservation
Not all flowers preserve equally well. The right choice of blooms will make a big difference in how beautiful your preserved flowers look and how long they last.
Selecting Fresh Flowers
Choose flowers that are in their prime, not fully open but just past the bud stage. Avoid blooms with any signs of damage, disease, or wilting. These flaws will only become more noticeable after preservation.
Look for flowers with strong, intact petals. Morning is the best time to collect flowers when they’re hydrated and fresh. Make sure to gently shake off any insects or dirt.
Remove excess foliage before preserving, as leaves often don’t dry as nicely as the blooms. Cut stems at an angle with sharp scissors and place them in water if you’re not preserving them immediately.
Suitable Types for Preserving
Roses, lavender, daisies, and baby’s breath preserve exceptionally well and are popular choices. Peonies, forget-me-nots, and other sturdy blooms also maintain their form and color nicely during preservation.
Best flowers for preservation:
- Roses (especially miniature varieties)
- Lavender
- Baby’s breath
- Daisies
- Peonies
- Forget-me-nots
Everlastings like strawflowers and statice are excellent choices as they’re naturally suited to drying. Their petals are already somewhat dry even when fresh.
Orchids can be preserved but require special handling due to their delicate nature. They typically do better with pressing or silica gel methods rather than air-drying.
Timing the Harvest
Harvest flowers at the right moment for the best preservation results. For most blooms, mid-morning after the dew has dried but before the heat of the day is ideal.
Pick roses when they’re about 1/3 to 1/2 open. Harvest lavender when only a few flowers on the stem have opened. For daisies and similar flowers, collect them when they’re fully open but still fresh.
Seasonal timing matters too. Spring and summer blooms typically have the brightest colors and strongest structures for preservation. If you’re growing your own flowers, harvest after a dry spell rather than after rain.
Pay attention to the weather forecast. Collecting flowers before a rainy period ensures you’re getting them at their driest and most preservation-friendly state.
Methods of Preserving Flowers
Preserving flowers lets you enjoy their beauty long after they’ve wilted. There are several effective methods to choose from depending on the type of flower and your desired results.
Pressing Technique
Pressing is one of the oldest and simplest ways to preserve flowers. Start by selecting flowers that are dry and not too thick. Place your flowers between two sheets of absorbent paper like parchment paper or coffee filters.
Next, put the paper with flowers inside a heavy book. Add more weight on top by stacking additional books. Leave them undisturbed for 2-3 weeks in a dry place.
For faster results, you can use a flower press or even an iron on low heat. Press flowers work great in craft projects like bookmarks, greeting cards, and framed art. They keep their color but lose their 3D shape.
Air-Drying Process
Air-drying is perfect for preserving whole bouquets and keeping flowers’ natural shape. Choose flowers before they’re fully open for best results. Remove excess leaves and trim stems to desired length.
Gather 5-8 stems together with a rubber band or string. Hang them upside down in a dark, dry room with good air circulation. Your closet or attic works well!
The drying process takes about 2-3 weeks. You’ll know they’re ready when the flowers feel papery and rigid. Air-dried flowers may fade a bit but maintain their structure. They’re perfect for wreaths and long-lasting bouquets.
Sand Drying Method
Sand drying helps flowers keep their 3D shape better than air-drying. You’ll need fine, clean sand (like from craft stores). Start by finding a container that fits your flowers without crowding them.
Pour a 1-inch layer of sand in the bottom. Place your flowers face-up and carefully pour more sand around and over them. The sand should completely cover every petal.
Leave the container in a warm, dry place for 2-4 weeks. When done, gently pour out the sand to reveal your preserved flowers. This method works especially well for daisies, roses, and carnations.
Using Silica Gel for Preservation
Silica gel gives the most lifelike results of all drying methods. Find silica gel at craft stores in granular form. Place a layer in an airtight container, then lay your flowers on top.
Gently cover the flowers completely with more silica gel. Make sure it gets into all crevices without crushing the petals. Seal the container tightly.
Check your flowers after 3-7 days. When they feel dry and papery, remove them carefully and brush off excess gel. For a quicker option, you can microwave the container for 2-3 minutes.
Silica-dried flowers keep almost perfect color and shape. They’re ideal for special bouquets like wedding flowers that you want to preserve as keepsakes.
Pressing Flowers 101
Pressing flowers is a wonderful way to preserve their beauty for years to come. This simple technique can turn your favorite blooms into lasting keepsakes that maintain their color and delicate details.
Choosing Flowers to Press
Start with fresh flowers that are at their peak of beauty. Avoid using wet flowers as they may develop mold during the pressing process. Flowers with naturally flat faces like pansies, violets, and daisies work especially well for beginners.
Thinner blooms press more easily than thick, bulky ones. If you want to press roses or other fuller flowers, consider pressing individual petals rather than the whole bloom.
Some great choices for beginners include:
- Daisies and black-eyed Susans
- Violets and pansies
- Larkspur and delphinium
- Small wildflowers
- Ferns and leaves
Pick your flowers in the late morning after the dew has dried but before the heat of the day causes wilting.
Steps for Pressing Flowers
There are several methods to press flowers, each with its own advantages. The book method is simplest for beginners. Place your flowers between absorbent paper (like coffee filters or parchment paper), then tuck them into a heavy book. Stack more books on top for added pressure.
For better results, try making a DIY wooden press using two pieces of wood, cardboard, blotting paper, and bolts with wing nuts to create pressure.
Follow these simple steps:
- Arrange your flowers face down on absorbent paper
- Cover with another sheet of paper
- Place between book pages or in your press
- Wait 2-4 weeks until completely dry
Change the absorbent paper every few days to prevent moisture buildup and mold. Your pressed flowers are ready when they feel papery and completely dry to the touch.
Air-Drying Flowers
Air-drying is one of the simplest and most popular methods to preserve flowers. This technique helps maintain the flower’s shape and color while requiring minimal supplies.
Preparing Flowers for Air-Drying
Start by selecting flowers that are fresh but not fully opened. Partially opened blooms dry better and keep their shape. Cut stems to at least 6 inches long to give you enough length to work with.
Strip away excess foliage from the stems as leaves tend to curl and look untidy when dried. This also helps the flowers dry faster. Group your flowers into small bunches of 5-8 stems depending on their size.
For best results, harvest your flowers in the morning after the dew has dried but before the heat of the day. Avoid using flowers that are already wilting or damaged, as these won’t preserve well.
The Hanging Method Explained
To hang-dry your flowers, secure the stems together with a rubber band. Rubber bands work better than string because they’ll tighten as the stems shrink during drying.
Hang the bundles upside down in a dark, dry place with good air circulation. A closet, attic, or unused room works well. Keep the flowers away from direct sunlight as it can fade their colors.
Allow 2-4 weeks for complete drying. You’ll know they’re ready when the stems snap easily rather than bend. Once dried, you can spray them lightly with unscented hairspray for extra protection.
Remember to handle your dried flowers gently as they become quite fragile. When stored properly, your air-dried flowers can last for months or even years as beautiful decorations.
Using Desiccants for Drying Flowers
Desiccants draw moisture out of flowers while helping them keep their shape and color. They’re perfect for preserving special blooms from weddings, anniversaries, or garden harvests.
Silica Gel Drying Technique
Silica gel is one of the best desiccants for preserving flowers. It helps flowers keep their bright colors and natural texture better than other methods. To use silica gel, start with fresh flowers – the fresher they are, the better your results will be!
First, remove the stems if you’re drying whole roses (you can reattach them later). Place your flowers in a container and gently pour silica gel around them until completely covered. Make sure the petals keep their shape as you pour.
Leave your flowers in the silica gel for 3-4 days. The timing matters – too short and they’ll still be moist, too long and they might become brittle. When they’re fully dried, carefully remove them and brush off any remaining silica gel with a small, soft paintbrush.
Sand Drying Practices
Sand is a more traditional and affordable desiccant option. You’ll want to use fine, clean sand for the best results. Before starting, mix the sand with a little salt to improve its moisture-absorbing ability.
Place a layer of sand in your container, then position your flowers on top. Gently pour more sand around and over the flowers, taking care not to crush or distort the petals. Tap the container lightly to help the sand settle between petals.
Sand drying takes longer than silica gel – usually 2-3 weeks. Keep your container in a warm, dry place during this time. When the flowers are completely dry, slowly tip the container and carefully remove your preserved blooms.
The flowers dried with sand might not retain colors as vibrantly as with silica gel, but they’ll still look beautiful and natural.
Caring for Preserved Flowers
Proper care will help your preserved flowers maintain their beauty for months or even years. The right handling, placement, and maintenance can make a big difference in how long they last.
Handling Dried Flowers
Always touch your preserved flowers gently to avoid damage. Their delicate petals and stems become brittle after drying and can break easily. When dusting them, use a soft tissue or set a hairdryer to cool, low setting and keep it at least 12 inches away.
Never use water on dried flowers! Moisture is their enemy and will cause mold or deterioration. If you’re arranging dried flowers or ornamental grasses in a new display, work in a draft-free area to prevent pieces from breaking off.
When moving preserved flower arrangements, support them from the bottom rather than lifting by stems or flowers. For loose dried flowers, consider wearing cotton gloves to minimize oils from your skin transferring to the petals.
Display and Storage Tips
Keep your preserved flowers away from direct sunlight to prevent fading. Even bright indirect light can gradually bleach the colors, so display them in areas with moderate to low light for best results.
Avoid placing dried flowers in humid areas like bathrooms or near kitchen sinks. High humidity makes preserved flowers absorb moisture, causing them to lose their shape and develop mold. Instead, display them in climate-controlled rooms with stable temperatures.
Don’t position preserved flowers or ornamental grasses near air vents, fans, or frequently opened doors. Excessive airflow can damage delicate parts and create dust.
For storage, wrap preserved flowers loosely in acid-free tissue paper and place in cardboard boxes. Never use plastic containers or bags as they trap moisture and encourage mold growth.
Creative Uses for Dried and Pressed Flowers
Once you’ve mastered the art of preserving flowers, a world of creative possibilities opens up. Pressed and dried flowers can add a touch of natural beauty to many projects around your home.
Craft Project Ideas
Pressed flowers are perfect for handmade greeting cards. Simply glue them onto cardstock and add a personal message for birthdays or thank-you notes.
You can embed dried flowers in candles or homemade soap for a decorative touch that sometimes adds a subtle fragrance. For a quick project, press flowers between two pieces of clear contact paper to make unique bookmarks.
Try making custom phone cases by arranging pressed flowers under a clear case. The natural elements create a one-of-a-kind accessory that stands out.
For holiday crafting, pressed flowers can transform plain gift tags into special decorations. You can also use them to create delicate Christmas ornaments that preserve summer memories throughout winter.
Incorporating into Art and Decor
Transform a simple tea tray into a showpiece by gluing pressed flowers to the surface and coating with epoxy resin. This creates a functional piece of art that’s perfect for serving guests.
Frame pressed flower arrangements to create botanical wall art. Try arranging them in patterns or recreating the shape of a bouquet for a vintage-inspired look.
You can press flowers into homemade paper for unique stationery. The texture and color add natural beauty to letters or journals.
For a bigger project, arrange pressed flowers under glass on a coffee table. The flowers become a conversation piece while being protected from damage.
Don’t forget about jewelry! Pressed flowers can be sealed in resin to create pendants, earrings, or bracelets that capture nature’s beauty.
Advanced Techniques and Tips
Beyond basic drying methods, you can use advanced techniques to create lasting floral keepsakes and gifts. These methods help preserve special blooms for important occasions and creative displays.
Creating Floral Arrangements
Dried and preserved flowers make beautiful long-lasting arrangements. Try combining different preservation methods in one display for interesting textures and colors. For example, mix pressed flowers in frames with glycerin-preserved foliage and air-dried blooms.
Pressed flowers work wonderfully in shadow boxes or between glass frames. You can use a traditional wooden flower press or place blooms between heavy books with absorbent paper.
For three-dimensional arrangements, flowers preserved with silica gel maintain their shape best. Group similar colors or create contrast with complementary hues.
Consider adding dried flowers to wreaths, garlands, or table centerpieces. These arrangements can last for months or even years with proper care.
Preservation for Special Occasions
Wedding bouquets and other sentimental flowers deserve special preservation techniques. You can freeze-dry important blooms to maintain their original appearance and color for years.
For wedding flowers, act quickly! Process them within 2-3 days after the event for best results. Remove any ribbon or wire before preserving.
Try the glycerin method for preserving flowers from special events. The process involves reheating dried plants in a bath of glycerin, water, and food coloring heated to at least 104°F. This technique keeps flowers flexible rather than brittle.
Display preserved special occasion flowers in shadow boxes with mementos like invitation cards or small photographs. This creates a meaningful keepsake that tells a story.