
Pressing flowers is a beautiful way to preserve nature’s delicate beauty. This simple craft lets you capture a moment in time, creating keepsakes that last for years. Whether you’ve been gifted a special bouquet or found wildflowers on a walk, pressing flowers allows you to enjoy their charm long after they would have wilted.
To press flowers successfully, you need to start with dry blooms, place them between absorbent paper, and apply even pressure for 2-4 weeks. You can use various methods including a traditional wooden press with screws, heavy books, or even an iron for quick results. The key is removing moisture while maintaining the flower’s shape and color.
If you want a similar preservation method for craft projects, you can also dry flowers for resin.
You don’t need fancy equipment to begin this relaxing hobby. With basic supplies from around your home and a bit of patience, you’ll soon have pressed flowers perfect for creating cards, framed art, bookmarks, or jewelry. The process connects you with nature in a meaningful way while producing stunning keepsakes or gifts.
The Beauty of Pressed Flowers
Pressed flowers transform ordinary plants into delicate works of art that capture nature’s beauty in a timeless way. The flat, preserved blooms offer unique textures and colors that change subtly as they dry.
History and Significance
People have been pressing flowers for centuries across many cultures. In Victorian England, pressed flowers became extremely popular as a genteel hobby for ladies. They created elaborate albums and decorative pieces that told stories through botanical arrangements.
In Japan, the art form known as oshibana dates back hundreds of years. Artists created entire landscapes using only pressed plant materials. These weren’t just crafts but meaningful keepsakes that preserved memories of special places or events.
Pressed flowers have also served scientific purposes. Botanists created herbarium specimens to document and study plant species. Many of these collections still exist today in museums and universities, some dating back hundreds of years.
Modern Applications
Today, pressed flowers appear in many creative projects. You can use them to make beautiful greeting cards by gluing dried flowers onto cardstock. They add a personal, handmade touch that digital cards can’t match.
Shadow boxes and floating glass frames offer elegant ways to display your pressed blooms. The transparency of glass frames creates a lovely effect where light passes through the delicate petals.
Craft glue specially formulated for dried flowers helps secure them without damage. When using regular glue, apply it sparingly with a toothpick to avoid overwhelming delicate specimens.
Home décor items like coasters, bookmarks, and journal covers all benefit from pressed flower decorations. You can even frame a collection of your favorite blooms to create affordable, unique wall art that brings nature indoors year-round.
Materials Needed for Flower Pressing
Getting started with flower pressing requires just a few simple materials that you might already have at home. The right supplies will help your flowers dry properly while keeping their color and shape.
Choosing the Right Flowers
Fresh flowers work best for pressing. Pick them on a dry day after the morning dew has evaporated. Flat flowers like pansies, violets, and daisies are easiest for beginners.
Avoid very thick or bulky flowers as they contain more moisture and can develop mold. If you must use thicker flowers, consider removing some petals or cutting them in half.
Try to press your flowers as soon as possible after picking them. The fresher they are, the better they’ll maintain their color. Remove any damaged leaves or petals before pressing.
You can experiment with leaves, herbs, and grasses too! These often press wonderfully and add variety to your pressed flower collection.
Types of Presses
You have several options for pressing your flowers:
Book Press: The simplest method! Place flowers between sheets of parchment or blotting paper, then tuck them inside a heavy book. Stack more books on top for added weight.
Homemade Wooden Press: Make one using:
- Two 12×12-inch pieces of plywood or MDF
- Cardboard sheets
- Blotting or parchment paper (not wax paper as it doesn’t absorb moisture)
- Four bolts with wingnuts
Store-bought Press: These are designed specifically for flower pressing and come in various sizes.
Newspaper works well as the immediate covering for your specimens because it absorbs moisture effectively. Change the paper every few days to prevent mold growth.
Preparation for Pressing Flowers
Getting your flowers ready for pressing is a simple but important step. Proper preparation ensures your pressed flowers will look their best and last longer.
Harvesting Flowers
Choose flowers that are at their peak bloom, not wilted or damaged. Pick them on a dry day after the morning dew has evaporated. This helps prevent mold during the pressing process.
When collecting flowers from nature, always get permission if you’re on private property. Take only what you need and avoid endangered species.
Cut stems at an angle using sharp scissors or pruning shears. This helps the flowers take up water if you need to store them briefly before pressing.
For best results, press flowers soon after harvesting. If you need to wait, place them in a vase with flower food and fresh water to maintain freshness.
Cleaning and Arranging
Before pressing, make sure your flowers are completely dry and free of dirt. Gently shake off any insects or debris.
For wet flowers, lay them on a flour sack towel or paper towel and gently blot excess moisture. Never press damp flowers as they may develop mold or discolor.
Arrange your flowers face down on absorbent paper. Carefully spread petals to show their natural form. For thicker flowers, you might want to cut them in half to reduce bulk.
Consider how you’ll use the pressed flowers later. If you’re creating artwork, press a variety of shapes, sizes, and colors to give yourself options.
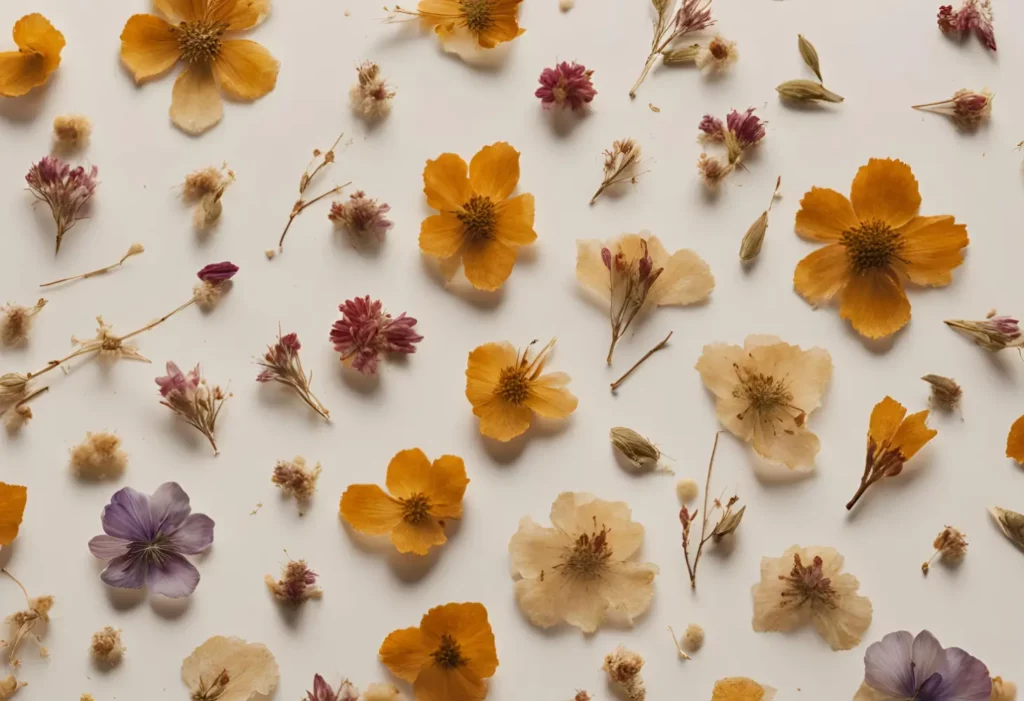
The Pressing Process
Once you’ve selected your flowers, the real magic happens during the pressing process. This transforms delicate blooms into flat, preserved keepsakes that can last for years.
Layering Flowers and Paper
Start by placing absorbent paper like parchment paper, newspaper, or blotting paper on a flat surface. This creates your base layer. Carefully arrange your fresh flowers on top, making sure they don’t overlap.
Remember to position the flowers exactly how you want them to look when pressed, as you won’t be able to adjust them later. For flowers with thick centers, you might want to cut them in half to press more effectively.
Cover your arranged flowers with another sheet of absorbent paper. You can press multiple flowers at once by creating several of these paper-flower-paper “sandwiches” stacked on top of each other.
Applying Pressure and Heat
Now it’s time to apply pressure! If you’re using a traditional flower press, place your layered flowers between the wooden boards and tighten the bolts or wingnuts evenly. Don’t overtighten as this might crush delicate petals.
For a DIY approach, place your flower layers inside a heavy book, then stack more books on top. The weight should be evenly distributed across the entire surface.
For quicker results, try the microwave method using a microwave press, or the ironing method:
- Microwave: Place between microwave-safe papers and heat in short 30-second bursts
- Iron: Set to medium heat (no steam!) and press gently over absorbent paper for 10-15 seconds
Check your flowers after 1-2 weeks. They should feel papery and completely dry to the touch.
After Pressing Care
Once your flowers are pressed, proper care is essential to preserve their beauty for a long time. Correctly drying and storing your pressed flowers will keep them looking vibrant and prevent damage.
Drying and Curing
After removing your pressed flowers from the press, make sure they’re completely dry before handling them. If they still feel damp, lay them on absorbent paper for a day or two.
Check for any moisture by gently touching the petals and stems. Flowers should feel papery and crisp, not soft or cool to the touch.
For extra protection, you can spray your dried flowers with a light mist of hairspray. This adds a thin protective coating and helps preserve colors. Hold the can about 12 inches away and spray lightly.
Let your pressed flowers cure for at least 24 hours before using them in projects. This final drying period helps stabilize the flowers and prevents mold growth later.
Storing Pressed Flowers
Store your pressed flowers in acid-free paper or between pages of a book when not in use. Avoid plastic bags which can trap moisture and cause your flowers to deteriorate.
Keep pressed flowers away from direct sunlight to prevent fading. A dark, dry place like a drawer or closet works best.
For long-term storage, consider these options:
- Acid-free albums with plastic sleeves
- Archival boxes lined with acid-free tissue
- Between sheets of wax paper in a heavy book
Label your storage containers with the flower types and pressing dates. This helps you track how long they’ve been stored and how well different varieties preserve.
Check your stored flowers occasionally for signs of insects or mold. If you notice any problems, remove affected flowers immediately to protect the rest of your collection.
Creative Projects and Uses
Once you’ve mastered pressing flowers, there are countless beautiful ways to display and use them. These delicate natural treasures can transform ordinary items into special keepsakes.
Decorative Art Pieces
Pressed flower art frames make stunning wall decorations that bring nature indoors. Choose a floating glass frame to create a simple but elegant display that lets light shine through your flowers. These frames highlight the delicate details and colors of each bloom.
Shadow boxes offer another wonderful option for displaying pressed flowers. The depth allows you to create layered designs or tell a story with your arrangement. Try organizing flowers from a special garden or vacation as a lasting memory.
For a more artistic approach, arrange pressed flowers on watercolor paper to create a scene. Mountains made from fern fronds or trees from dried stems can form beautiful landscapes. Seal your creation with Modge Podge for protection and a professional finish.
Personalized Gifts
Pressed flower bookmarks make thoughtful gifts that are simple to create. Press flowers between two pieces of contact paper or laminate them for durability. Add a tassel or ribbon for an extra special touch.
Handmade cards with pressed flowers feel much more meaningful than store-bought ones. Glue your pressed blooms to cardstock and write a personal message inside. These cards are perfect for birthdays, thank you notes, or any special occasion.
Pressed flower candle holders or luminaries create magical lighting effects. Apply pressed flowers to the outside of glass jars using Modge Podge, then place a tea light inside. The glow shining through the petals creates a warm, colorful ambiance perfect for dinner parties or relaxing evenings.
Phone cases decorated with pressed flowers showcase your love of nature every day. Clear cases work best to let the beauty of the flowers shine through.
Protecting and Preserving Your Pressed Flowers
Once you’ve successfully pressed your flowers, it’s important to protect them so they’ll last for years to come. Proper preservation techniques will help maintain their color and prevent damage from moisture and handling.
Using Sealants
Hairspray works as a simple sealant for pressed flowers. Give your dried blooms a light mist of basic hairspray to keep them crisp and well-preserved. Hold the can about 12 inches away and spray lightly to avoid soaking them.
Modge Podge is another excellent option for sealing pressed flowers. Apply a thin layer using a small paintbrush, being careful not to disturb the delicate petals. Work from the center outward for best results.
Clear craft glue can also protect your pressed flowers. Dilute it slightly with water for easier application. This creates a protective barrier that helps preserve the flower’s color and prevents it from becoming brittle over time.
Recommended Sealants:
- Hairspray (basic, non-scented)
- Modge Podge (matte finish works best)
- Clear craft glue (diluted)
- Acrylic sealer spray
Proper Display and Storage Techniques
Shadow boxes provide an ideal way to display your pressed flowers while protecting them from dust and damage. Leave a small gap between the glass and flowers to prevent moisture buildup that could cause mold.
If you’re storing pressed flowers for future projects, keep them between sheets of acid-free paper in a book or flat container. Avoid places with high humidity or direct sunlight, as these can fade colors and damage the delicate petals.
For long-term preservation, consider mounting pressed flowers between two pieces of glass sealed with washi tape or copper foil tape. This creates a beautiful floating effect while keeping air and moisture away from your flowers.
Store any unused pressed flowers in a cool, dry place. A plastic container with a desiccant packet will help maintain the perfect environment and keep your botanical treasures in perfect condition for your next creative project.
Troubleshooting Common Issues
Even the most careful flower pressers run into problems sometimes. Here are solutions to common issues that might pop up during your pressing journey.
Color Preservation
Flowers can lose their vibrant colors during pressing, but you can take steps to keep them looking fresh. Press your flowers as soon as possible after picking – waiting too long leads to color loss before you even start.
Choose your paper wisely! Use smooth white typing paper that absorbs moisture without transferring patterns onto your blooms. Colored paper might bleed onto delicate petals.
Try pressing in a dark area since sunlight can fade colors quickly. For vibrant specimens like bright red roses or purple violets, consider changing your blotting papers more frequently to remove moisture faster.
Some flowers naturally preserve their colors better than others. Blues and purples often fade to a lighter shade, while whites and yellows tend to maintain their original appearance. For special blooms, you might want to experiment with silica gel drying before pressing.
Mold and Damage Prevention
Moisture is the biggest enemy when pressing flowers! If you notice mold appearing on your pressed flowers, you’re likely not removing enough moisture during the process.
Change your paper towels or blotting sheets every 2-3 days during the first week of pressing. This prevents trapped moisture from causing mold growth. Viva paper towels work well because they have no pattern to imprint on your flowers.
For thick-petaled flowers like roses and orchids, try pressing each petal separately rather than the whole flower. The center parts often contain more moisture and take longer to dry.
Using a warm iron or microwave press can speed up the drying process for problem flowers. Just be careful not to overdo it – too much heat can brown your petals.
Store your finished pressed flowers in a dry place. Consider adding silica gel packets to your storage containers to absorb any remaining moisture and prevent damage over time.
Advanced Techniques in Flower Pressing
Once you’ve mastered the basics, there are exciting ways to elevate your flower pressing skills. These advanced methods help create more intricate designs and incorporate your pressed flowers into beautiful artwork.
Using A Flower Press for Intricate Designs
A dedicated flower press gives you much more control than books or microwave methods. Look for presses with multiple layers so you can work on several projects simultaneously. When pressing delicate flowers like pansies or Queen Anne’s lace, place them between acid-free paper rather than newspaper to preserve their natural colors better.
Try creating patterns before pressing by arranging small blooms in specific designs. You can also press whole bouquets intact to preserve their arrangement. Remember to label each layer with the date and flower type.
For three-dimensional effects, press flowers at different stages of blooming. This gives you varied shapes from the same plant that can create depth in your final artwork.
Pro Tip: Some flowers press better when slightly dried first. Let them sit for a few hours before pressing to reduce moisture content.
Incorporating Pressed Flowers into Mixed Media
Your pressed flowers can become stunning elements in various art forms. Try embedding them in clear resin to create jewelry, bookmarks, or coasters. The transparency highlights their delicate beauty.
For scrapbooking or card making, use a thin layer of PVA glue or special flower glue that dries clear. Apply it with a fine brush only to the stems and thicker parts.
Create botanical prints by arranging pressed flowers on watercolor paper and adding light washes of paint around them. The contrast between the natural elements and painted backgrounds creates striking results.
Framed pressed flower art makes wonderful gifts. Try shadow boxes for a 3D effect or float frames with glass on both sides to display your flowers from all angles.
Don’t limit yourself to flat surfaces! Pressed flowers can decorate candles, lampshades, and even furniture when sealed properly with mod podge or clear varnish.
Sourcing and Sustainability
Getting beautiful pressed flowers starts with responsible sourcing. When you choose flowers with sustainability in mind, you create art that’s as kind to the planet as it is beautiful.
Eco-Friendly Practices
When pressing flowers, try to use materials that are gentle on the environment. Look for flower presses made from 100% sustainably sourced wood. These tools will last for years and have minimal environmental impact.
Don’t throw away your pressing supplies! Reuse paper, cardboard, and wooden press components whenever possible. This simple step reduces waste and saves money.
For wrapping finished pressed flower creations, choose recyclable paper or bags. Many artists now offer these eco-options to customers who want to repurpose flowers after events.
Tie stems with rubber bands or soft string when drying flowers to make future pressing easier. These flexible ties move with the flowers as they dry, preventing damage.
Supporting Local Flora
Always ask permission before picking wildflowers. Take only what you need—a small section from each plant rather than the entire flower. This helps protect native plant populations.
Growing your own cutting garden is a wonderful way to ensure a steady supply of pesticide-free flowers. Even a small patch can provide beautiful varieties throughout the growing season.
Consider incorporating flower growing into vegetable gardens. This practice supports pollinators and can provide both financial and environmental benefits for small farms.
Visit local farmer’s markets to find unique, seasonal blooms that haven’t traveled far. These flowers often last longer and support your local economy.
Forage responsibly by learning which plants in your area are abundant and which are protected or endangered. Never take rare specimens for pressing.