To remove soft sticky resin, first scrape away as much gummy material as possible, then wipe the remaining residue with an appropriate cleaner such as isopropyl alcohol or acetone, depending on the surface. Work in a ventilated area, wear nitrile gloves, and keep paper towels, plastic scrapers, and a trash bag nearby.
If the resin is sticky only on the surface but hard underneath, you may be able to clean the tacky layer and recoat it. If the resin is soft all the way through, it usually needs to be removed completely before you can repair or restart the project. Do not sand wet or gummy resin; it smears, clogs sandpaper, and may expose you to uncured resin dust or residue.
Before You Start: Identify What Kind of Sticky Resin You Have
Before removing anything, figure out whether the resin is tacky on top or soft throughout.
Press a gloved finger or a wooden craft stick onto an inconspicuous area. If the surface feels sticky but the piece underneath is firm, you are probably dealing with a tacky top layer. This can sometimes be cleaned and recoated.
If the tool sinks in, pulls up strings, or leaves dents, the resin is undercured. That means the resin did not harden properly and should be scraped off. Pouring more resin over it usually traps the problem.
Also check the surface underneath. Glass, metal, ceramic, and silicone can handle stronger cleanup than painted wood, paper, photos, or porous art surfaces.
Tools, Supplies, and Safety Prerequisites
Gather everything before you start so you are not touching drawers, faucets, or tools with sticky gloves.
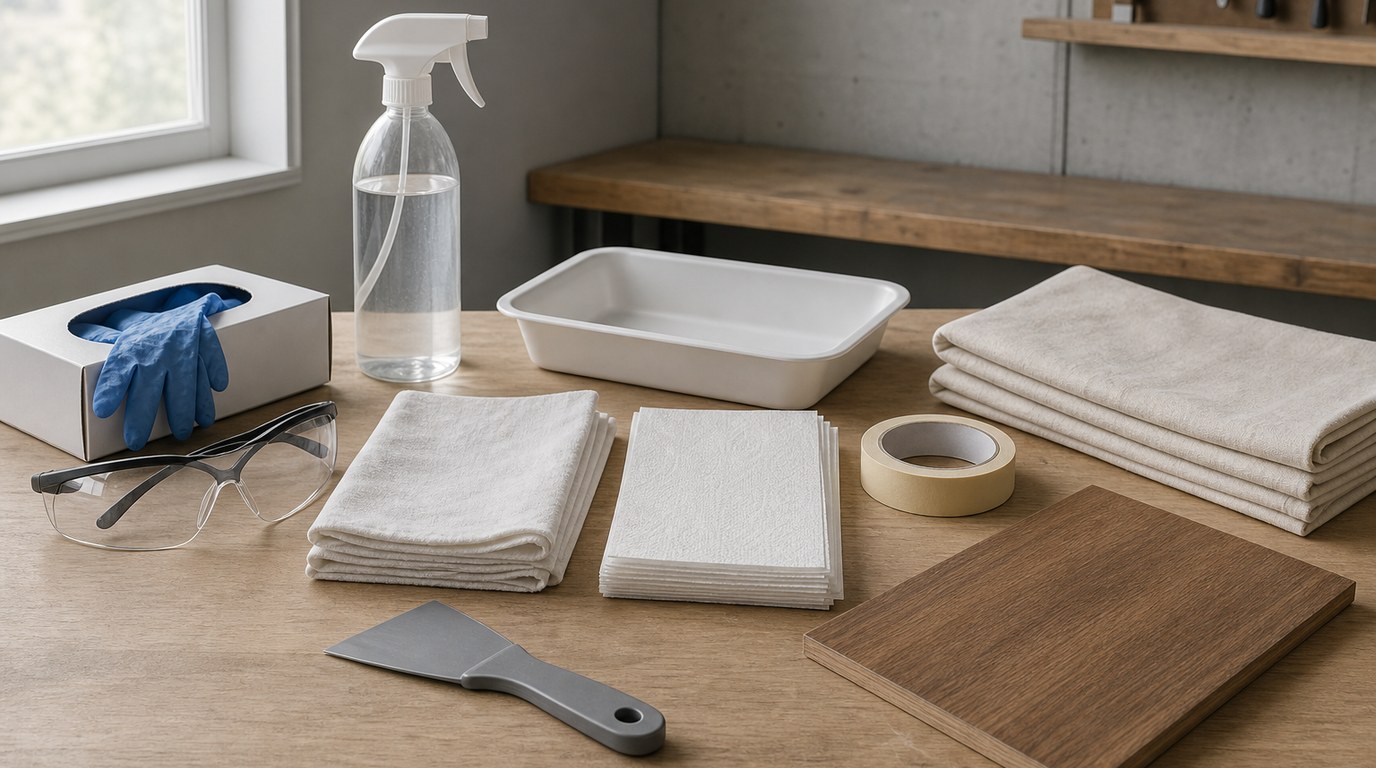
You will need:
- Nitrile gloves
- Safety glasses
- Good ventilation or an open window
- Plastic scraper, old gift card, or silicone spatula
- Paper towels or disposable shop towels
- Isopropyl alcohol, preferably 91% or higher
- Acetone for non-porous, solvent-safe surfaces
- Cotton swabs for corners
- Trash bag or disposable container
- Dish soap and warm water for final washing
- Optional: painter’s tape to protect nearby areas
Avoid latex gloves because resin can break them down. Do not use solvents near flames, heat guns, candles, or smoking materials. Test acetone in a hidden spot first; it can damage paint, plastic, varnish, and some countertops.
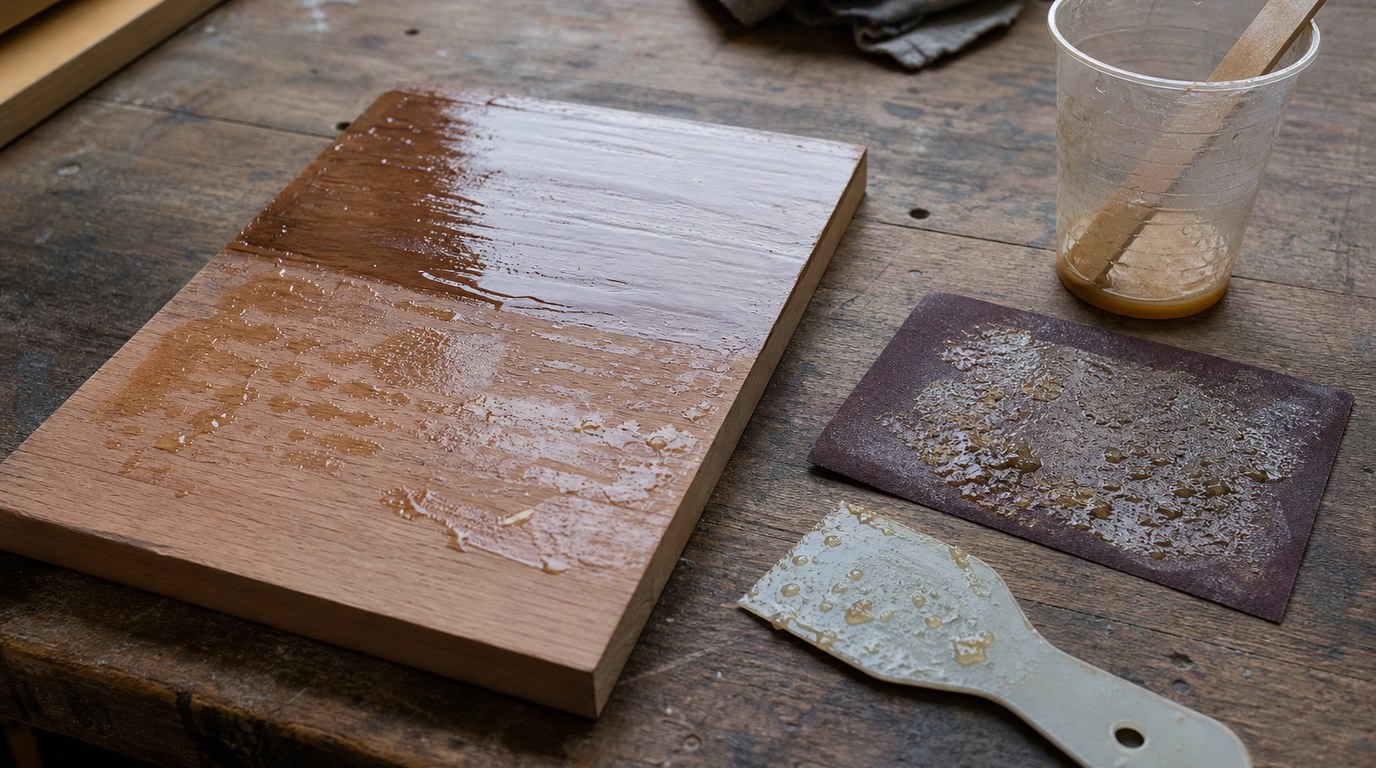
Step 1: Remove as Much Soft Resin as Possible by Scraping
Start with physical removal. The less sticky resin left behind, the less solvent you need.
Put on gloves and place the project on a protected surface. Hold a plastic scraper at a low angle and push the soft resin toward one edge. Wipe the scraper onto paper towels as you work. For curved areas, a silicone spatula or wooden craft stick may give better control.
Do not use a sharp metal blade unless the base can handle scratches. On artwork, tumblers, trays, or tabletops, aggressive scraping can damage the surface you are trying to save.
Keep changing paper towels. Smearing the same gummy resin around only spreads contamination and makes cleanup slower.
Step 2: Wipe the Residue with the Right Cleaner
After scraping, remove the remaining sticky film. For most resin craft surfaces, start with high-percentage isopropyl alcohol. Dampen a paper towel, then wipe in one direction. Fold to a clean area often so you lift residue instead of redistributing it.
For glass, metal, ceramic tile, and some silicone tools, acetone can work faster. Use it sparingly and only where it will not damage the surface. Never soak painted, sealed, plastic, paper, or photo-based projects in acetone.
Cotton swabs help around edges, bezels, and mold details. When the towel starts coming away mostly clean, wash the area with warm water and dish soap if the surface allows it. Dry completely before judging the repair.
Step 3: Clean Sticky Resin Out of Silicone Molds
Silicone molds need gentle handling so you do not tear details or leave residue that ruins the next casting.
First, flex the mold carefully and peel out any large pieces of soft resin. Use a plastic scraper or gloved finger to lift gummy areas. Wipe the cavity with isopropyl alcohol on a paper towel or cotton pad.
For stubborn residue, repeat with fresh towels rather than flooding the mold. Too much solvent can swell or dull some silicone over time. Once clean, wash the mold with mild dish soap and warm water, rinse well, and let it air dry completely.
If the mold still feels greasy or sticky after cleaning, retire it from important projects.
Step 4: Deal with a Tacky Top Layer Without Removing the Whole Project
If the resin is hard underneath and only the top is tacky, you may be able to save it.
Wipe the surface with isopropyl alcohol to remove the sticky film. Use light pressure and fresh towels. Once the tackiness is gone, let the piece dry fully. Check that the surface is clean, dull, and free from oily patches.
If the surface is solid, you can lightly scuff it with fine-grit sandpaper, wipe away dust, and apply a fresh, accurately mixed flood coat of resin. If the surface gums up while wiping or sanding, stop. That means the cure problem goes deeper, and the soft resin should be removed instead.
Step 5: Decide Whether to Recoat, Repair, or Start Over
Recoating works only when the base layer is firm, clean, and stable. If the piece dents easily, bends unusually, smells strongly of uncured resin, or keeps bleeding sticky residue after cleaning, do not add more resin.
Repair is reasonable for coasters, trays, jewelry, tumblers, and art pieces where the sticky layer was shallow. Remove the tack, sand only after the surface is hard, then recoat.
Start over when the resin is soft throughout, mixed into porous materials, or trapped in detailed areas you cannot clean. It is frustrating, but pouring new resin over a bad cure usually wastes more resin and creates a thicker sticky mess.
Result Check: How to Know the Sticky Resin Is Really Gone
After cleaning, let the project sit for several hours in a dust-free area. Then check it with clean gloves.
The surface should feel dry, not greasy, tacky, or rubbery. A paper towel should glide over it without sticking. Press lightly with a craft stick; it should not dent or pull strings.
Also smell the piece. A strong uncured resin odor can mean residue remains. If the area still feels slick or sticky after another wipe, remove more material before recoating.
Common Mistakes That Make Sticky Resin Harder to Remove
The biggest mistake is adding fresh resin over uncured resin. This traps sticky material and can prevent the new layer from bonding correctly.
Another mistake is sanding too soon. Soft resin does not sand cleanly; it smears and clogs the paper. Wait until the surface is hard or remove it by scraping and wiping.
Avoid using household cleaners, vinegar, or water alone on uncured resin. They usually do not break down the residue well. Also avoid touching the project with bare hands. Uncured resin can irritate skin, and skin oils can interfere with repair coats.
Why Resin Stays Soft or Sticky in the First Place
Sticky resin usually comes from a mixing or curing problem. Common causes include inaccurate measuring, not scraping the cup sides while mixing, using the wrong resin-to-hardener ratio, or mixing too briefly.
Understanding why epoxy resin does not harden can help you spot the problem before mixing your next batch.
Cold temperatures can also slow or prevent a good cure. Resin generally needs a warm, stable room to cure properly. Old resin, contaminated pigments, too much colorant, or incompatible additives can also leave a surface tacky.
For the next pour, measure carefully, mix thoroughly, follow the product’s temperature range, and avoid guessing ratios.
FAQ
Can I Just Pour New Resin Over Sticky Resin?
Only if the resin underneath is hard and you have cleaned off the tacky surface. Do not pour over resin that is soft, gummy, dented, or wet-looking. New resin will not reliably fix an undercured layer and may trap uncured material inside the project.
Will Sticky Epoxy Resin Eventually Cure?
Sometimes a slightly tacky surface improves with more time and warmth, especially if the room was cold. But resin that is soft, stringy, or gummy after the normal cure window usually will not cure correctly. In that case, remove it instead of waiting indefinitely.
Can I Sand Off Soft Sticky Resin?
No. Soft resin smears instead of sanding into dust, and it can clog sandpaper immediately. It may also spread residue over the surface. Scrape away the gummy resin first, wipe with the right cleaner, and sand only after the remaining surface is firm and dry.
What Solvent Removes Uncured Resin?
High-percentage isopropyl alcohol is a good first choice for many resin craft cleanups. Acetone can remove uncured resin faster on solvent-safe, non-porous surfaces such as glass or metal. Always test first, ventilate well, and avoid using solvents near flames or heat sources.
How Do I Dispose of Sticky Resin Cleanup Waste?
Place used towels, gloves, and scraped resin in a disposable bag or container. Follow your local rules for resin and solvent waste, especially if towels are soaked with alcohol or acetone. Do not rinse uncured resin down the sink, and keep waste away from children, pets, and heat.