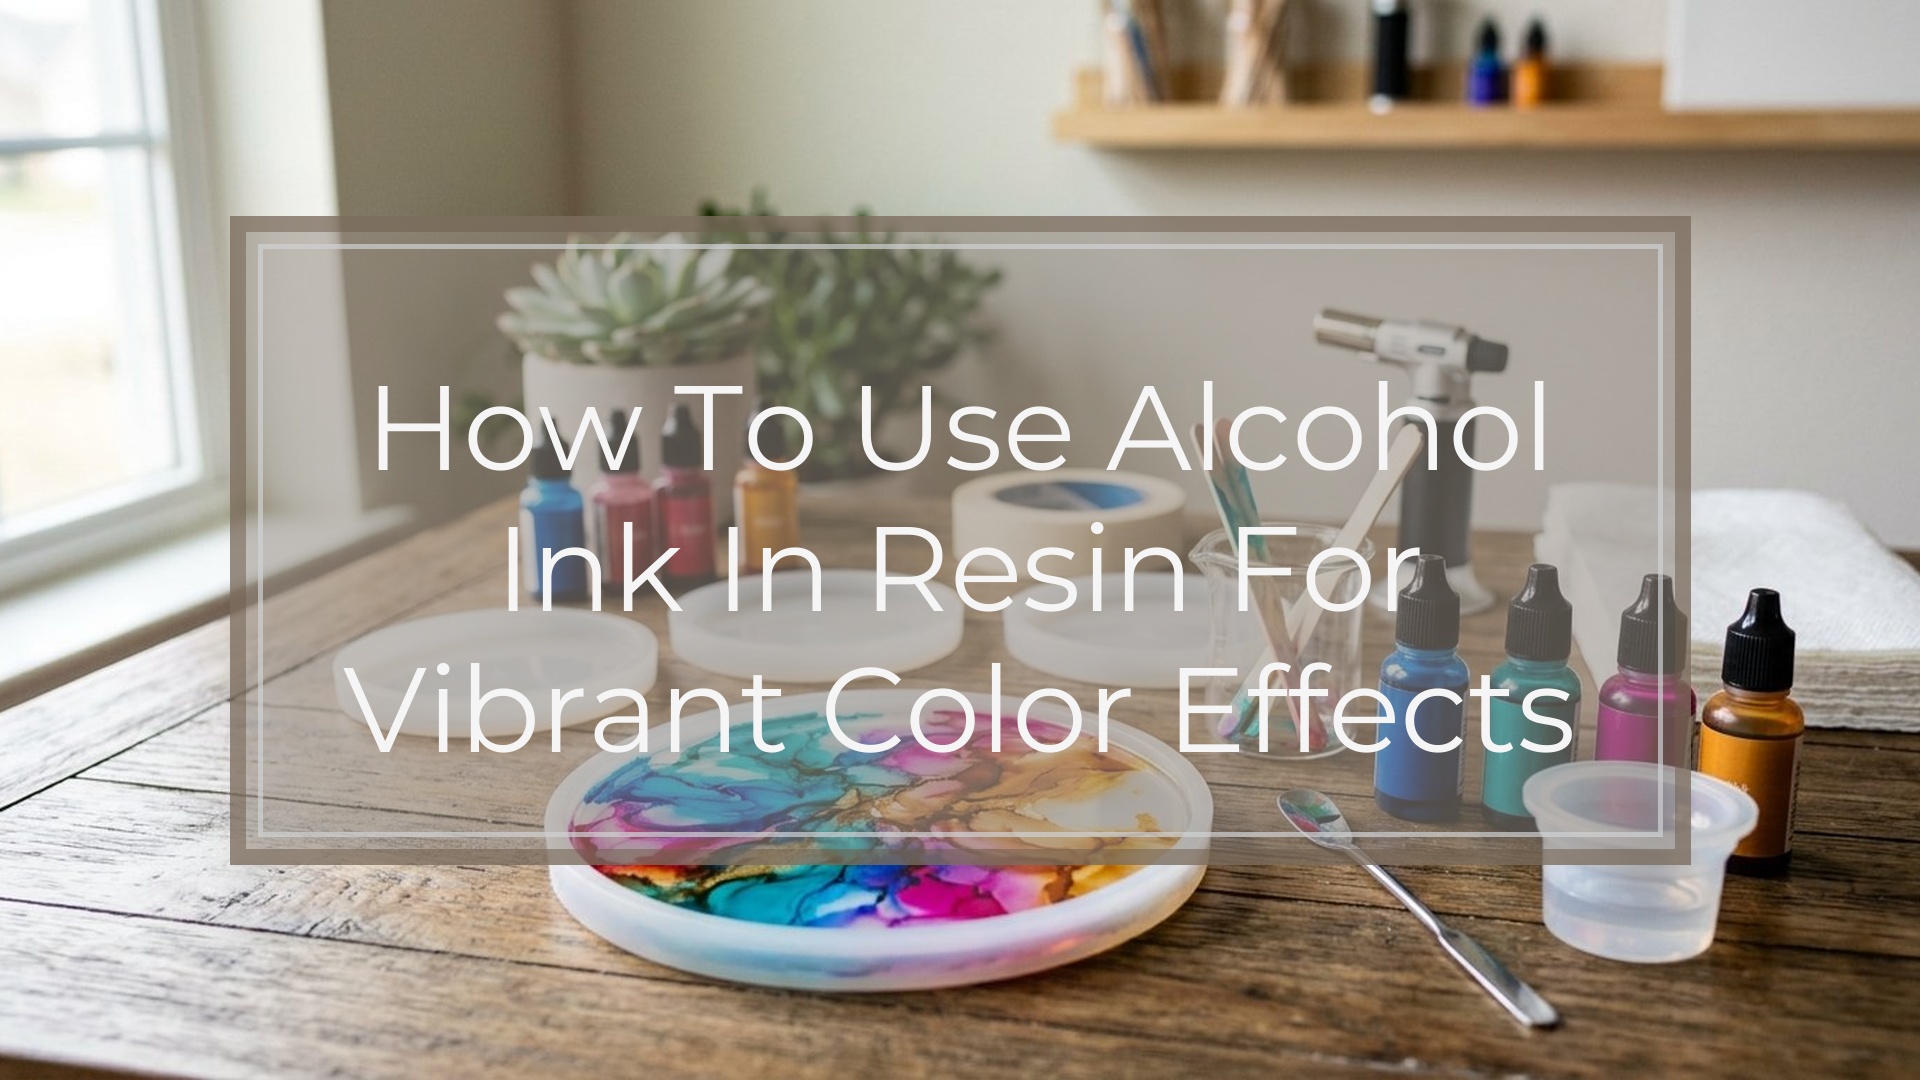
To use alcohol ink in resin, mix your epoxy resin fully first, then add a very small amount of alcohol ink and stir gently until the color is even. Start with drops, not squeezes, because too much ink can slow curing, cause soft spots, or make colors muddy. For layered looks, tint separate cups instead of overmixing everything together. For petri or bloom effects, pour clear or lightly tinted resin first, then drop ink onto the surface and move it with a stick or white sinker ink if needed. Work in thin layers, watch heat buildup in deep pours, and always test your ink-to-resin ratio before doing a final piece.
What You Need Before You Start
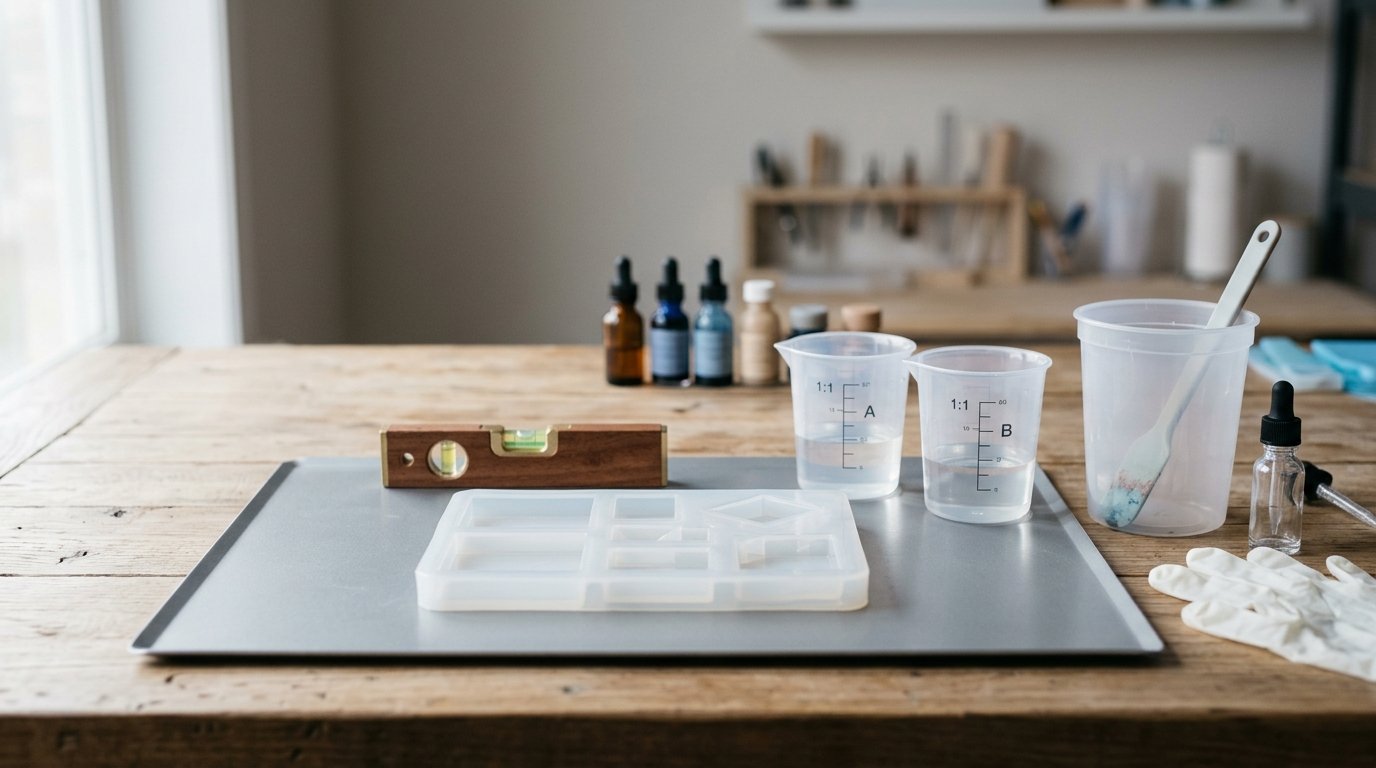
Gather everything before you mix, because epoxy gives you limited working time.
You’ll need:
- Epoxy resin and hardener suited to molds, coating, or casting
- Alcohol ink made for art use
- Mixing cups for clear resin and color batches
- Stir sticks or silicone tools
- Silicone mold, bezel, panel, or blank
- Gloves and a protected work surface
- Heat gun or torch if you normally use one for bubbles
- Toothpicks or skewers for dragging ink
- White alcohol ink or sinker ink if you want petri effects
- Level workspace in a dust-controlled room
Best conditions:
- Room temperature: usually 70–75°F / 21–24°C
- Dry environment with low humidity
- Pieces that are not excessively deep unless your resin is made for deep pours
Before starting, check three rules:
- Measure and mix resin correctly first. Alcohol ink cannot fix poorly mixed epoxy.
- Use alcohol ink sparingly. Too much liquid additive can weaken curing.
- Match the effect to the resin depth. Swirls and surface blooms behave differently in shallow pours versus deep molds.
Here’s a quick guide for ink amount:
| Resin amount | Suggested starting ink | Notes |
|---|---|---|
| — | —: | — |
| 15–30 ml | 1–2 drops | Good for light transparent tint |
| 30–60 ml | 2–4 drops | Build color slowly |
| 60–120 ml | 4–8 drops | Split into separate cups for multiple colors |
| Any batch | Usually stay under about 3–6% additive by volume | More can cause soft cure or separation |
If you want crisp colors, pre-plan them. Alcohol ink blends fast in resin, so too many shades in one cup often turn brown or gray.
Step 1
1. Mix the Resin First, Then Tint in Small Batches
Start by preparing your mold or surface and making sure it sits level. If you are using a mold, set it on a tray or flat board so you can move it without flexing.
Measure the resin and hardener exactly as the manufacturer directs. Pour both parts into a clean cup and stir thoroughly, scraping the sides and bottom for the full recommended mixing time. This matters more than the ink. If the resin is under-mixed, adding color only hides the problem until the piece stays tacky.
Once the resin is fully mixed, divide it if you want more than one color. Pour small amounts into separate cups rather than trying to create multiple shades from one large cup. This gives you better control and keeps the colors cleaner.
Now add alcohol ink:
- Add 1 drop at a time to each cup.
- Stir slowly and fully.
- Check the color against the side of the cup.
- Add another drop only if needed.
For transparent jewel tones, stop early. Alcohol ink is strong, and resin usually looks darker in the cup than in the cured piece, especially in thin casts. If you want a smoky or marbled look, don’t fully blend every streak; mix just enough to disperse most of the ink.
If bubbles appear, let the cup rest briefly or pass gentle heat across the surface if your resin allows it.
Caution: Don’t squeeze in extra ink to “save time.” Overloading resin with alcohol-based color is one of the fastest ways to get soft spots, fish-eye separation, or delayed cure.
At this stage, decide which of these two routes you want:
- Even color: fully mix the tint, then pour
- Swirl or bloom effect: partially mix or layer different tinted cups in the mold
The main goal of Step 1 is simple: get a properly mixed resin base and controlled color strength before you start creating effects.
Step 2
2. Pour, Place the Ink for the Effect You Want, and Stop Before It Turns Muddy
Pour your tinted resin into the mold, bezel, or onto your surface. For a single transparent color, pour slowly in one stream and let it self-level. For multiple colors, pour each shade into separate areas, then lightly connect them with a stick, toothpick, or silicone tool.
Use these methods depending on the look you want:
For a solid transparent tint
- Pour the fully mixed colored resin
- Pop surface bubbles
- Leave it alone so the color stays uniform
For marbling or wispy swirls
- Pour clear resin first, then add small ribbons or drops of tinted resin
- Drag a stick through the color once or twice
- Stop early; extra swirling quickly muddies the design
For a layered effect
- Pour one tinted batch
- Let it thicken slightly or partially cure if your resin system allows
- Add the next color gently to avoid complete blending
For petri-style effects
- Fill the mold with clear or lightly tinted resin
- Drop alcohol ink onto the surface
- Add a drop of white sinker ink over or near the color if you want it to push downward
- Let the ink spread naturally before adding more
If an ink drop spreads too much, don’t keep chasing it with a tool. That usually enlarges the blur. Instead, wait a few seconds, then add a second controlled drop nearby for more contrast.
Watch heat and depth carefully. Alcohol ink effects can shift as resin warms during cure. In deeper pours, colors may drift, fade, or sink more than expected. If you need strong definition, work in shallower layers.
Caution: Use heat lightly. A torch or heat gun can over-thin the resin surface, which makes inks blow out, merge too fast, or create bare spots. One quick pass is usually enough.
When the piece looks slightly cleaner than your ideal final result, stop. Resin continues to flow for a while, and designs soften as they level.
How to Check the Result
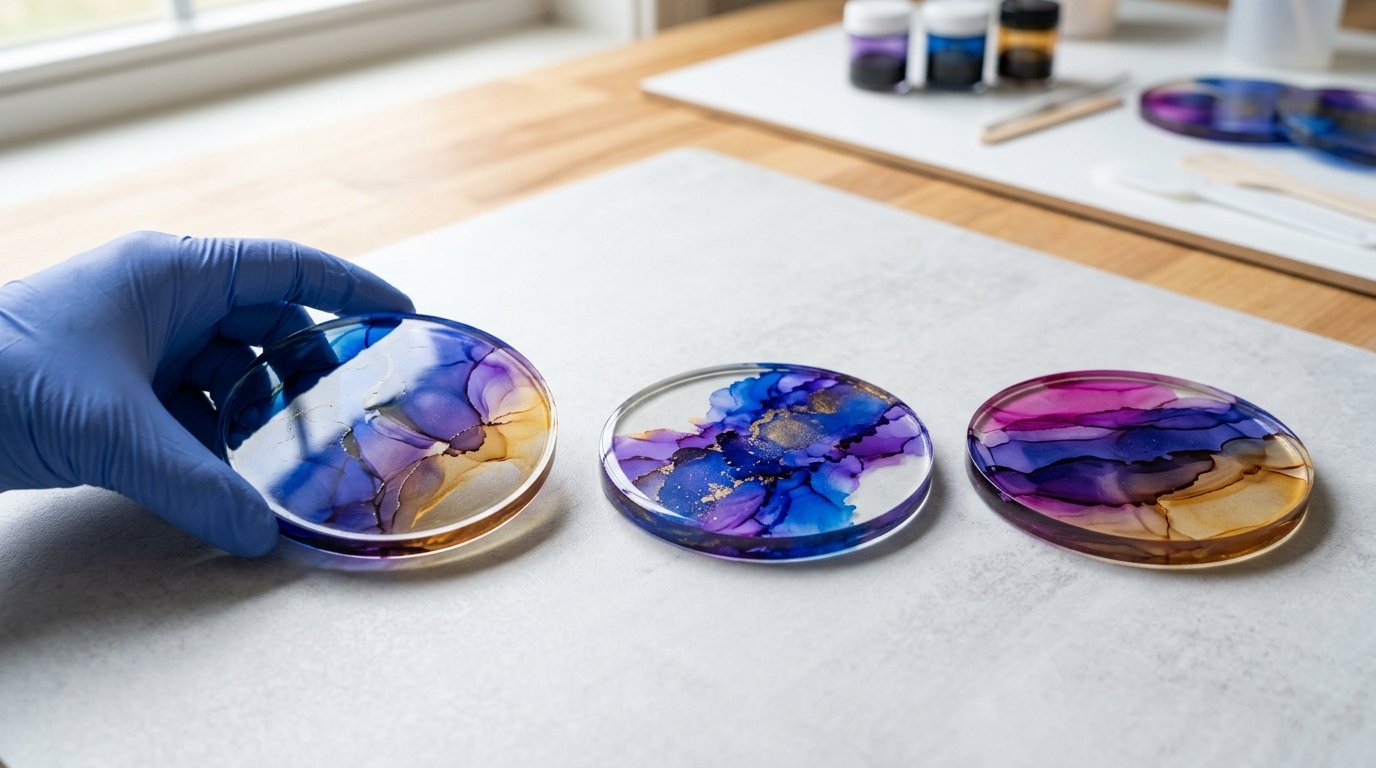
A successful alcohol ink resin piece should meet three checks: cure, color, and pattern.
First, check the cure after the full manufacturer cure time, not just after a few hours. The surface should feel hard or appropriately firm for that resin type, not gummy, oily, or rubbery. If it bends more than expected, the ink load may have been too high or the resin may have been under-mixed.
Next, check the color quality. Good results usually look:
- Clear or intentionally translucent
- Even in solid-color areas
- Distinct instead of brownish where multiple colors meet
- Free from large separated puddles of pure ink
Then check the pattern behavior. Swirls should still be visible after curing, not collapsed into one flat tone. Petri drops should show intentional sinking or blooming, not random cloudy blobs throughout the whole mold.
If the piece cured well but the effect is weak, your fix next time is easy: use the same mixing method and add slightly more ink, or create more contrast by keeping some resin clear. If the piece looks muddy, use fewer colors and make fewer passes with your tool. If the piece stayed sticky, reduce the ink amount and recheck your resin ratio and mixing time before blaming the brand of ink.
FAQ
Can You Put Alcohol Ink Directly Into Epoxy Resin?
Yes. Add it after the resin and hardener are fully mixed. Use only a small amount, because alcohol ink is a liquid additive and too much can interfere with curing, create soft spots, or cause the color to separate instead of blending cleanly.
How Much Alcohol Ink Should You Add to Resin?
Start with 1–2 drops in a small batch and build slowly. In most projects, keeping total liquid colorant low is safest. If you need strong color, tint separate small cups rather than dumping a large amount of ink into one batch.
Why Did My Resin Stay Sticky After Adding Alcohol Ink?
The usual causes are too much ink, inaccurate resin-to-hardener measurement, or incomplete mixing. Alcohol ink can contribute to a soft cure if overused, but many sticky pieces also come from mixing errors that were already present before the color was added.
Can Alcohol Ink Make Resin Opaque?
Not usually by itself. Alcohol ink is best for transparent or translucent color. If you want an opaque finish, use a pigment paste, resin dye made for opacity, or combine alcohol ink effects with an opaque white or colored resin layer.
Do Alcohol Inks Work for Petri Dish Resin Art?
Yes, especially in clear resin poured in molds. Drop the ink onto the surface and use white sinker ink if you want the color to descend. Results depend on resin thickness, mold depth, and timing, so small test pours help a lot.