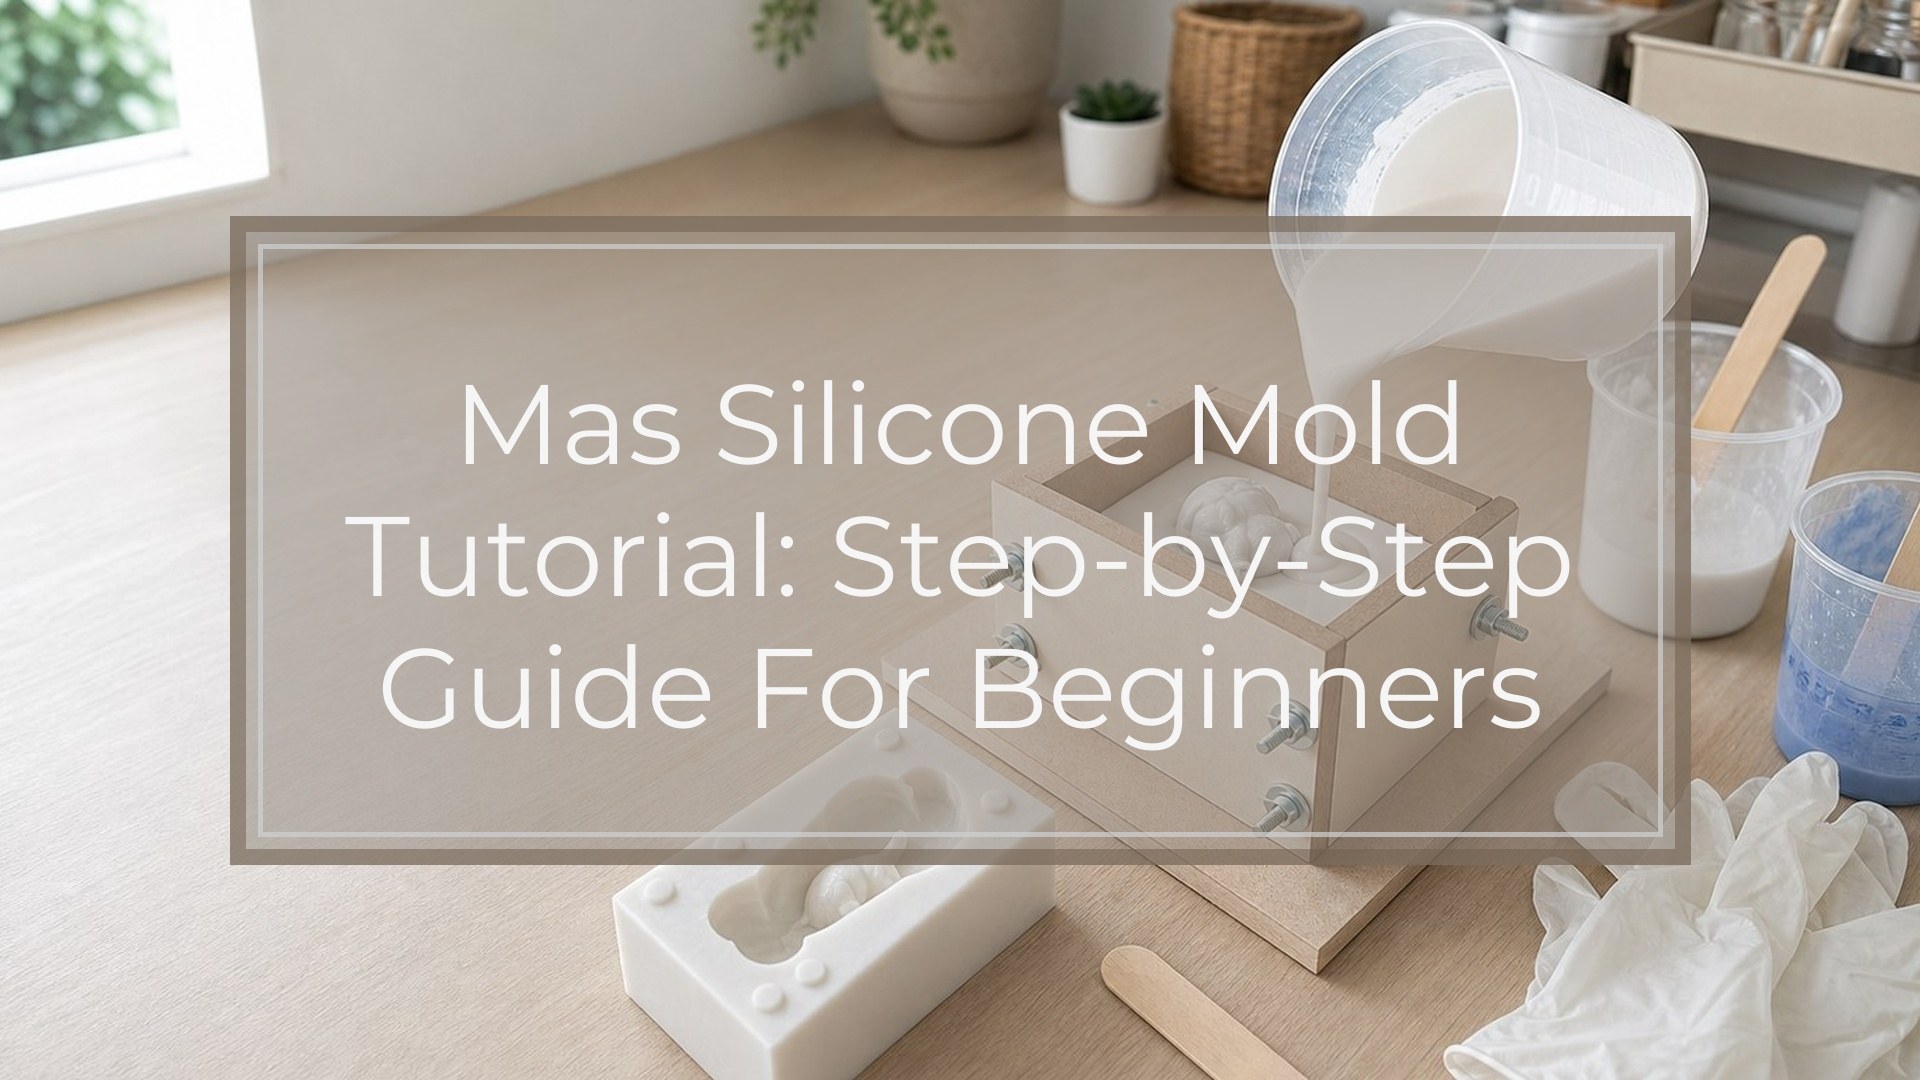
A MAS silicone mold tutorial for resin projects starts with a clean master object, a sealed mold box, accurate silicone measuring, slow mixing, and a controlled pour. The goal is to make a reusable silicone mold that captures detail without leaks, bubbles, or cure problems. For most beginner resin projects, a simple one-piece pour mold is the best starting point because it needs fewer cuts, fewer registration points, and less setup than a two-part mold. Work on a level surface, follow the silicone manufacturer’s mix ratio exactly, and let the mold cure fully before using it with resin. Rushing the measuring, pouring, or demolding stages is the fastest way to waste silicone.
Once the basic pour steps make sense, silicone mold making for epoxy resin follows the same careful measuring, sealing, and curing habits.
Before You Start: What This Silicone Mold Tutorial Covers
This tutorial walks through making a basic reusable silicone mold for resin casting. It is best for flat-backed or single-sided objects such as charms, pendants, cabochons, small decorative pieces, tiles, coins, and simple shapes.
It does not cover complex two-part molds, food-safe mold making, high-temperature casting, or molds for objects with deep undercuts. If your master object has areas where cured silicone could lock around it, choose a simpler item first or plan a cut mold. Beginners should start small to learn the process before using expensive silicone.
Tools, Materials, and Workspace Prerequisites
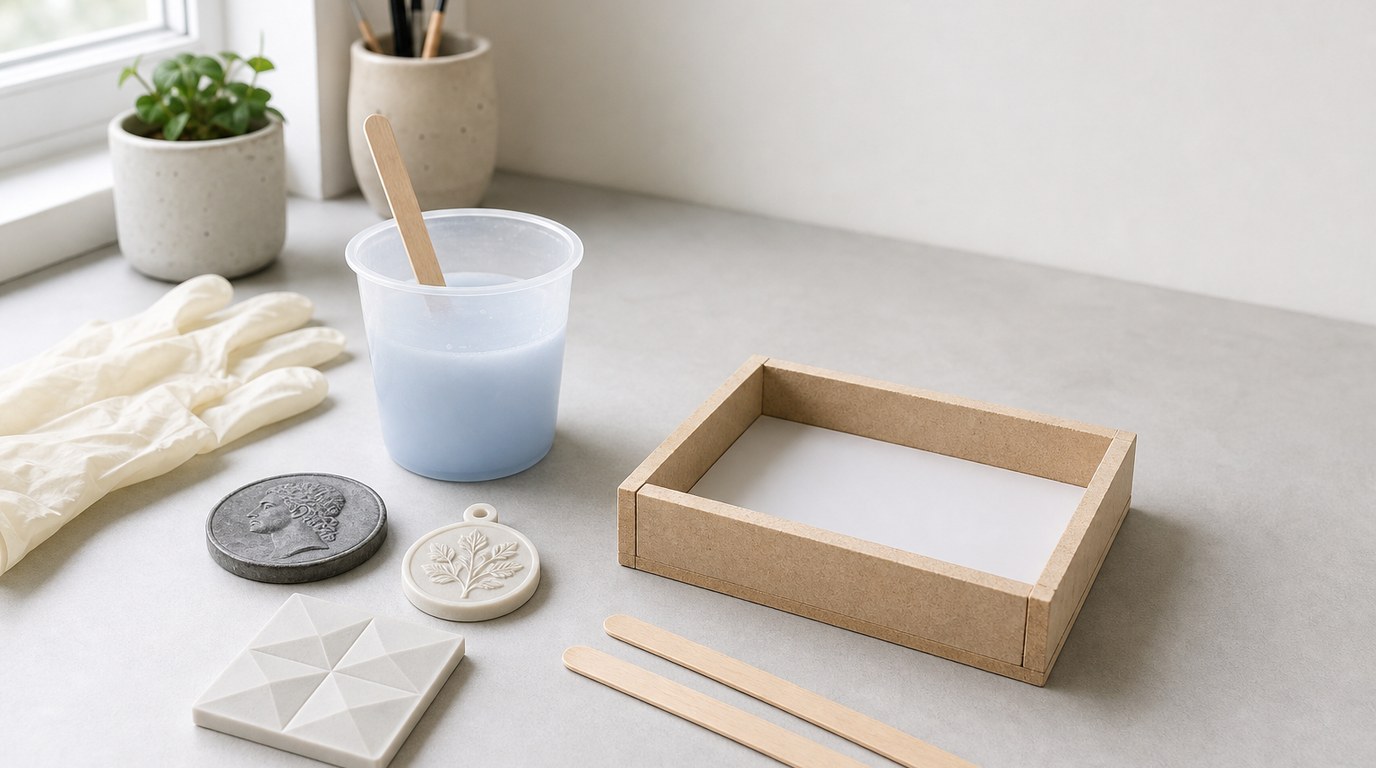
Gather everything before opening the silicone containers. You need MAS-style two-part silicone mold material, a clean master object, a mold box, hot glue or clay for sealing, a mixing cup, stir sticks, a digital scale or measuring cups as required by your product, gloves, paper towels, and a level work surface.
Use a mold release if your master is porous, delicate, or has a surface that may bond to silicone. Good mold box materials include plastic containers, foam board, acrylic sheet, or sealed cardboard. Work in a dust-free area at the temperature recommended on the silicone label. Wear gloves, protect the table, and keep resin, water, and contaminants away from uncured silicone.
Step 1: Choose and Prepare the Master Object
Pick a master object with a smooth, clean surface and enough strength to handle light pressure during setup. Wash it if needed, then dry it completely. Any dust, lint, fingerprints, or scratches on the master can transfer into the mold and show up in future resin castings.
Seal porous items such as wood, plaster, paper, or unglazed clay before molding. Use an appropriate sealer and let it dry fully. If the master is glossy, make sure it is free from oil or polish residue. Place the best-looking side facing the direction you want the resin detail to capture.
Step 2: Build and Seal the Mold Box
Build a mold box with at least 1/4 to 1/2 inch of space around all sides of the master. The walls should be taller than the highest point of the object, with extra room for a solid silicone backing. A mold that is too thin can warp, tear, or flex unevenly during resin casting.
Attach the master to the bottom of the box with a small amount of hot glue, double-sided tape, or clay. Press it down firmly so silicone cannot flow underneath unless you want a full surround mold. Seal every corner and seam of the box. Silicone finds tiny gaps quickly, so check twice before pouring.
Step 3: Estimate How Much Silicone You Need
To avoid wasting silicone, estimate the mold box volume before mixing. For a rectangular box, multiply length by width by planned pour height. Then subtract a rough estimate of the space taken up by the master object.
A simple beginner method is to fill the mold box with dry rice to the desired level, pour the rice into a measuring cup, and use that volume as a guide. Do this before securing anything that cannot get dusty. Always mix slightly more silicone than calculated, but not so much that you create unnecessary waste.
Step 4: Measure and Mix the Silicone
Read the product instructions before measuring. Some silicones mix by weight, while others mix by volume. Do not guess the ratio. Too much Part A or Part B can leave the mold sticky, weak, or uncured.
Measure both parts into a clean mixing cup. Scrape the sides of the containers if needed, but avoid introducing dirt or old cured silicone bits. Mix slowly and thoroughly, scraping the bottom and sides of the cup several times. Fast whipping adds bubbles. The silicone should look uniform, with no streaks.
Pay attention to pot life, which is the amount of working time before the silicone thickens. If the pot life is short, have the mold box ready before mixing.
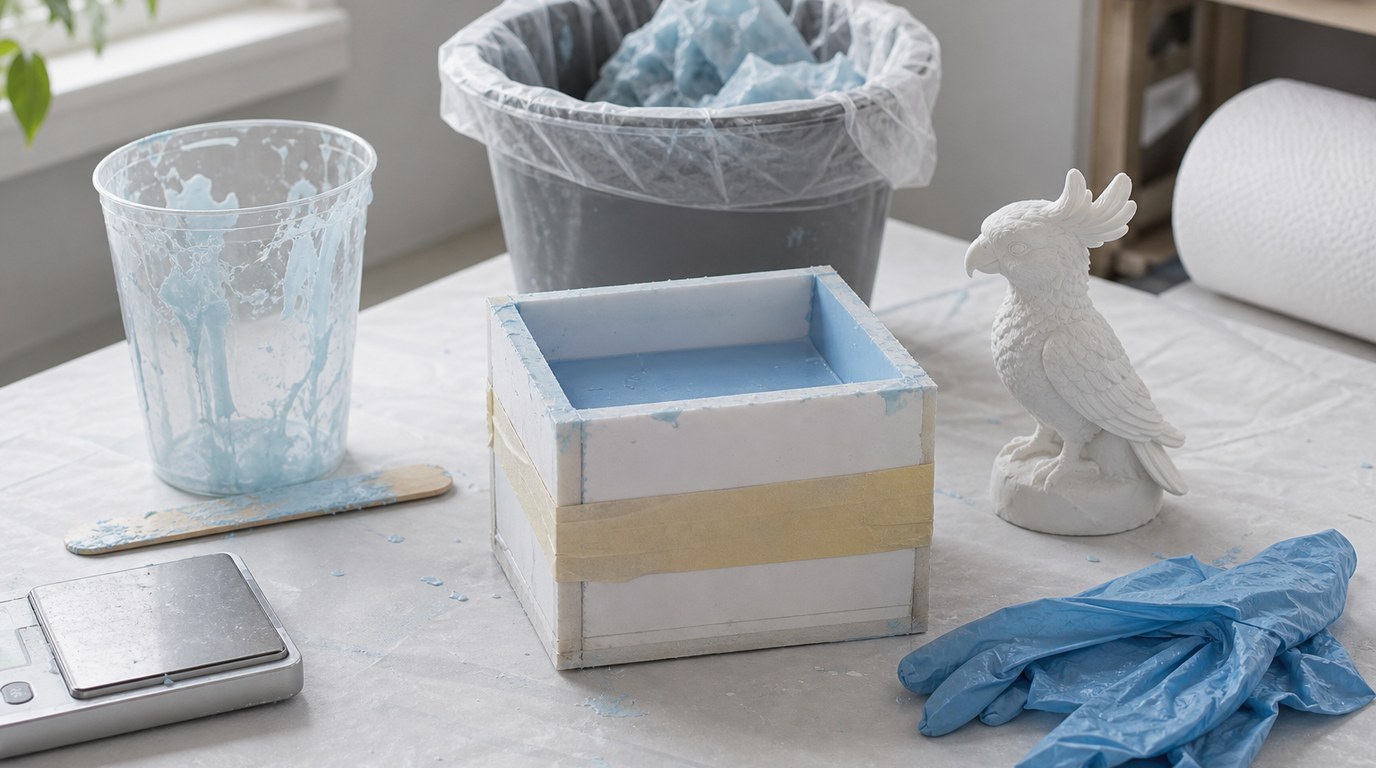
Step 5: Pour the Silicone Slowly
Pour the silicone in a thin stream from one corner of the mold box, not directly over the master object. Let the silicone flow around and over the master on its own. This helps push air out instead of trapping bubbles against the detailed surface.
Keep the pour steady and slow. If you see bubbles on the surface, you can gently tap the sides of the mold box or vibrate the table lightly. Do not shake so hard that the master comes loose. Continue pouring until the highest point of the master is covered by enough silicone to make a sturdy backing.
Step 6: Let the Mold Cure Completely
Leave the mold on a level surface where it will not be bumped, tilted, or exposed to dust. Cover it loosely with a clean box or plastic bin if needed, but do not let the cover touch the silicone.
Follow the cure time listed by the silicone manufacturer. Temperature affects curing: a cold room can slow the process, while excessive heat may cause problems. Do not demold early just because the top feels firm. The deeper silicone near the master may still be soft.
Step 7: Demold and Trim the Silicone Mold
Once fully cured, remove the mold box walls carefully. Flex the silicone gently away from the master instead of pulling hard from one spot. If the master resists, work slowly around the edges to break the seal.
After removing the master, inspect the mold cavity. Trim thin flashing, uneven edges, or ragged overflow with small scissors or a craft knife. Cut away only what interferes with casting. Avoid slicing near important detail areas. Wash out loose debris and let the mold dry completely before adding resin.
Result Check: How to Know Your Mold Is Ready for Resin
Your silicone mold is ready for resin when it is fully cured, flexible, dry, and free from sticky spots. The cavity should clearly show the details of the master object without torn areas, trapped debris, or large bubbles in important surfaces.
Set the empty mold on your work surface and check that it sits level. A warped mold can cause uneven resin castings. Lightly flex the mold to confirm it returns to shape. If you used mold release or trimmed the silicone, make sure no residue or crumbs remain inside the cavity before pouring resin.
Common Silicone Mold Mistakes and How to Fix Them
Silicone did not cure: The most common causes are incorrect ratio, poor mixing, expired material, low temperature, or contamination. Unfortunately, uncured silicone often cannot be saved. Remove it, clean the master if possible, and start again with accurate measuring.
Mold box leaked: Seal seams with hot glue, clay, or tape before pouring. For future molds, test the box with rice or inspect it under bright light for gaps.
Bubbles appeared in the detail: Pour from one corner in a thin stream and let silicone rise around the object. For very detailed masters, brush a thin coat of silicone over the surface before the main pour.
Master floated: Secure it better to the base. Lightweight objects need strong tape, glue, or clay.
Mold tore during demolding: The mold may be too thin, the master may have undercuts, or you pulled too aggressively. Add more silicone thickness next time.
Mold warped: Use a stronger mold box, pour a thicker backing, and cure on a level surface.
Care Tips for Reusing Your Silicone Resin Mold
Clean the mold gently after each resin casting. Remove cured resin bits with your fingers or low-tack tape instead of sharp tools. Avoid abrasive scrubbing, alcohol soaking, or harsh solvents unless your silicone manufacturer says they are safe.
Store molds flat, away from sunlight, dust, and heat. Do not stack heavy objects on top of them. If a mold starts to lose shine, tear, or distort, reserve it for practice pours and make a fresh mold from the original master.
FAQ
What Is the First Step Someone Should Take with Mas Silicone Mold Tutorial?
Start by choosing the right master object. Pick something clean, sealed if porous, and simple enough for a one-piece mold. A flat-backed charm, pendant, or small decorative piece is easier than an object with deep undercuts or fragile details.
What Can Go Wrong When Following Mas Silicone Mold Tutorial Advice?
The main problems are uncured silicone, leaking mold boxes, trapped bubbles, floating master objects, tearing, and warping. Most come from inaccurate measuring, rushed mixing, weak sealing, or demolding too early. Careful setup prevents more failures than any fix afterward.
How Long Does It Usually Take to Work Through Mas Silicone Mold Tutorial?
Hands-on time is usually 30 to 60 minutes for a small beginner mold. Curing takes longer and depends on the silicone formula, often several hours or overnight. Always follow the cure time on your product label instead of relying on touch alone.
How Can a Beginner Tell Whether Mas Silicone Mold Tutorial Worked?
The finished mold should be fully cured, flexible, non-sticky, and detailed. It should sit level, release the master cleanly, and have no large bubbles in important areas. If it holds its shape and the cavity is clean, it is ready for resin.