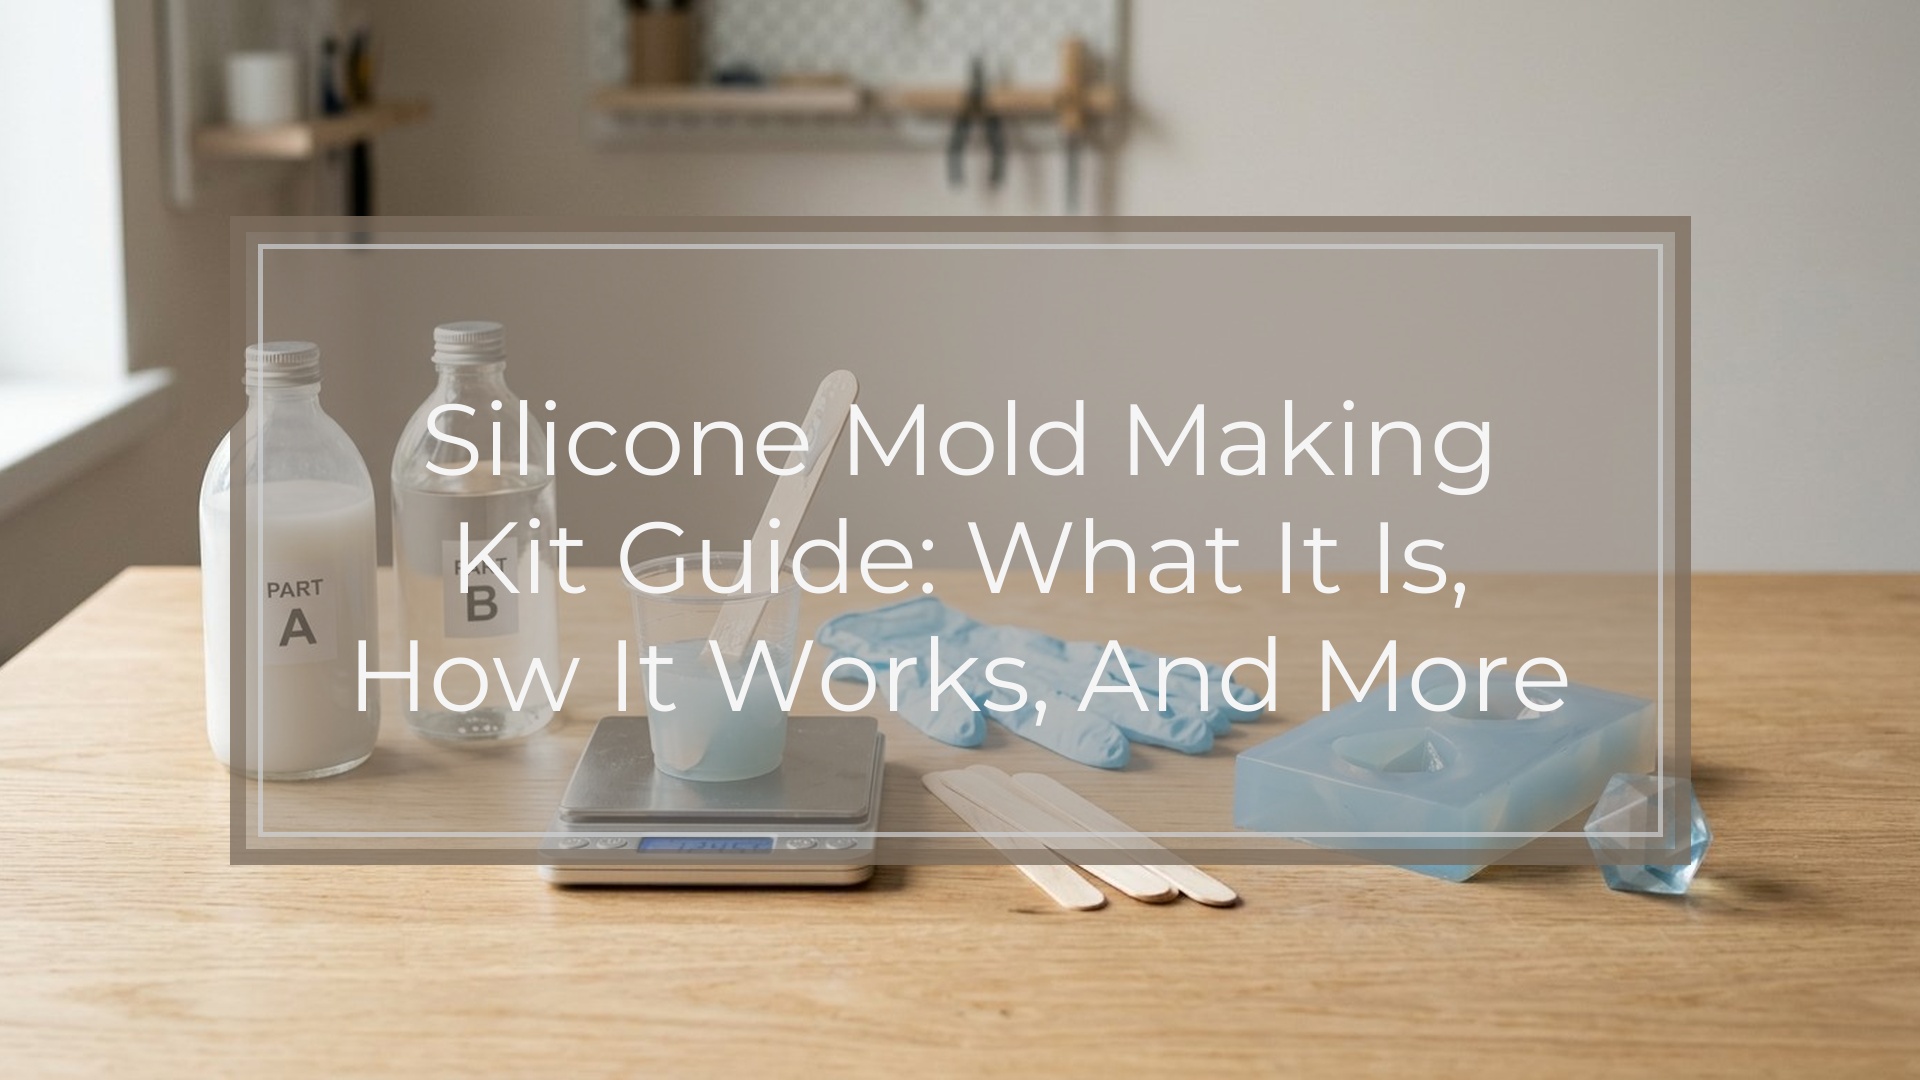
A silicone mold making kit is a beginner-friendly set that helps you turn an original object into a flexible, reusable mold for resin casting. Instead of buying silicone and tools separately, you get the core materials in one package, usually with basic instructions.
Resin crafters use these kits to copy charms, cabochons, tags, coaster shapes, small trays, and other custom pieces. Most kits include two-part silicone, cups, and stir sticks; some also include gloves, a mold box, or release agent.
If you want to make your own mold shapes, duplicate a handmade piece, or try mold making without buying large amounts of material, a kit is often the easiest place to start. The best kit depends on your project size, detail level, and whether the silicone is measured by volume or weight.
What a Silicone Mold Making Kit Is and Who It’s for
A silicone mold making kit is a packaged starter set designed to make home mold making simpler. The main material is usually two-part liquid silicone. You combine Part A and Part B, pour or press it around an original object, and let it cure into a flexible mold.
The key difference between a kit and buying raw silicone alone is convenience. A kit usually includes small tools, pre-sized quantities, and instructions aimed at first-time users. That reduces guesswork and makes it easier to complete a small project without sourcing every supply separately.
These kits are ideal for resin crafters who want custom shapes, duplicate their own artwork, or make short runs of small pieces. They are less useful if you already make molds often and would save money by buying silicone in larger quantities.
How a Silicone Mold Making Kit Works
The basic idea is simple: silicone captures the outside shape of your original object, then becomes the negative cavity you fill with resin later.
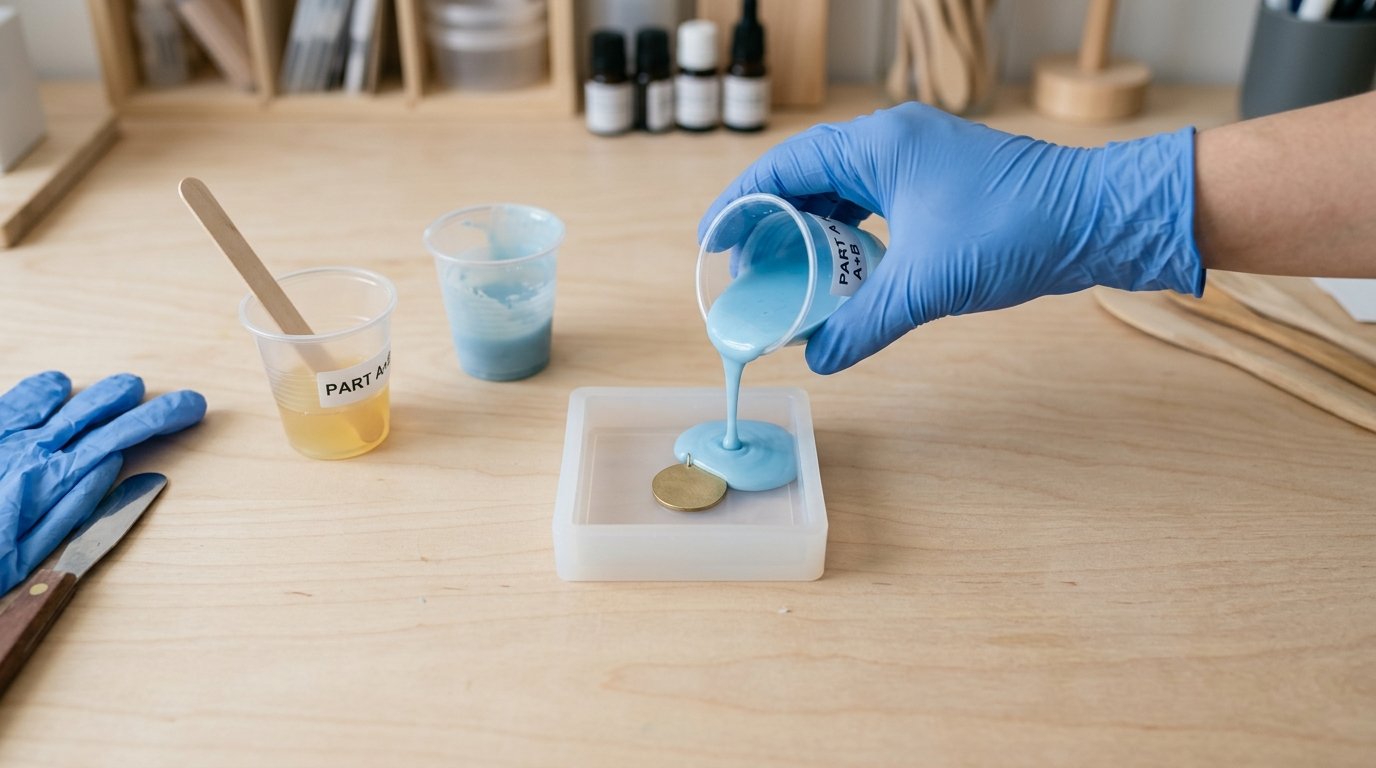
First, you choose a master object, such as a pendant blank, charm, coaster form, or sculpted embellishment. You place it inside a mold box or container so the silicone has walls around it. Then you measure and mix the silicone according to the brand’s ratio, which may be by volume or by weight.
After mixing, you pour or press the silicone around the master and let it cure. Once the silicone is fully set, you remove the original object. What remains is a reusable mold shaped like the master.
For simple, flat, or rounded pieces, a one-piece mold is often enough. More complex shapes with strong undercuts may need a split mold or a different kit style.
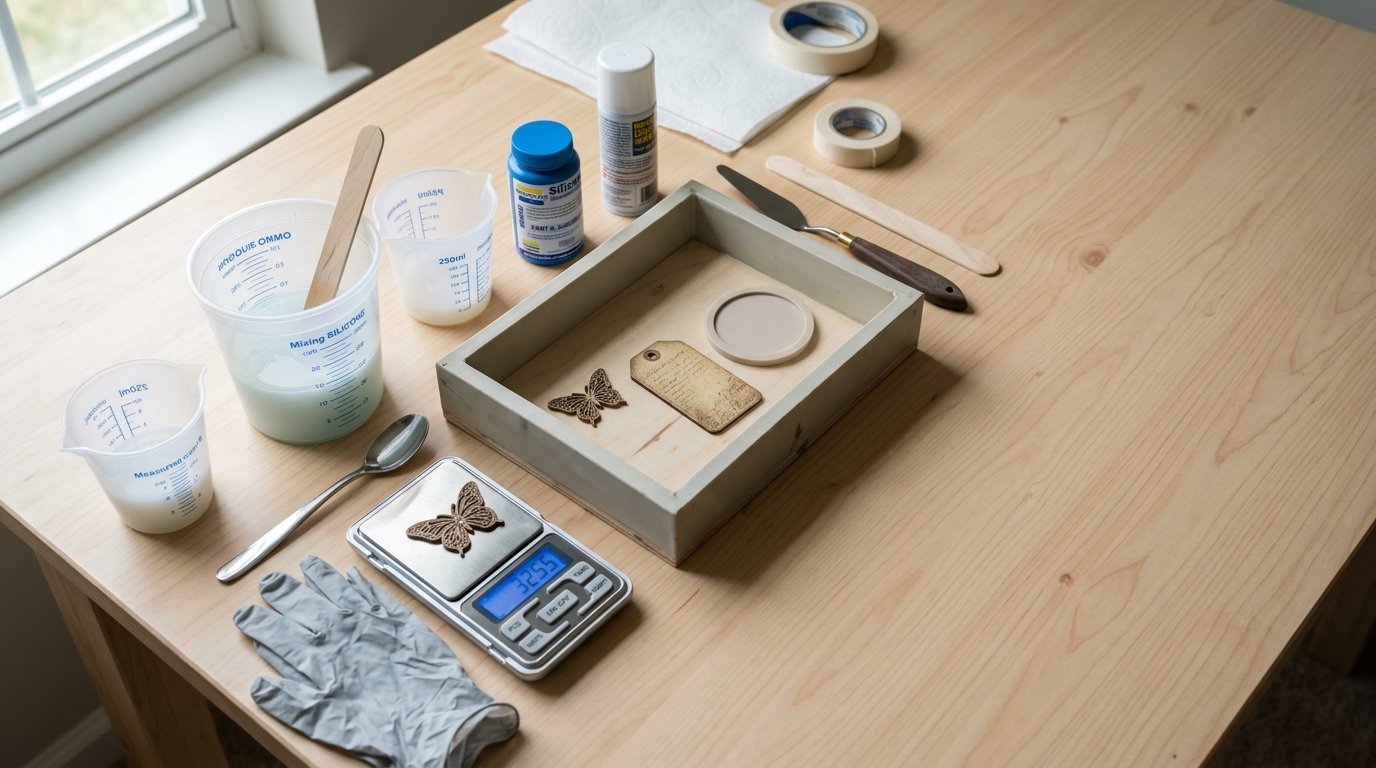
What’s Inside Most Kits and What You May Still Need
Most kits include the basics, but not always every supply needed for a smooth first project.
| Item | What it does | Usually in kit? | You may still need |
|---|---|---|---|
| — | — | —: | — |
| Two-part silicone | Forms the mold | Yes | Extra for larger molds |
| Mixing cups | Holds measured parts | Often | Additional cups |
| Stir sticks | Blends silicone | Often | Spare sticks |
| Gloves | Keeps hands clean | Sometimes | Nitrile gloves |
| Digital scale | Measures by weight | Rarely | Needed for weight-ratio kits |
| Mold box/container | Holds silicone around master | Sometimes | DIY box, cup, or Lego walls |
| Release agent | Helps with some surfaces or two-part molds | Sometimes | Project-specific release |
| Instructions | Basic workflow | Yes | Extra tutorials if needed |
You may also want tape, hot glue, clay for sealing gaps, and a level work surface.
Types of Silicone Mold Kits for Different Projects
Different kit styles suit different projects better than others.
Pour-on kits use liquid silicone that flows around the master. They are the most common choice for resin crafts because they capture surface detail well and work for charms, tags, coasters, and other custom shapes.
Putty kits use two hand-mixed parts with a dough-like feel. They are convenient for quick impressions and small simple pieces, but they are not always the best option for deep molds or very fine detail.
You may also see kits described by firmness. Softer silicones make demolding easier, especially for detailed resin pieces. Firmer silicones can support larger shapes better.
For most beginners, a general-purpose pourable kit is the easiest and most forgiving starting point.
How to Choose the Right Silicone Mold Making Kit
Start with your project, not the marketing. Think about the object’s size, how much detail it has, whether it has undercuts, and how many molds you want to make.
Then check the product specs. A good beginner kit should clearly state its mix ratio, cure time, and total amount of silicone included. If those details are vague, that is a warning sign. It should also explain whether the silicone is mixed 1:1 by volume or by weight, because that affects the tools you need.
Two other useful terms are:
- Pot life: how long you can work after mixing
- Cure time: how long the silicone needs before demolding
Beginners often do better with a slightly longer pot life because it allows slower pouring and fewer rushed mistakes.
Also consider:
- Detail capture for textured or jewelry-scale pieces
- Tear strength for thin or delicate mold areas
- Quantity if you want more than one small mold
- Included tools for convenience, though silicone quality matters more
If you are unsure, a mid-range 1:1 pourable craft kit is usually the safest choice.
Basic Step-by-step: How to Use a Silicone Mold Making Kit
- Choose a good master. It should be clean, dry, and sturdy enough to remove from the cured mold.
- Prepare a mold box. Use the included box or make one from plastic, cardstock, or Lego bricks. Leave enough room for silicone thickness around the object.
- Secure the master. Tape or glue it in place so it does not float.
- Use release agent if needed. Many simple nonporous objects do not need it, but porous materials and two-part molds often do.
- Measure accurately. Follow the brand’s ratio exactly. Do not guess.
- Mix thoroughly. Scrape the sides and bottom of the cup so both parts combine fully.
- Pour slowly. Pour from one corner and let the silicone rise around the object to reduce bubbles.
- Let it cure fully. Do not demold early just because the surface feels set.
- Remove the master. Flex the mold gently and peel it away without tearing thin edges.
- Inspect the mold. Look for sticky spots, thin walls, or trapped debris before you cast resin.
For a first attempt, start with something small and simple, like a pendant or flat tag shape, rather than a deep 3D object.
Common Beginner Mistakes and How to Avoid Them
The most common problem is incorrect measuring. If the ratio is off, the silicone may stay sticky, cure unevenly, or tear more easily. Use a scale when the product requires weight-based mixing.
Poor mixing is another major cause of failure. Stir carefully and scrape the cup well. Incomplete mixing often leaves soft or uncured areas.
Bubbles are also common. Avoid whipping the silicone and pour slowly. Finally, many beginners choose difficult masters too early. Fragile originals, deep undercuts, and porous surfaces add complexity fast. Start with smooth, simple shapes and leave enough silicone thickness around the object for support.
Care, Reuse, and Storage of Silicone Molds and Leftover Kit Materials
Clean finished molds gently if needed and let them dry fully before storage. Store them flat or supported so they do not warp, and keep them away from dust, direct sun, and heat.
Seal leftover silicone bottles tightly and store them in a cool, dry place. Prevent Part A and Part B from contaminating each other.
With good care, a silicone mold can be reused many times, though lifespan depends on the mold shape, the casting material, and how carefully you demold each piece.
Is a Silicone Mold Making Kit Worth It for Resin Crafters?
For many beginners, yes. A kit lowers the barrier to entry, reduces missing-supply mistakes, and lets you test mold making without committing to bulk materials.
It is especially worth it if you want custom shapes or small-batch resin pieces. If you already know your preferred silicone and make molds regularly, buying supplies separately may be more economical.
FAQ
What Can You Make with a Silicone Mold Making Kit?
You can make molds for pendants, keychains, cabochons, coaster shapes, tags, charms, small trays, and other custom resin pieces. The easiest projects use clean, solid originals with shapes that can be removed without tearing the silicone.
Do I Need a Release Agent When Using a Silicone Mold Making Kit?
Not always. Many simple nonporous masters release well without one in a one-piece mold. However, porous objects, delicate surfaces, and two-part molds often benefit from a release agent. If the original is valuable, test first.
How Much Silicone Do I Need for One Mold?
Estimate the volume of the mold box, then subtract the approximate volume of the master object. That gives you a practical estimate. It is usually better to have a little extra than to run short during the pour.
Why Is My Silicone Mold Still Sticky After Curing?
Sticky silicone usually means the mix ratio was wrong, the material was not mixed thoroughly, the silicone was expired, or the batch was contaminated. Also make sure the full cure time has passed before judging the result.
Can I Use One Silicone Mold Kit for Resin, Clay, Wax, and Soap Projects?
Sometimes, but only if the manufacturer lists those uses. Some silicones are general craft products, while others are made for specific materials or safety requirements. Always follow the product’s compatibility guidance.