To make clean epoxy resin swirls, measure and mix epoxy accurately, divide it into cups, tint each portion with resin-safe colorants, pour a base layer, then add accent colors in lines, ribbons, dots, or small pools. Use a toothpick, skewer, or silicone tool to drag slow S-curves, figure-eights, feathered lines, or marble veins through the colors. Swirl while the resin is still fluid but slightly settled, stop before the colors overblend, remove bubbles, cover the project, and let it cure undisturbed.
For a looser look with layered cups of color, the colored dirty pour technique lets the resin blend more freely as it spreads.
Before You Start: Choose the Right Swirl Project
For your first resin swirl project, choose something small and shallow, such as coasters, a trinket tray, keychains, bookmarks, or a small rimmed panel. Large pours are harder because resin heats, spreads, and moves longer while curing.
Avoid deep molds until you understand your resin’s working time. A thin project lets you practice timing, color placement, and tool movement without wasting much material.
Prerequisites: Safety, Workspace, and Resin Basics
Work in a well-ventilated area and follow the safety instructions for your resin brand. Wear nitrile gloves, protect your table, and use a respirator if your product requires one or ventilation is limited. Keep resin away from children, pets, food surfaces, and open drinks.
Your workspace must be level. If the surface tilts, your swirl pattern will drift while curing. Keep the room within the temperature range listed by the manufacturer. Cold resin is thick and bubbly; warm resin may cure too fast. Read the mix ratio, working time, and cure time before opening the bottles.
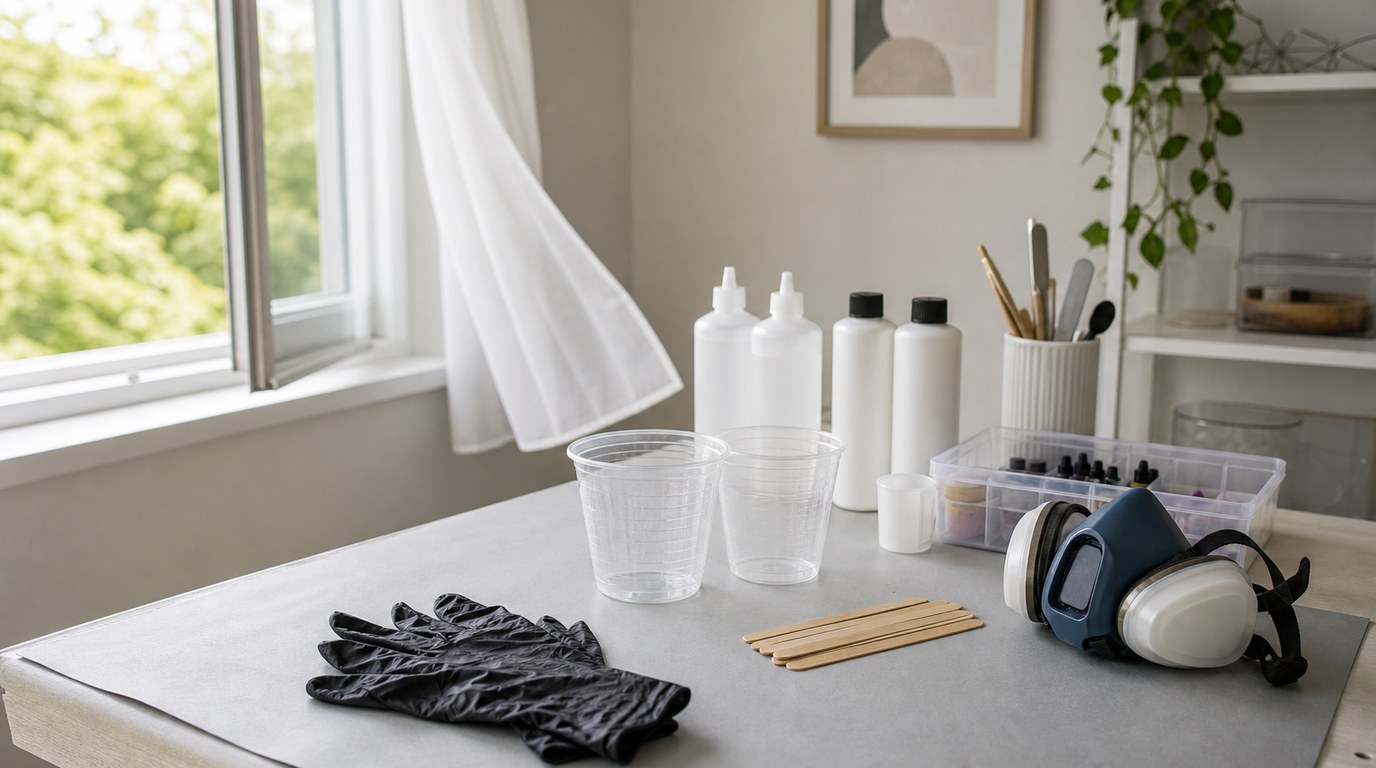
Materials and Tools for Epoxy Resin Swirls
Gather everything before mixing because epoxy resin has a limited working window.
You will need:
- Two-part epoxy resin
- Measuring cups or a digital scale, based on resin instructions
- Mixing cups and stir sticks
- Small cups for separate colors
- Resin-safe pigments, mica powder, alcohol ink, or resin dye
- Silicone mold, tray, panel, or project surface
- Toothpicks, skewers, or silicone detail tools
- Heat gun, torch, straw, or small blower
- Nitrile gloves, apron, and table covering
- Dust cover, such as a plastic storage bin
Step 1: Plan Your Color Palette and Swirl Pattern
Choose two to four colors. Beginners usually get the cleanest results with one base color, one main accent, and one highlight. Too many colors can blend into brown, gray, or a muddy design.
Decide where each color will go before mixing resin. For example, plan a white base with blue and gold ribbons, or a clear base with smoky black and silver wisps. Good swirls begin with controlled placement, not random stirring.
Step 2: Measure and Mix the Epoxy Resin
Measure resin and hardener exactly according to the product instructions. Some resins use a 1:1 volume ratio; others require a specific ratio by weight or volume. Do not guess.
Combine the parts in a clean cup and stir slowly, scraping the sides and bottom. Mix for the full time recommended by the manufacturer, often three to five minutes. Fast stirring traps bubbles, so use steady movements. If your resin recommends a “double cup” mix, pour the mixed resin into a second cup and stir again.
Step 3: Divide and Tint the Resin
Pour the mixed resin into smaller cups for your planned colors. Keep the largest portion for the base layer and use smaller amounts for accent colors.
Add pigment gradually. For mica powder, start with a small scoop. For liquid dye or alcohol ink, use drops. Too much colorant can affect curing, make resin soft, or hide swirl detail. Stir each color slowly until even. Use less pigment for transparent swirls and slightly more opaque pigment for bold ribbons.
Step 4: Pour the Base Layer
Pour your base color into the mold or onto the project surface. Start in the center and let the resin spread, or pour in a slow line and guide it with a stick.
Do not fill a mold to the very top yet. Leave room for accent colors so the resin does not overflow. For panels or trays, use a stick or gloved finger to push resin toward the edges. Let the base settle for a minute or two before adding swirl colors.
Step 5: Add Accent Colors for the Swirl
Pour accent colors in thin lines, curved ribbons, dots, or small puddles. Place them where you want movement to begin. For a wave effect, pour parallel bands. For a marble effect, add uneven veins. For a galaxy look, add scattered spots and short streaks.
Keep accent pours light at first. You can add more color, but removing excess is difficult. Leave open space between colors so the swirl has contrast and does not look crowded.
Step 6: Create the Swirl Pattern
Use a toothpick, skewer, or silicone tool to drag through the accent colors and into the base. Move slowly. Try S-curves, loose figure-eights, spirals, or long feathered strokes.
For marble veins, pull a fine tool through the color in thin, irregular lines. For soft ocean-like movement, drag a wider tool in broad curves. For flower or petal effects, pull color outward from a center point, then lightly curve the ends.
Do not stir in circles like mixing batter. That blends colors instead of creating swirls. After every few passes, lift the tool and wipe it if colors build up. Stop while the pattern still has defined light and dark areas.
Step 7: Use Heat or Air to Add Movement
Heat and air are optional, but they can soften lines and create natural flow. Use a heat gun or torch briefly to pop bubbles and encourage movement. Keep it moving; do not hold heat in one spot or you may scorch resin, damage a mold, or create uncontrolled ripples.
A straw or small blower can push accent colors into wispy shapes. Blow gently from the edge of a color line, not straight down. Too much air can flatten or overblend the design.
Step 8: Final Touches Before Curing
Look at the piece from above and from the sides. Add tiny highlights only where needed. A few metallic lines or white wisps can improve contrast, but too many last-minute additions can clutter the design.
Pop visible bubbles with brief heat or a toothpick. Check for dry corners, overflowing edges, or pigment clumps. Wipe drips from the underside if your project allows it. When you like the design, stop touching it. Overworking is one of the fastest ways to ruin clean swirls.
Step 9: Cure, Demold, and Finish
Cover the project with a dust cover and leave it on a level surface. Do not move it during the early cure stage unless absolutely necessary. Even a small tilt can stretch or distort the swirl.
Follow your resin’s cure time before demolding. Many pieces feel firm after 24 hours but need longer for a full cure. Once cured, demold carefully. Sand rough edges if needed, then polish, add a topcoat, or attach hardware depending on the project. If sanding cured resin, wear dust protection.
Result Check: How to Know Your Resin Swirl Worked
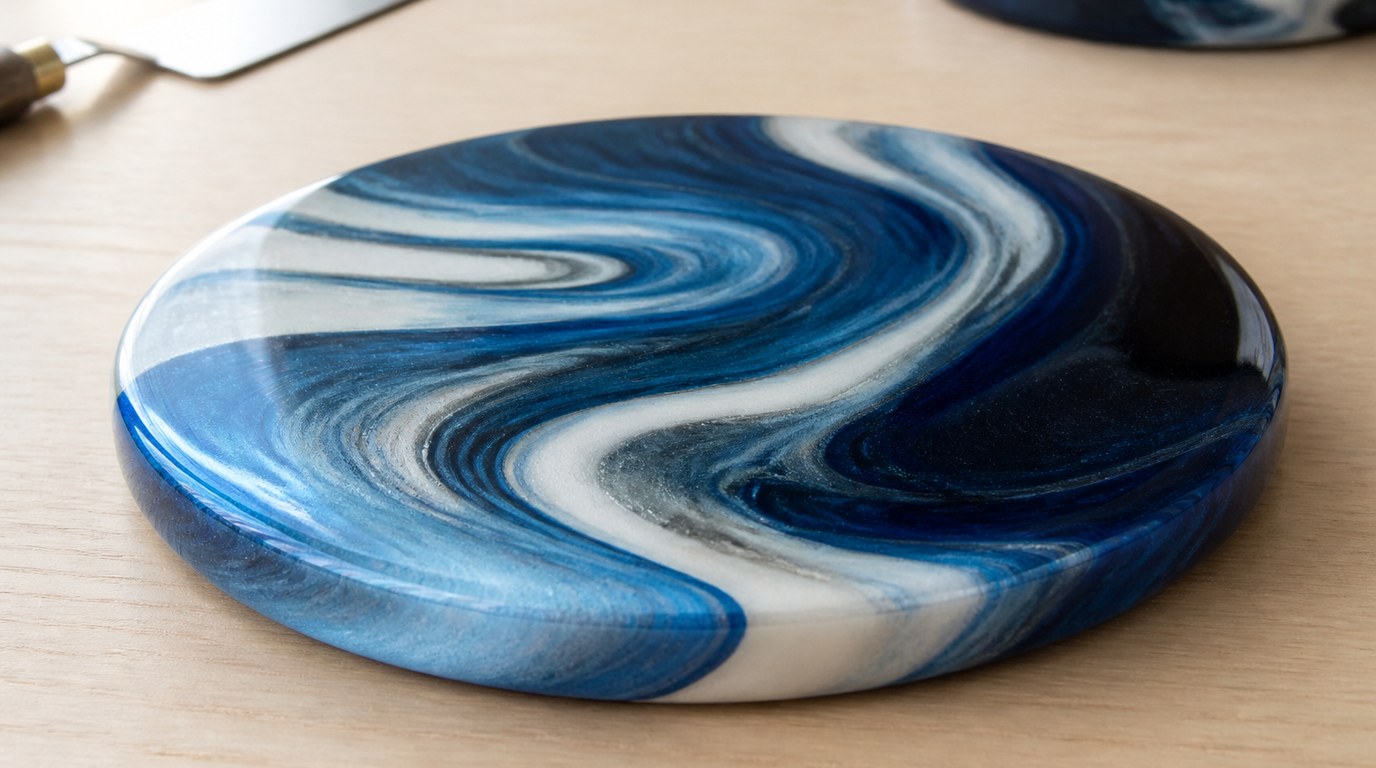
A successful resin swirl has visible color separation, smooth curves, and intentional movement. The colors should look connected without becoming one muddy shade. The surface should cure hard, glossy, and mostly bubble-free.
Check the edges and center. If the swirl remains visible across the whole piece, your timing and placement were good. If the design drifted but still looks balanced, that is normal resin movement. If it cured sticky, soft, or cloudy, the issue is likely measuring, mixing, temperature, or too much pigment.
Common Mistakes and Troubleshooting
Muddy colors: You swirled too much, used too many colors, or chose colors that mix poorly. Next time, limit your palette and stop sooner.
Sticky or soft resin: The resin may have been measured incorrectly, mixed incompletely, or overloaded with pigment. Follow the ratio exactly and scrape the cup while mixing.
Swirls disappeared: The resin was too thin and fluid, or the pigments were too light. Wait a few minutes before swirling and use stronger accent colors.
Too many bubbles: Stir more slowly, warm resin bottles gently if the brand allows it, and use brief heat after pouring.
Pattern drifted: Your surface may not be level, or the resin stayed fluid for a long time. Level the workspace before pouring.
Beginner Variations to Try Next
Once you can make basic swirls, try small changes instead of jumping to a complicated project. Make a monochrome marble coaster with white, gray, and black. Try a beach-inspired swirl with sand, turquoise, and white. Create a smoky clear bookmark with transparent dye and metallic mica.
You can also practice different tool movements: tight spirals, long feathered lines, or gentle wave curves. Keep notes on pigment amounts, timing, room temperature, and resin brand so you can repeat successful results.
FAQ
When Is the Best Time to Swirl Epoxy Resin?
Swirl after the resin is fully mixed, poured, and slightly settled, but before it thickens too much. For many resins, this is within the early part of the working time. If colors spread too fast, wait a few minutes; if they drag heavily, you waited too long.
What Tool Makes the Best Resin Swirls?
A toothpick or wooden skewer is best for fine lines and marble veins. A silicone tool is better for broader curves and reusable cleanup. For beginners, a skewer gives the most control because it moves small amounts of resin without disturbing the whole design.
How Do I Keep Resin Swirls from Turning Muddy?
Use fewer colors, avoid over-swirling, and choose colors that blend well together. Place accents with space between them, then drag through the resin only a few times. Stop while you can still see distinct lines, ribbons, and contrast.
Can I Use Acrylic Paint for Epoxy Resin Swirls?
Acrylic paint can work in small amounts, but it is riskier than resin dye, mica powder, or pigments made for epoxy. Too much acrylic paint may add water, affect curing, or make the resin cloudy. Test first and use only a tiny amount.
Why Did My Resin Swirl Move While Curing?
Resin stays fluid for part of the cure, so designs can shift naturally. Movement can also happen if the surface is not level, the room is too warm, or the resin layer is thick. Level your workspace, avoid moving the project, and cover it until cured.