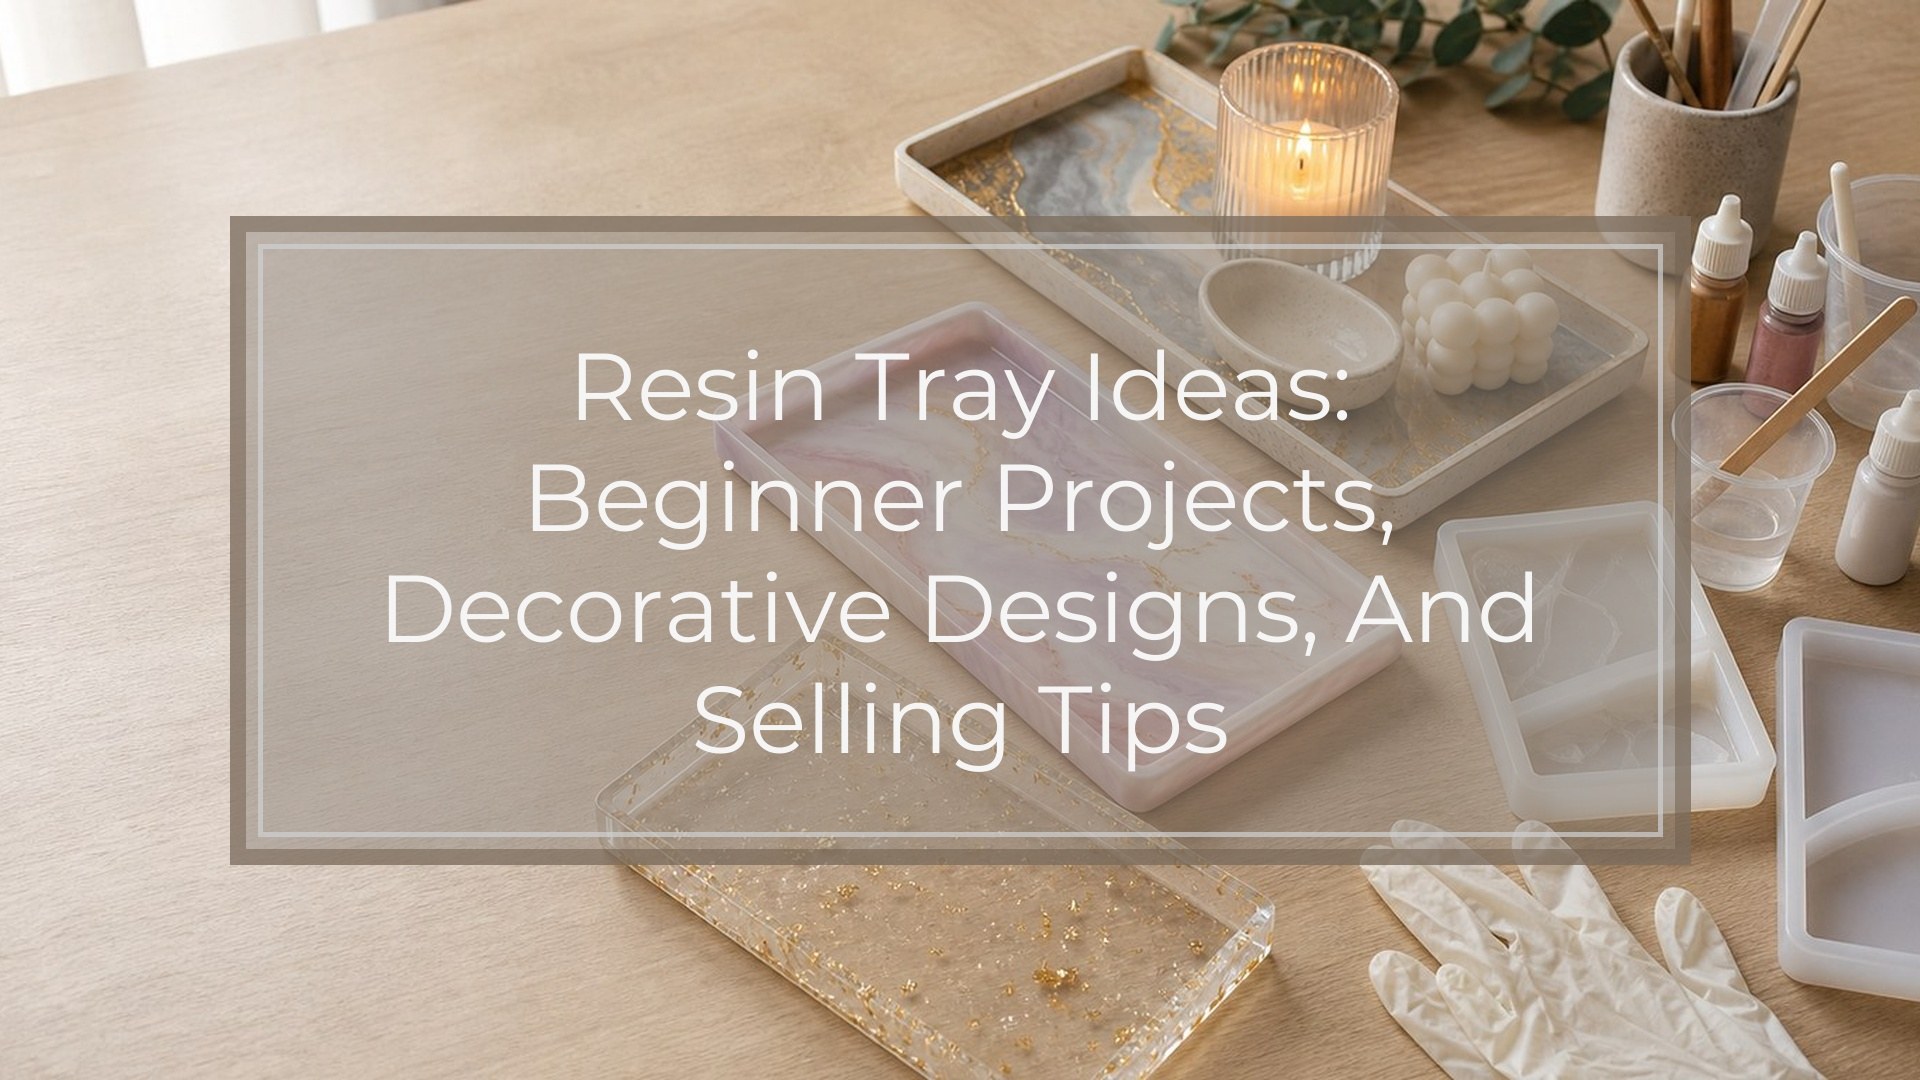
The best resin tray ideas are the ones that match your skill level, mold size, and purpose. Beginners usually do best with simple color pours, glitter trays, dried flowers, or alcohol ink effects. More experienced makers can try ocean waves, geode edges, layered botanicals, or embedded keepsakes. If you want to sell trays, choose designs that are repeatable, durable, and easy to photograph, such as marble, terrazzo, neutral floral, or gold-accent styles.
How to Choose the Right Resin Tray Idea
Start with the tray’s purpose. A decorative tray for candles can be more delicate than a tray meant to hold perfume bottles, coffee mugs, or bathroom items. If the tray may touch food, use a food-safe resin only after it is fully cured, and avoid loose glitter, paint, or inclusions on usable surfaces unless sealed properly.
Next, match the idea to your supplies. A one-color mica tray needs resin, pigment, and a mold. A beach tray may need white pigment, a heat gun, sand, shells, and several controlled pours. If you are new, choose a shallow mold, limited colors, and a design that still looks good if the pigments move slightly.
Once the design feels manageable, it also helps to price your epoxy resin project before choosing extras that raise your costs.
Finally, think about cleanup and finishing. Handles, edges, bubbles, and curing space matter as much as the design.
Beginner-friendly Resin Tray Ideas

A solid color mica tray is one of the easiest starting points. Mix one mica powder into clear resin, pour slowly, pop bubbles, and let the shimmer do the work. Pearl white, champagne, sage green, black, and blush pink all look polished without complex technique.
A glitter resin tray is also beginner-friendly, but use restraint. Fine glitter gives a smooth sparkle, while chunky glitter can sink or create rough areas. Try clear resin with gold glitter for a vanity tray, silver glitter for holiday decor, or iridescent glitter for a playful gift.
A simple marble tray gives a high-end look with minimal tools. Pour a white or cream base, then add thin lines of gray, black, brown, or gold. Drag a toothpick or silicone tool lightly through the lines. Avoid overmixing, or the marble effect can turn muddy.
A dried flower tray works well when you keep the layout simple. Pressed flowers, tiny leaves, and fern pieces look best in clear or lightly tinted resin. Make sure botanicals are fully dry before embedding them, because moisture can cause discoloration or cloudiness.
A confetti tray is good for parties, birthdays, and kids’ room decor. Use polymer clay sprinkles, small sequins, or shaped glitter. Keep the background clear or pastel so the confetti remains visible.
A two-tone color block tray is another reliable idea. Pour one side in a soft neutral and the other in a bolder shade, such as cream and terracotta, black and gold, or lavender and white. This style is forgiving because the design is meant to be simple and graphic.
Decorative Resin Tray Ideas with More Detail
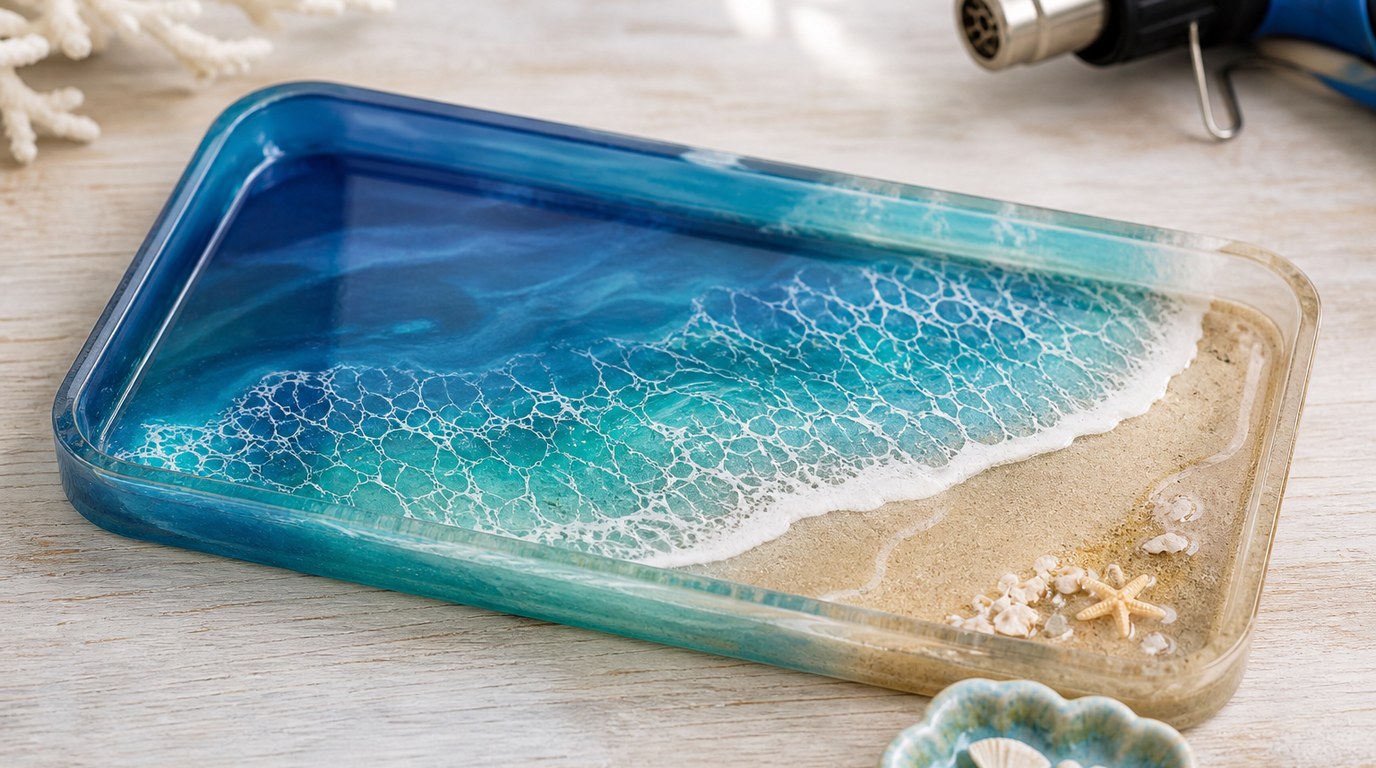
An ocean wave resin tray is a classic statement project. Use transparent blue or teal for water, sandy beige for the shore, and white pigment for waves. A heat gun or blower helps create lacing, but practice on a small mold first. Add tiny shells only if the tray is decorative or the surface will be sealed smooth.
A geode-inspired tray uses rich colors, metallic lines, crushed glass, crystals, or glitter to mimic stone. Popular palettes include amethyst purple with gold, emerald green with champagne, and smoky gray with silver. Place textured pieces away from areas that need to hold cups or bottles flat.
A terrazzo resin tray looks modern and sells well because it fits many interiors. Make small cured resin chips in different colors, then scatter them into a fresh pour. Use cream, tan, black, peach, and sage for a trendy neutral version.
A layered botanical tray creates depth. Pour a thin clear layer, place pressed flowers after it becomes tacky or cures, then add another clear layer. This reduces floating and helps preserve the arrangement. Keep flowers spaced out so the tray does not look crowded.
A metallic edge tray can upgrade almost any plain design. After curing, add gold, silver, copper, or rose-gold paint around the rim. This is especially effective on marble, floral, black, white, or jewel-tone trays.
A smoky alcohol ink tray creates soft, cloud-like movement. Drop alcohol ink into clear resin, then add white ink sparingly to push the colors. This style can be unpredictable, so use two or three colors at most.
Personalized Resin Tray Ideas
A name or initial tray makes a strong gift idea. Add vinyl lettering, small alphabet charms, or a monogram under a clear topcoat. For weddings, try initials with pearl pigment and gold flakes. For birthdays, use the recipient’s favorite colors and matching glitter.
A photo keepsake tray can be meaningful, but seal printed photos before adding resin. Use laminated images, resin-safe prints, or a clear sealant to prevent bleeding. Place the photo in a shallow layer, then cover it with clear resin.
A memory tray can hold tiny keepsakes such as ticket stubs, dried bouquet petals, charms, or fabric snippets. Keep inclusions thin and dry. Thicker items may need multiple layers so the final surface stays even.
A zodiac, birthstone, or theme tray is easy to customize without redesigning everything. Change the colors, metallic accent, and small symbols while using the same mold and basic layout.
Resin Tray Ideas That Can Sell Well
For selling, choose trays that are attractive but repeatable. A design that takes five unpredictable layers may be fun once, but hard to price and restock. Simple luxury styles often perform better: white marble with gold, black and copper, clear floral, neutral terrazzo, or pearl shimmer.
Think in sets. A tray with matching coasters, a ring dish, or a small jar creates a higher-value product. Vanity sets, coffee table sets, bridesmaid gifts, and bathroom counter sets are easy for buyers to understand.
Seasonal trays can sell well in limited batches. Try red and gold for holidays, pastel florals for spring, coastal colors for summer, and amber or burgundy for fall. Keep the mold shape consistent so production stays efficient.
Also consider shipping. Heavy trays, sharp handles, raised crystals, and fragile decorations can increase breakage risk. Smooth, flat, well-cured trays are easier to package and more likely to arrive looking professional.
Design Tips to Make Any Resin Tray Look Better
Use fewer colors than you think you need. Two or three coordinated colors usually look cleaner than five competing shades. If you add metallic flakes, place them intentionally instead of scattering them everywhere.
Warm resin slightly according to the manufacturer’s guidance to help bubbles rise, and pour slowly into the lowest part of the mold. After curing, inspect the edges. Sand rough spots carefully and seal or paint the rim if needed.
Choose handles that match the design. Gold handles suit marble and geode trays, black handles suit modern trays, and clear or minimal handles work well with floral designs. Attach hardware evenly so the tray looks balanced.
Let trays cure fully before use or sale. A tray can feel firm before it reaches its final hardness.
What to Make with Leftover Resin from Tray Projects
Keep small molds nearby so leftover resin does not go to waste. Good options include ring dishes, keychains, bookmarks, coaster samples, cabochons, magnets, jewelry charms, or small color swatches.
Leftover resin is also useful for testing pigment combinations before making a full tray. Label your best tests so you can repeat the color recipe later.
FAQ
What Should a Beginner Know First About Resin Tray Ideas?
Start simple. Choose a shallow tray mold, one or two colors, and a design that does not require perfect control. Mica powder, fine glitter, pressed flowers, and basic marble effects are good first projects. Always measure and mix resin according to the product instructions.
What Matters Most When Evaluating Resin Tray Ideas?
The most important factors are skill level, tray purpose, and surface finish. Decorative trays can include more texture, but functional trays need a flatter, smoother surface. Also consider whether the design requires extra layers, handles, sealing, sanding, or special tools.
What Mistakes Should Readers Avoid with Resin Tray Ideas?
Avoid using wet flowers, overloading the tray with heavy inclusions, adding too many pigments, or removing the tray from the mold too soon. Beginners should also avoid large, deep molds at first because they use more resin and make mistakes more expensive.
What Is the Next Logical Step After Learning About Resin Tray Ideas?
Pick one tray style and make a small test version before committing to a large mold. Test your colors, inclusions, and finishing method. Once you like the result, repeat the design and adjust details such as handles, metallic edges, or matching accessories.